Loading ...
Loading ...
Loading ...
Operating Basics
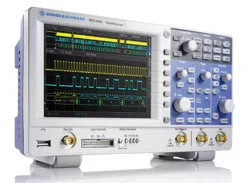
R&S
®
RTC1000
29User Manual 1335.7352.02 ─ 04
"LANGUAGE" Selects the language for user interface and help.
"SELF ALIGNMENT" The instrument adjusts vertical accuracy, time base and several
trigger settings and saves the identified correction data internally.
See also:
Chapter 3.7, "Self-Alignment", on page 29.
"PROBE ADJUST" Aligns the probe. A wizard explains all steps on the display.
"INTERFACE" Configures the USB and Ethernet (LAN) interfaces.
See also: .
"DEVICE INFORMATION" Shows detailed information on hardware and software of the
instrument.
"UPDATE" Firmware update, see Chapter 3.8, "Firmware Update",
on page 30.
"OPTIONS" Activation of options, see Chapter 3.9, "Options", on page 31.
"DATE & TIME" Sets the date and time.
"SOUND" You can activate a control beep to get information on the instru-
ment's activities, error beep, and trigger beep.
"DEVICE NAME" You can define a name with up to 19 characters, which is listed
when screenshots are printed.
"MENU OFF" Selects whether you close the menus manually, or they are closed
automatically after a specified time.
"DEVICE LOGO IN SCREENSHOT" If activated, the R&S logo is printed in the upper right corner of
screenshots and printouts.
"EDUCATION MODE" Activates and deactivates the education mode. You can set a
password to prevent unwanted deactivation.
In education mode, the AUTOSET, QUICK VIEW and automatic
measuring functions are disabled. This information is also shown
in the device information window.
"PRINTER" Configures the printer, see .
3.7 Self-Alignment
The R&S RTC1000 features an integrated self-alignment procedure to achieve the
highest possible accuracy. During the standard self-alignment, the instrument adjusts
vertical accuracy, offset, time base and several trigger settings and saves the identified
correction data internally.
Make sure that the instrument has been running and warming up for at least 20
minutes before you start the self-alignment.
Remove all probes and connected lines from the inputs.
1. Press the [SETUP] key.
2. Press "SELF ALIGNMENT".
Self-Alignment
Loading ...
Loading ...
Loading ...