Loading ...
Loading ...
Loading ...
DGS-1520 Series Gigabit Ethernet Smart Managed Switch Web UI Reference Guide
296
Parameter Description
with the highest IP address is preferred. The range is from 0 to 255. By default,
this value is 64.
Select the Default option to use the default value.
Interval
Enter the interval value between originating bootstrap messages here. The range
is from 1 to 255 seconds. By default, this value is 60 seconds.
Select the Default option to use the default value.
Click the Add button to add a new entry based on the information entered.
Click the Delete button to delete an entry based on the information entered.
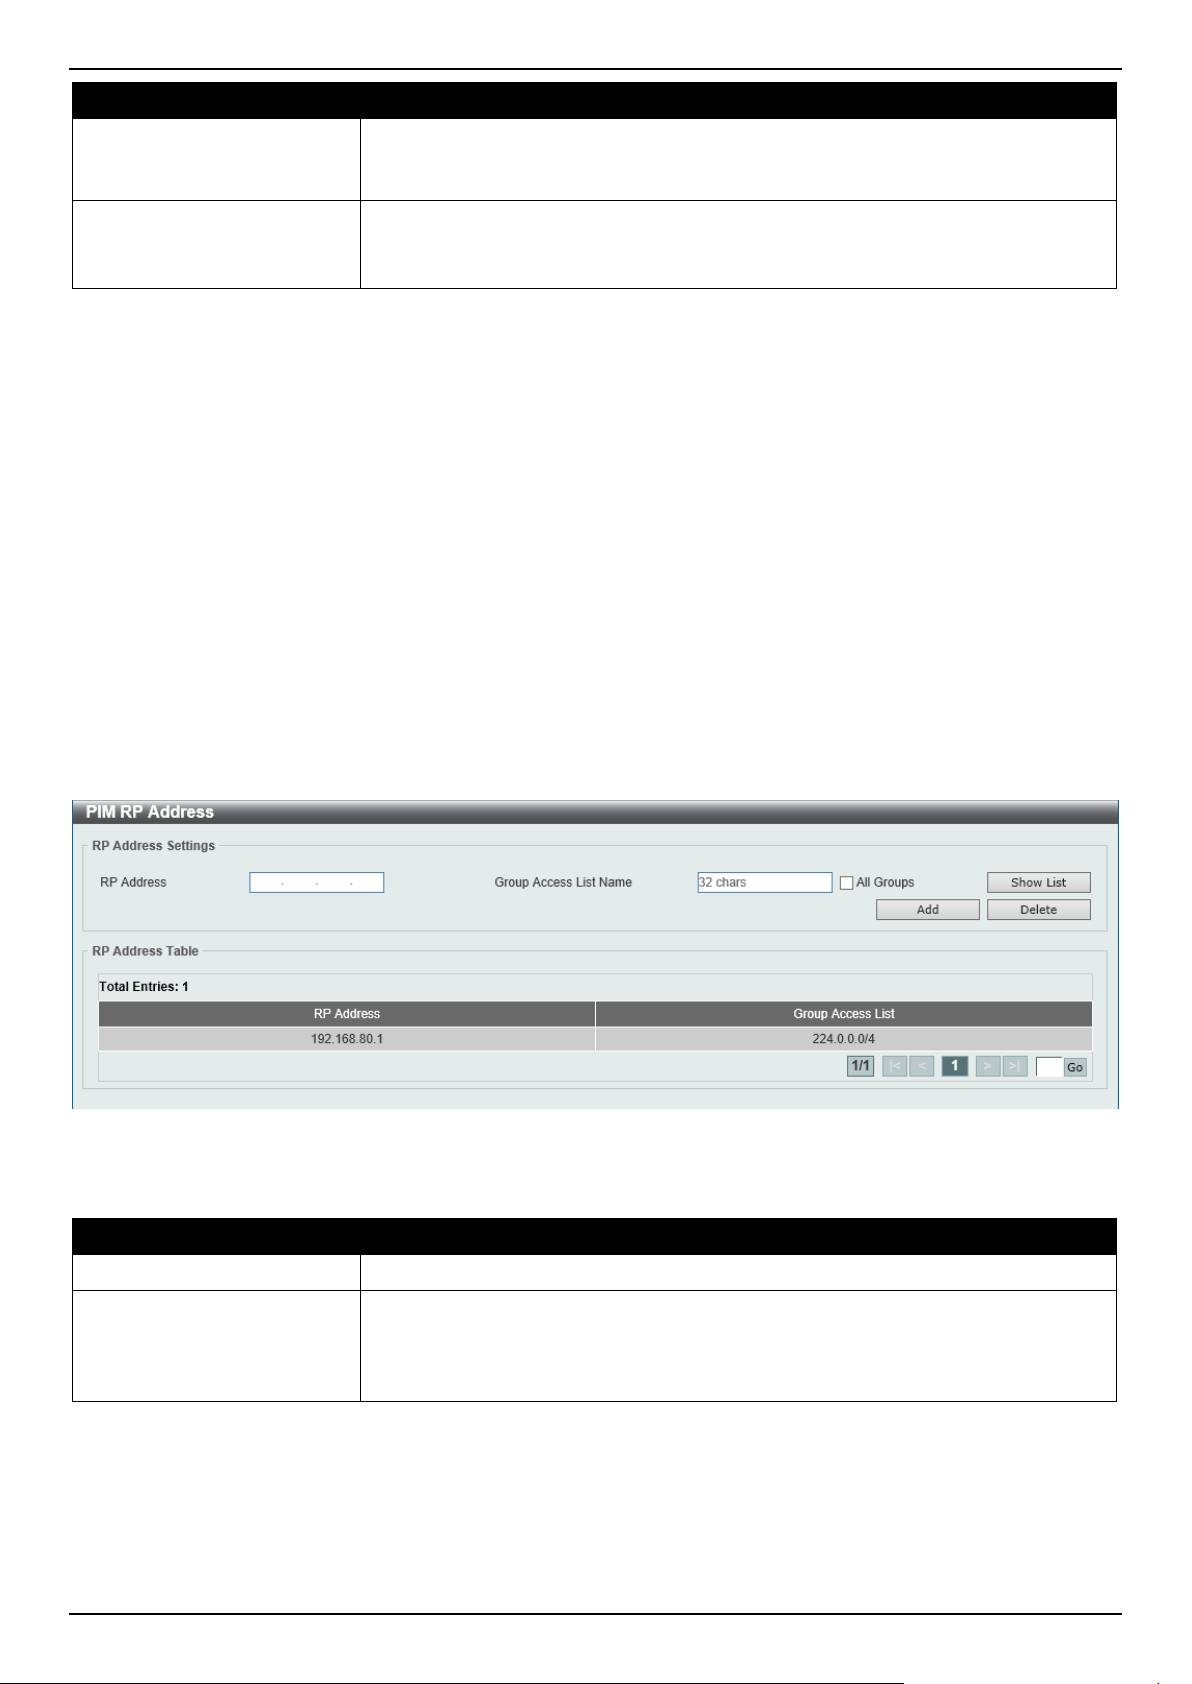
PIM RP Address
This window is used to display and configure the static multicast groups to RP mapping. In a multicast domain, the
static multicast group to RP mapping can be used together with BSR. All routers in a domain should have a consistent
multicast group to RP mapping. The first hop router that initiates a register message will use the mapping entries to
determine the RP for sending the PIM register message destined for a specific group. The last hop router that initiates
a join message uses the mapping entries to determine the RP for sending the join and prune message for a specific
group. When a router receives a join message, it will check the mapping entries for forwarding of the message. When
a RP receives a register message, if the router is not the right RP for the multicast group, a register-stop message will
be sent.
Multiple RPs can be defined, each with a single access list.
To view the following window, click L3 Features > IP Multicast Routing Protocol > PIM > PIM for IPv4 > PIM RP
Address, as shown below:
Figure 6-91 PIM RP Address Window
The fields that can be configured are described below:
Parameter Description
RP Address
Enter the RP IPv4 address here.
Group Access List Name Enter the standard access list that will be used here. Alternatively, click the Show
List button to find and select any of the exiting ACL configured on this Switch to be
used in this configuration.
Select the All Groups option to map the RP to all multicast groups.
Click the Add button to add a new entry based on the information entered.
Click the Delete button to delete an entry based on the information entered.
Enter a page number and click the Go button to navigate to a specific page when multiple pages exist.
Loading ...
Loading ...
Loading ...