Loading ...
Loading ...
Loading ...
92
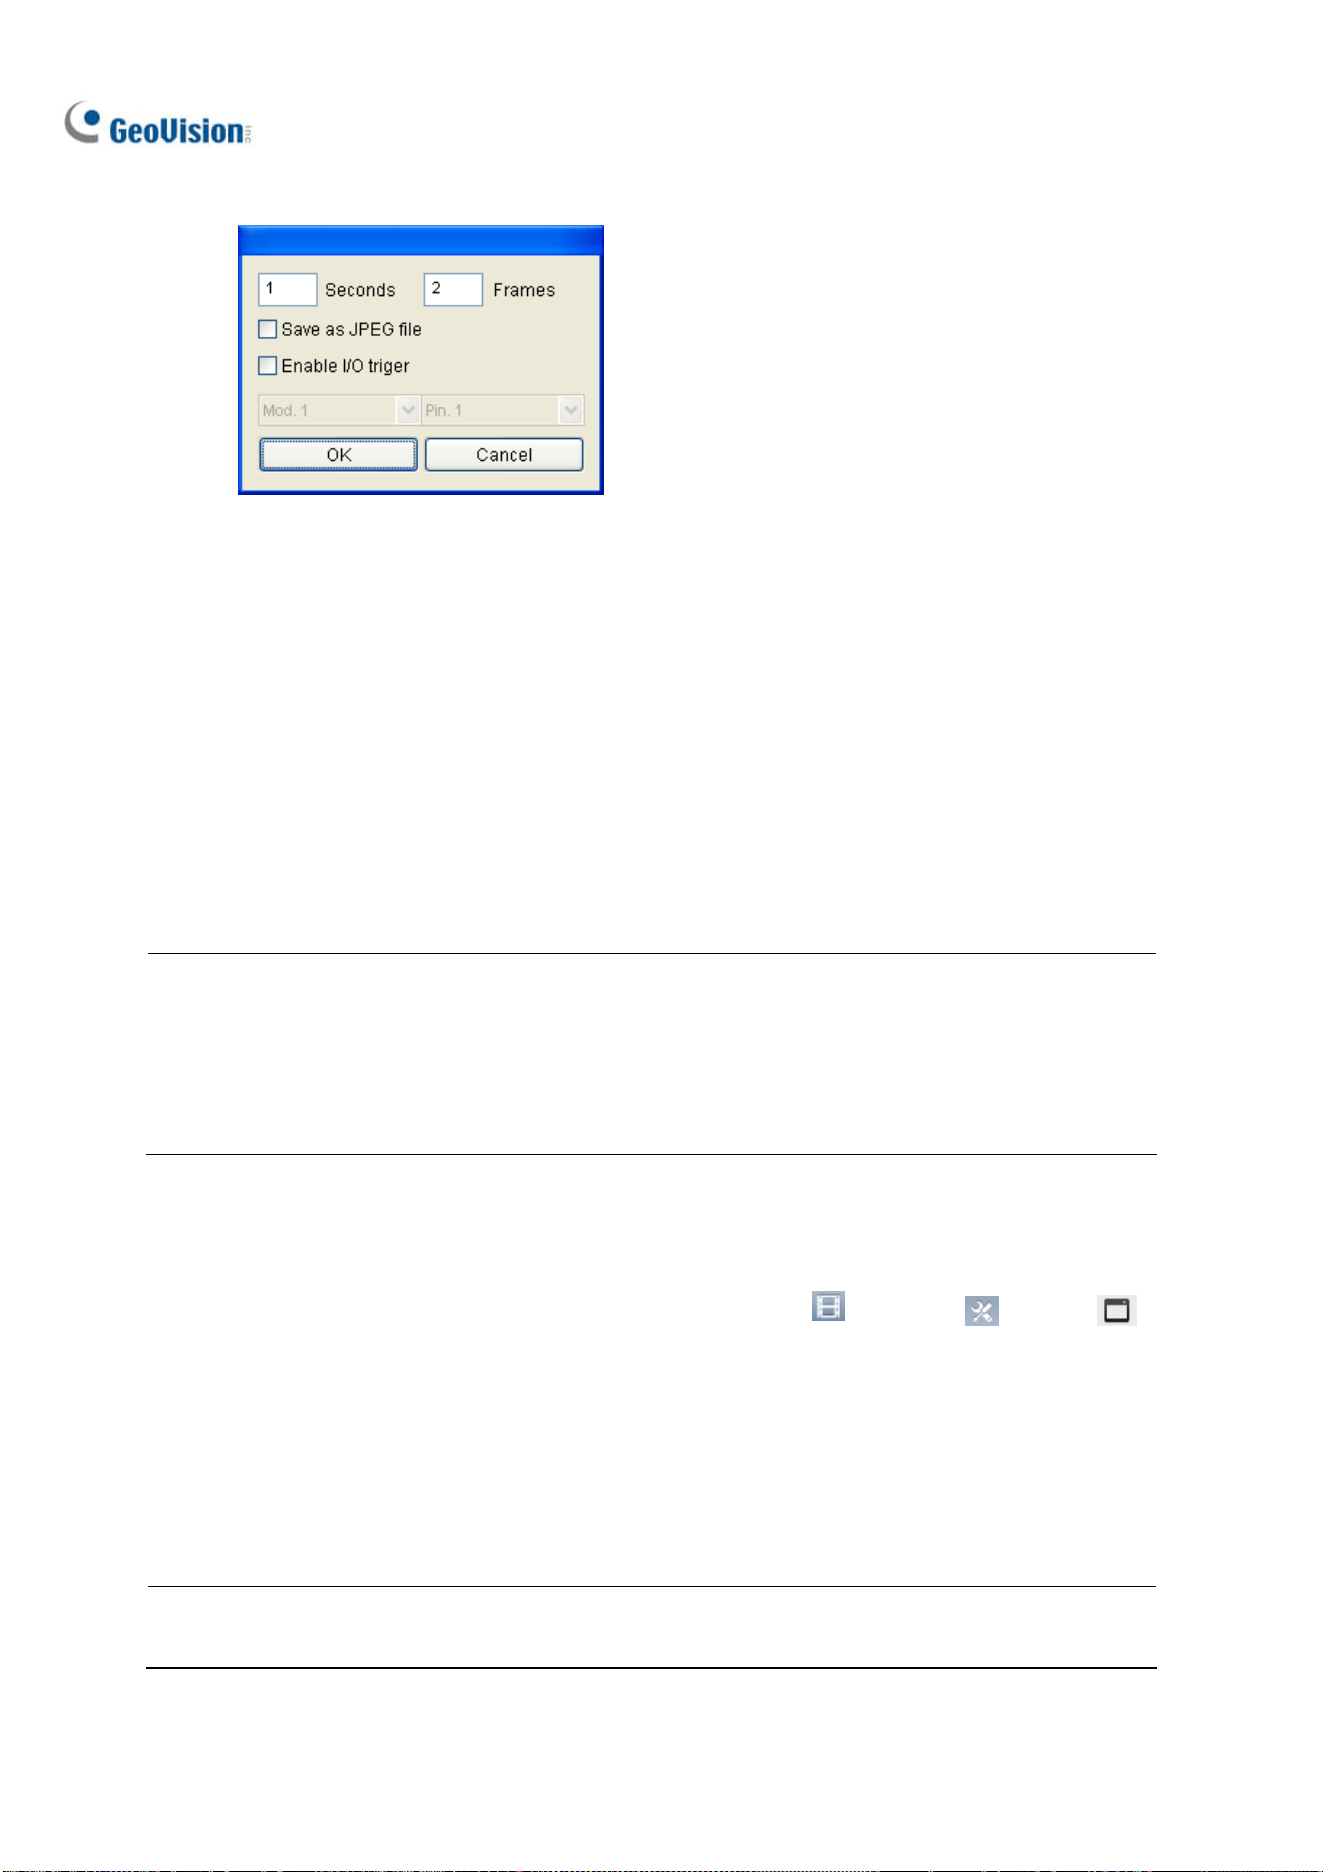
C. Click […] after Video Snapshot for further setup.
Figure 3-12
4. Specifies the frequency of automatic video snapshot. By default, the system will take 2 frames
every second when the monitoring starts.
Save as JPEG file: Saves the images in JPEG format. Otherwise, you can only access the
snapshots using the ViewLog player.
Enable I/O Trigger: Takes snapshots only when the assigned input device is triggered.
5. To configure another camera, select a different camera on Step 3.
6. Click OK to apply the settings.
7. Start monitoring to take snapshots.
Note:
1. For details on other settings of the Object Index dialog box, see Step 4, Setting up Object Index
earlier in this chapter.
2. Optionally create a schedule for video snapshot function to be enabled only at the time periods
specified. For details, see Creating Schedules in Chapter 1.
3.3.2 Searching Video Snapshots
1. To locate video snapshots of desired cameras, click ViewLog > Toolbar > Tools >
Object Index. A window similar to that of Object Index appears (Figure 3-10).
2. Select a desired camera channel and click Refresh to display all its event frames, including the
ones most recently recorded.
3. Select the desired date and time to display all the video snapshots captured, along with their event
frames, during that time period.
Note: When Save as JPEG file is enabled (Figure 3-12), you can also view the video snapshots
from the directory specified by Set Location (Figure 3-11).
Loading ...
Loading ...
Loading ...