Loading ...
Loading ...
Loading ...
7. Recording Motion Pictures
194
By attaching an XLR microphone adaptor (DMW-XLR1: optional) to the camera, you can
use a commercially-available XLR microphone to enable the recording of superior-quality
high-res/stereo sound.
Preparations:
• Turn this unit off.
• Remove the hot shoe cover that is attached to the camera. (P153)
∫ Setting the sampling frequency
1 Attach the XLR microphone adaptor to the hot shoe of this unit, and then turn
this unit on.
2 Select the menu. (P55)
• This item is available only when using an XLR microphone adaptor.
• The set sampling frequency is also applied to the sound output via HDMI. With [Sound
Down Convert] in [HDMI Rec Output], you can down-convert the sound output via HDMI.
(P191)
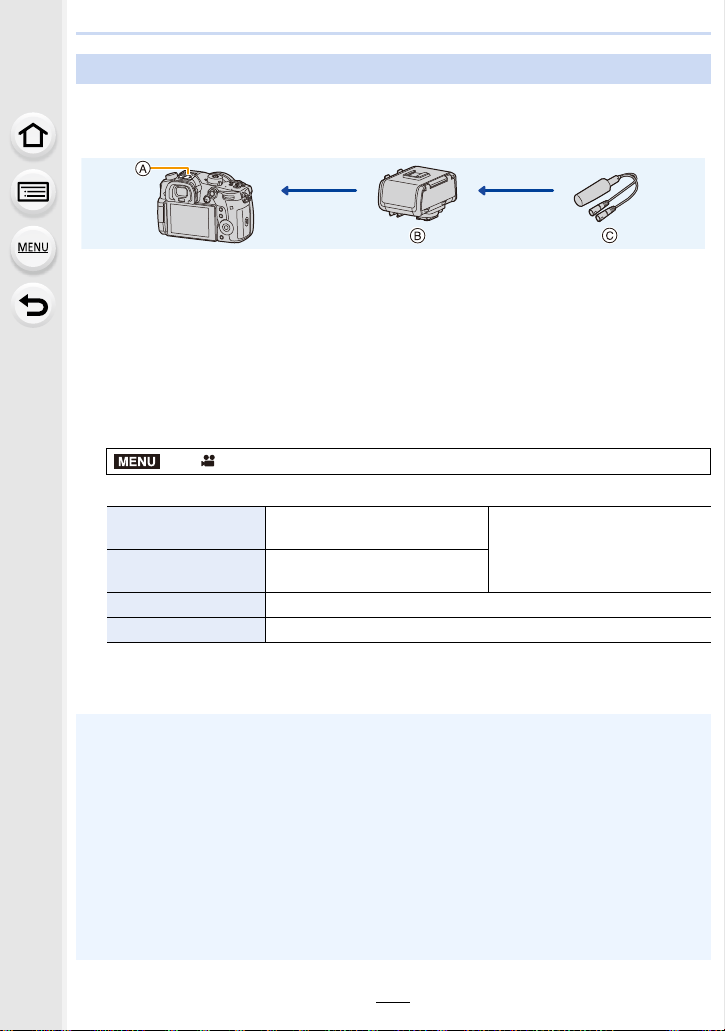
XLR Microphone Adaptor (optional)
A Hot shoe B XLR microphone adaptor (DMW-XLR1: optional)
C Commercially available XLR microphone
> [Motion Picture] > [XLR Mic Adaptor Setting]
[96kHz/24bit]
Records high-res sound at
96 kHz/24bit.
Only available when [Rec
Format] is set to [MOV].
[48kHz/24bit]
Records high-quality sound at
48 kHz/24bit.
[48kHz/16bit] Records standard-quality sound at 48 kHz/16bit.
[OFF] Records sound using the built-in microphone.
• The items below are fixed to the following settings when [XLR Mic Adaptor Setting] is set.
– [Mic Level Adj.]: [OFF]
– [Mic Level Limiter]: [OFF]
– [Lens Noise Cut]: [OFF]
– [Sound Output]: [REC SOUND]
• The following menu items are disabled when [XLR Mic Adaptor Setting] is set.
–[Wind Cut] – [Special Mic.]
• When the XLR microphone adaptor is connected, [Mic Level Disp.] (P170) is automatically set
to [ON].
• When a XLR microphone adaptor is attached to the camera, do not hold only the XLR
microphone adaptor to prevent the camera from falling.
• If the noises are recorded when you use an AC adaptor (optional), use a battery.
• For details, refer to the operating instructions of the XLR microphone adaptor.
MENU
Loading ...
Loading ...
Loading ...