Loading ...
Loading ...
Loading ...
68
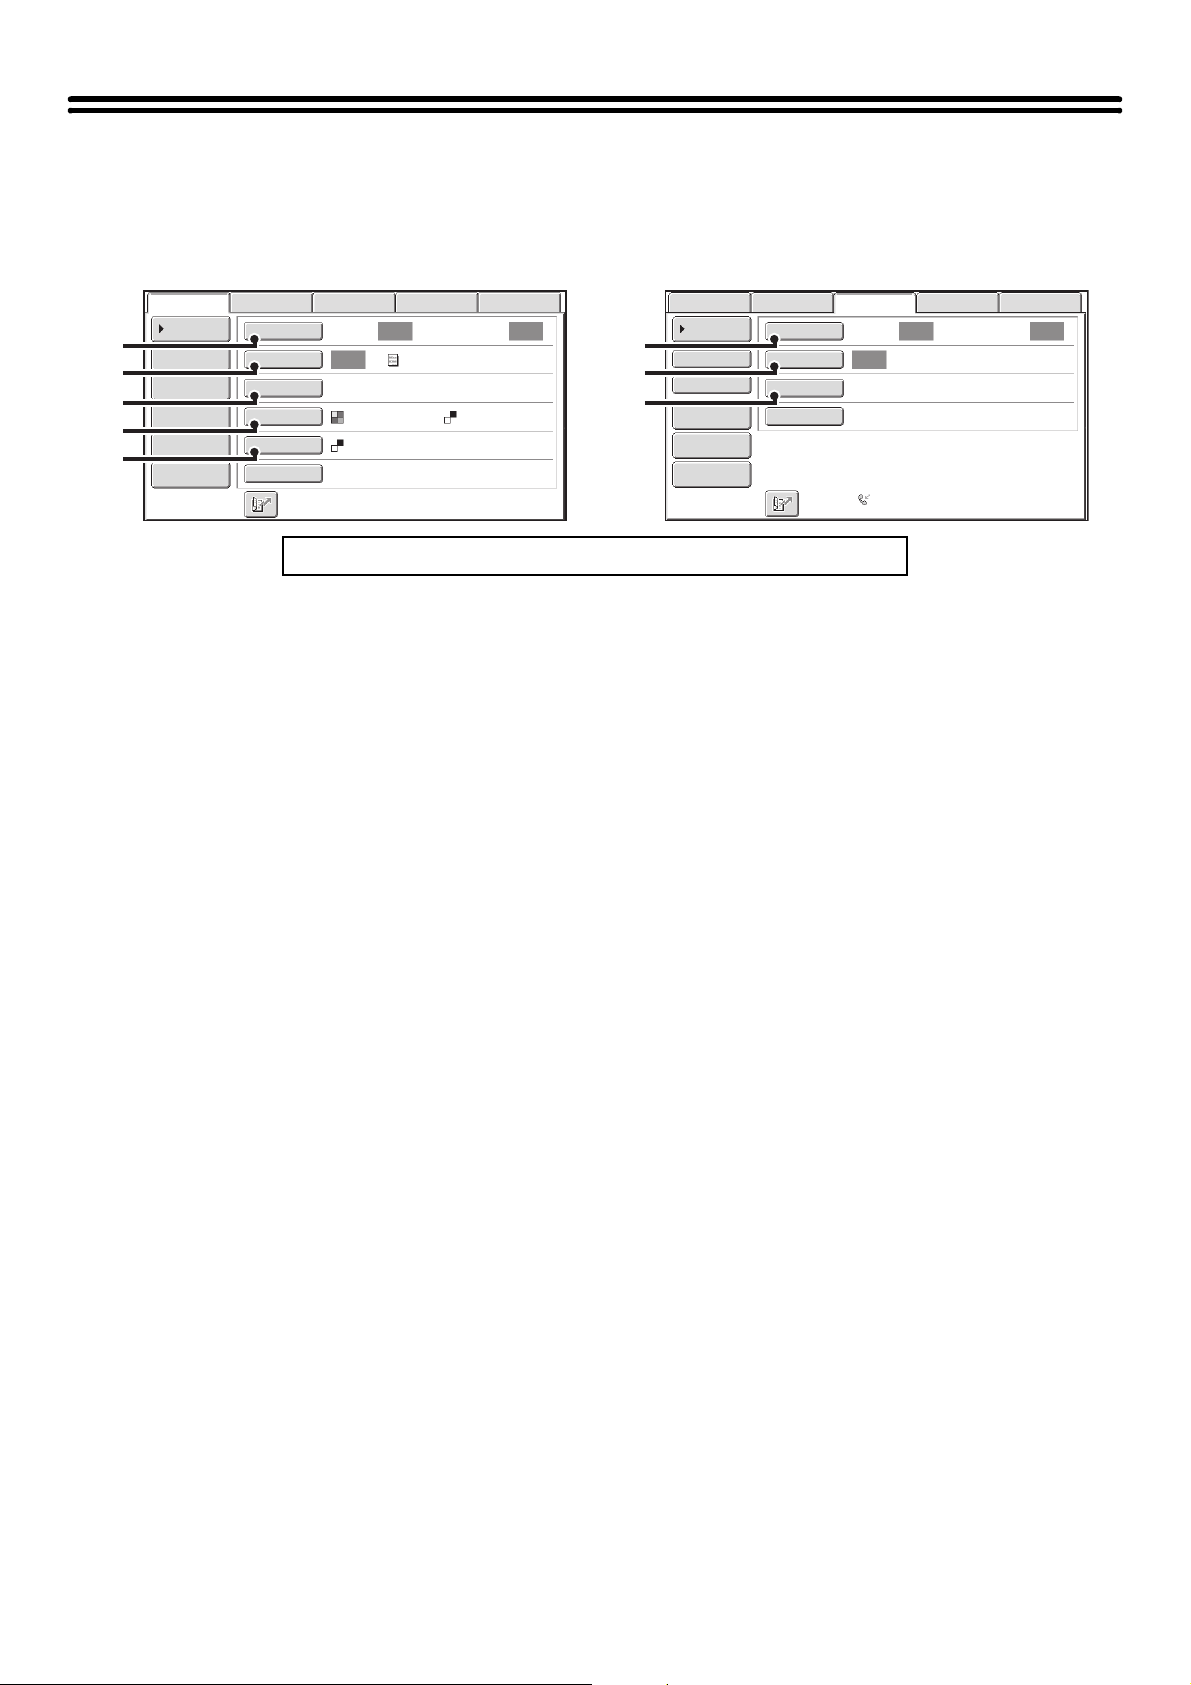
IMAGE SETTINGS
Settings for scanning the original are selected in the base screen of each mode. The current state of each setting
appears to the right of the key used to select the setting.
(1) [Original] key
Touch this key to set the scan size, send size, and
orientation of the original, and select 2-sided scanning
settings.
☞ AUTOMATICALLY SCANNING BOTH SIDES OF
AN ORIGINAL (2-Sided Original) (page 69),
SPECIFYING THE ORIGINAL SCAN SIZE AND
SEND SIZE (Enlarge/Reduce) (page 70)
(2) [Exposure] key
Touch this key to select the exposure for scanning.
☞ CHANGING THE EXPOSURE AND EXPOSURE
MODE (ORIGINAL IMAGE TYPE) (page 76)
(3) [Resolution] key
Touch this key to select the resolution for scanning.
☞ CHANGING THE RESOLUTION (page 78)
(4) [File Format] key
Touch this key to change the format (file type) of the
scanned image file.
☞ CHANGING THE FILE FORMAT (page 81)
(5) [Color Mode] key
Touch this key to select the color mode for scanning.
The [Color Mode] key will only appear if the color
expansion kit has been installed. This key does not
appear in Internet fax mode.
☞ CHANGING THE COLOR MODE (page 85)
Click a key in the screen to jump to an explanation of the key.
Auto Auto
Auto
File
Quick File
Address Review
Send Settings
Address Entry
Address Book
Data EntryFaxInternet Fax
Special Modes
Color Mode
File Format
Resolution
Exposure
Original
Scan:
Scan
Send:
Text
200X200dpi
PDF
Mono2
PDF
USB Mem. Scan
(1)
(2)
(3)
(4)
(5)
Auto Auto
Auto
Data EntryFaxInternet Fax
Scan:
Scan
Send:
Standard
Auto Reception
Fax Memory:100%
File
Quick File
Address Review
Direct TX
Sub Address
Address Book
Special Modes
Resolution
Exposure
Original
USB Mem. Scan
(1)
(2)
(3)
Example: Base screen of scan mode Base screen of fax mode
Loading ...
Loading ...
Loading ...