Loading ...
Loading ...
Loading ...
52
In the period interface, enter the time frame you would like to set as your period and select the checkbox to enable
the settings. There are a total of six periods that you can set for each day. Under the Copy menu, you can apply
these settings to all days of the week by checking the All option or you can also select specific days as well. To save
the settings in this menu, click OK to continue.
• Once you have set your desired settings in the Motion Detect interface, click Apply to complete the process.
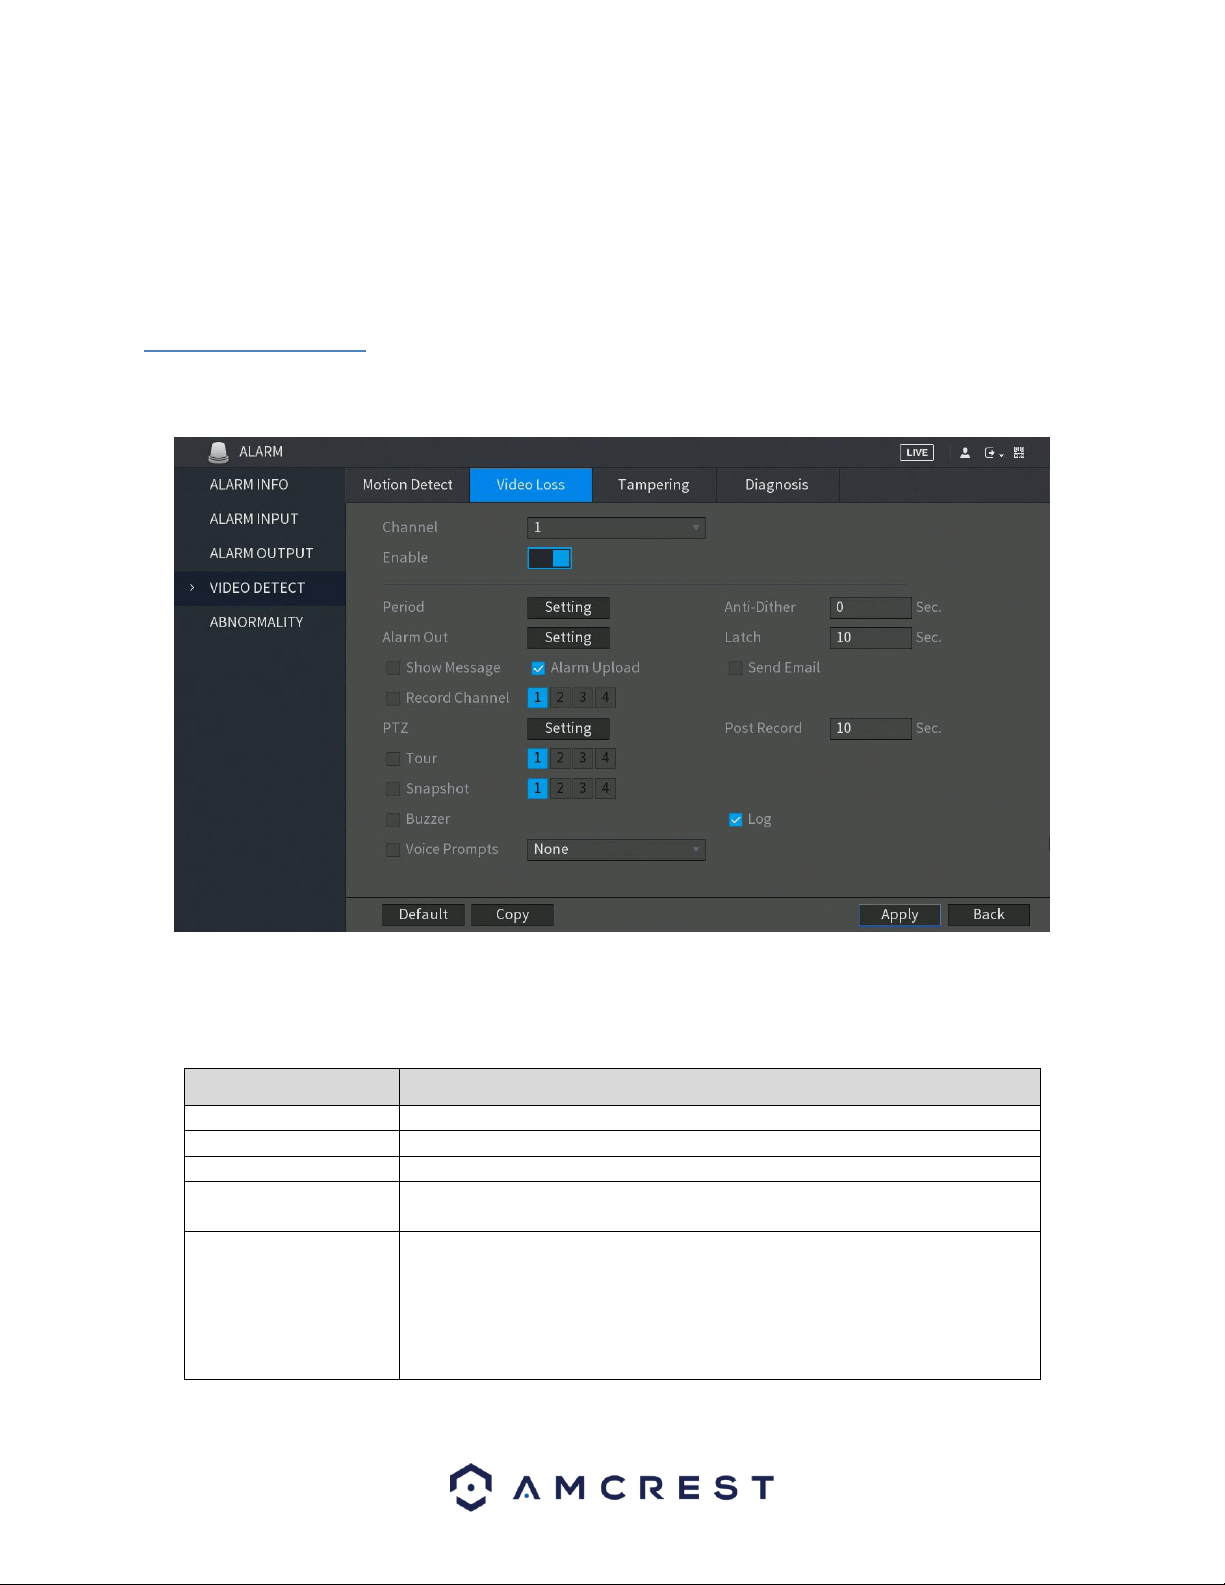
4.8.3. Video Loss
The video loss settings screen is where the DVR can be setup to notify the user any time there is video loss on any
of the channels. Below is a screenshot of the video loss settings screen:
To configure the video loss settings on your DVR, select the Video Loss tab in the Video Detect menu and toggle
the Enable switch to the on position. For more information on the settings set in this menu, refer to the table
listed below.
Parameter
Description
Channel
In the Channel list, select a channel to set the motion detection.
Enable
Enable or disable the motion detection function.
Period
Define a period during which the motion detection is active.
CAM Anti-Dither
Configure the event detection lasting time. The system records only one
event during this period. The value ranges from 5 seconds to 300 seconds.
Alarm Out
Click Setting to display setting interface.
General Alarm: Enable alarm activation through the alarm DVRs connected
to the selected output port.
External Alarm: Enable alarm activation through the connected alarm box.
Wireless Siren: Enable alarm activation through DVRs connected by USB
gateway or camera gateway.
Loading ...
Loading ...
Loading ...