Loading ...
Loading ...
Loading ...
127
Below is an explanation of the fields on the User Group settings screen:
• Number: This number indicates how many groups are in the system. Each line item has a number to signify its
place in the list.
• Group Name: This column indicates an account's username.
• Edit: This column has a button that allows for the account's properties to be edited.
• Delete: This column has a button that allows for the account's properties to be deleted.
• Memo: This column indicates any notes about the user group.
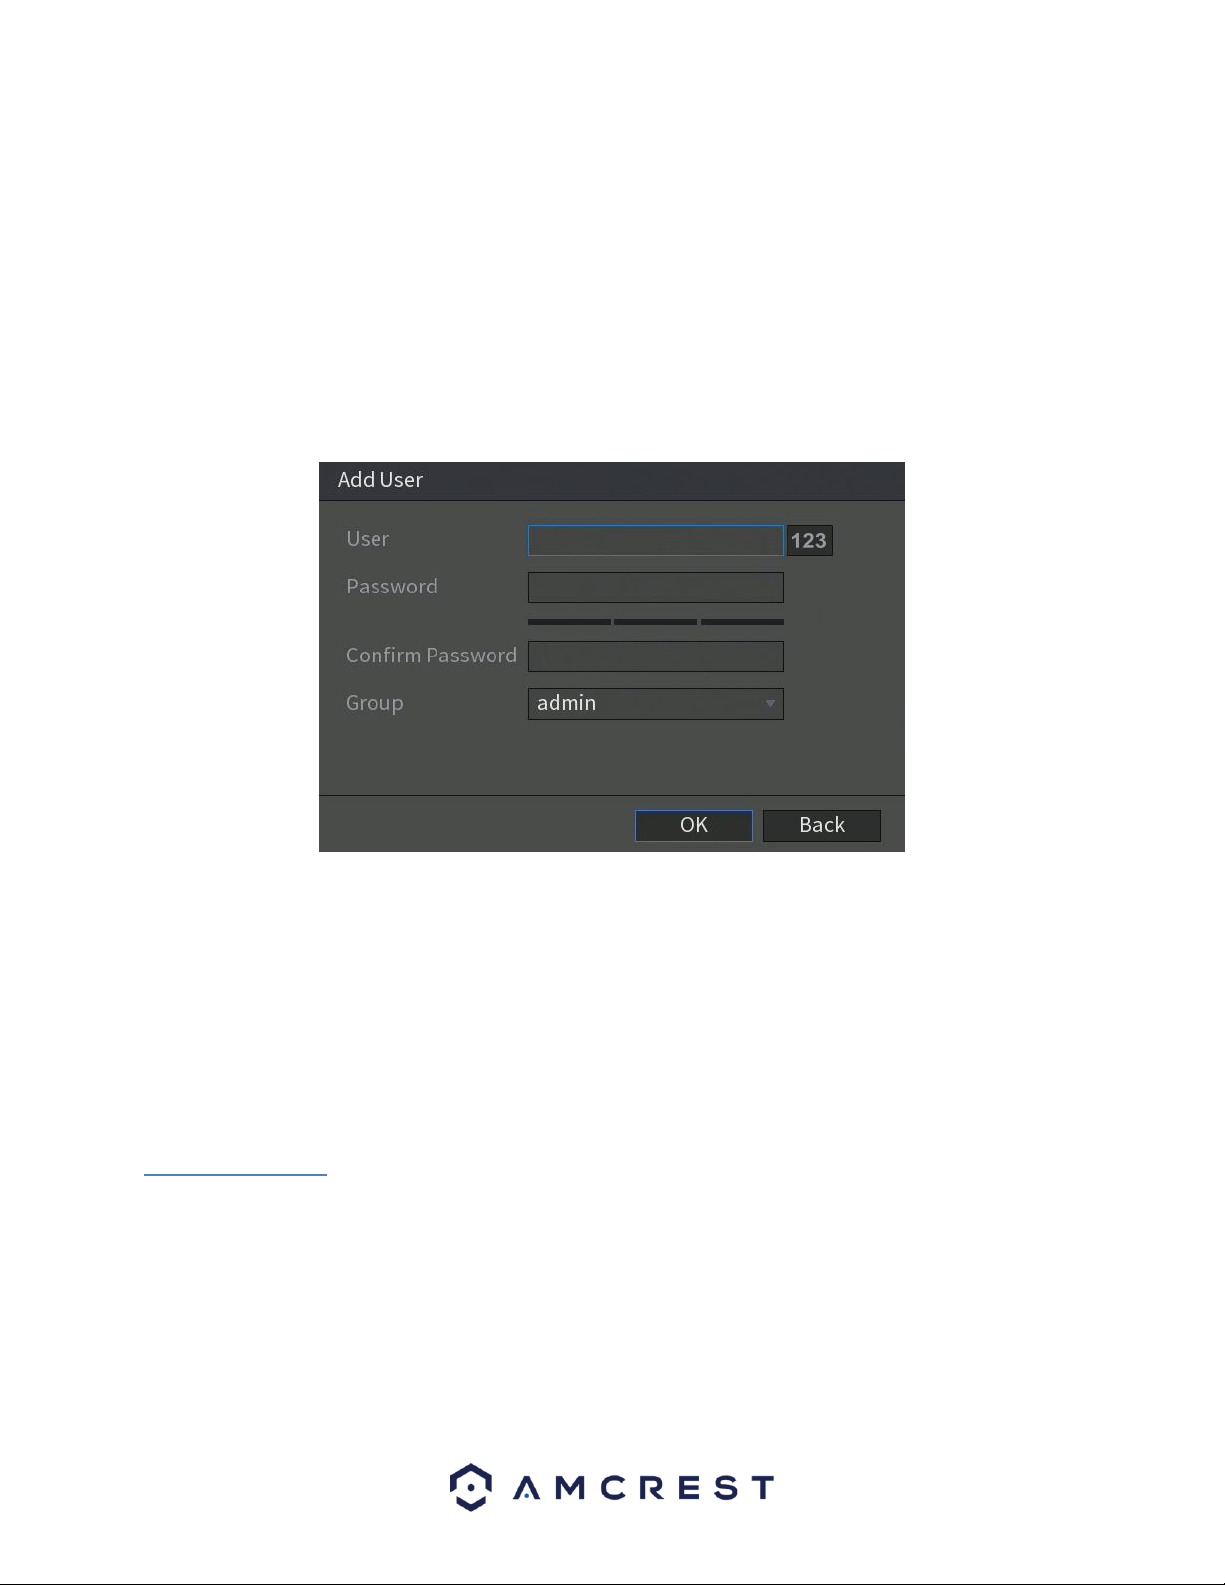
Add User: This button allows the user to add another ONVIF user to the system. On the next page is a screenshot
of the Add User screen.
In the add user interface, enter the ONVIF user name and password into the system. Confirm the password and
from the Group drop down menu, select which group you would like to associate this account with. There are
three categories listed, admin, operator, and user. When you have finished the process, click OK to continue. The
ONVIF username entered will then be implemented into the user list.
6.6. Info
This menu allows the user to access information related to their system. This information includes options such as,
system version, log, event, network, HDD, channel info, and bps information.
6.6.1. Version
This menu allows the user to access general DVR information. This includes the DVR model, system version, and
build date. Below is a screen shot of the version menu.
Loading ...
Loading ...
Loading ...