Loading ...
Loading ...
Loading ...
12
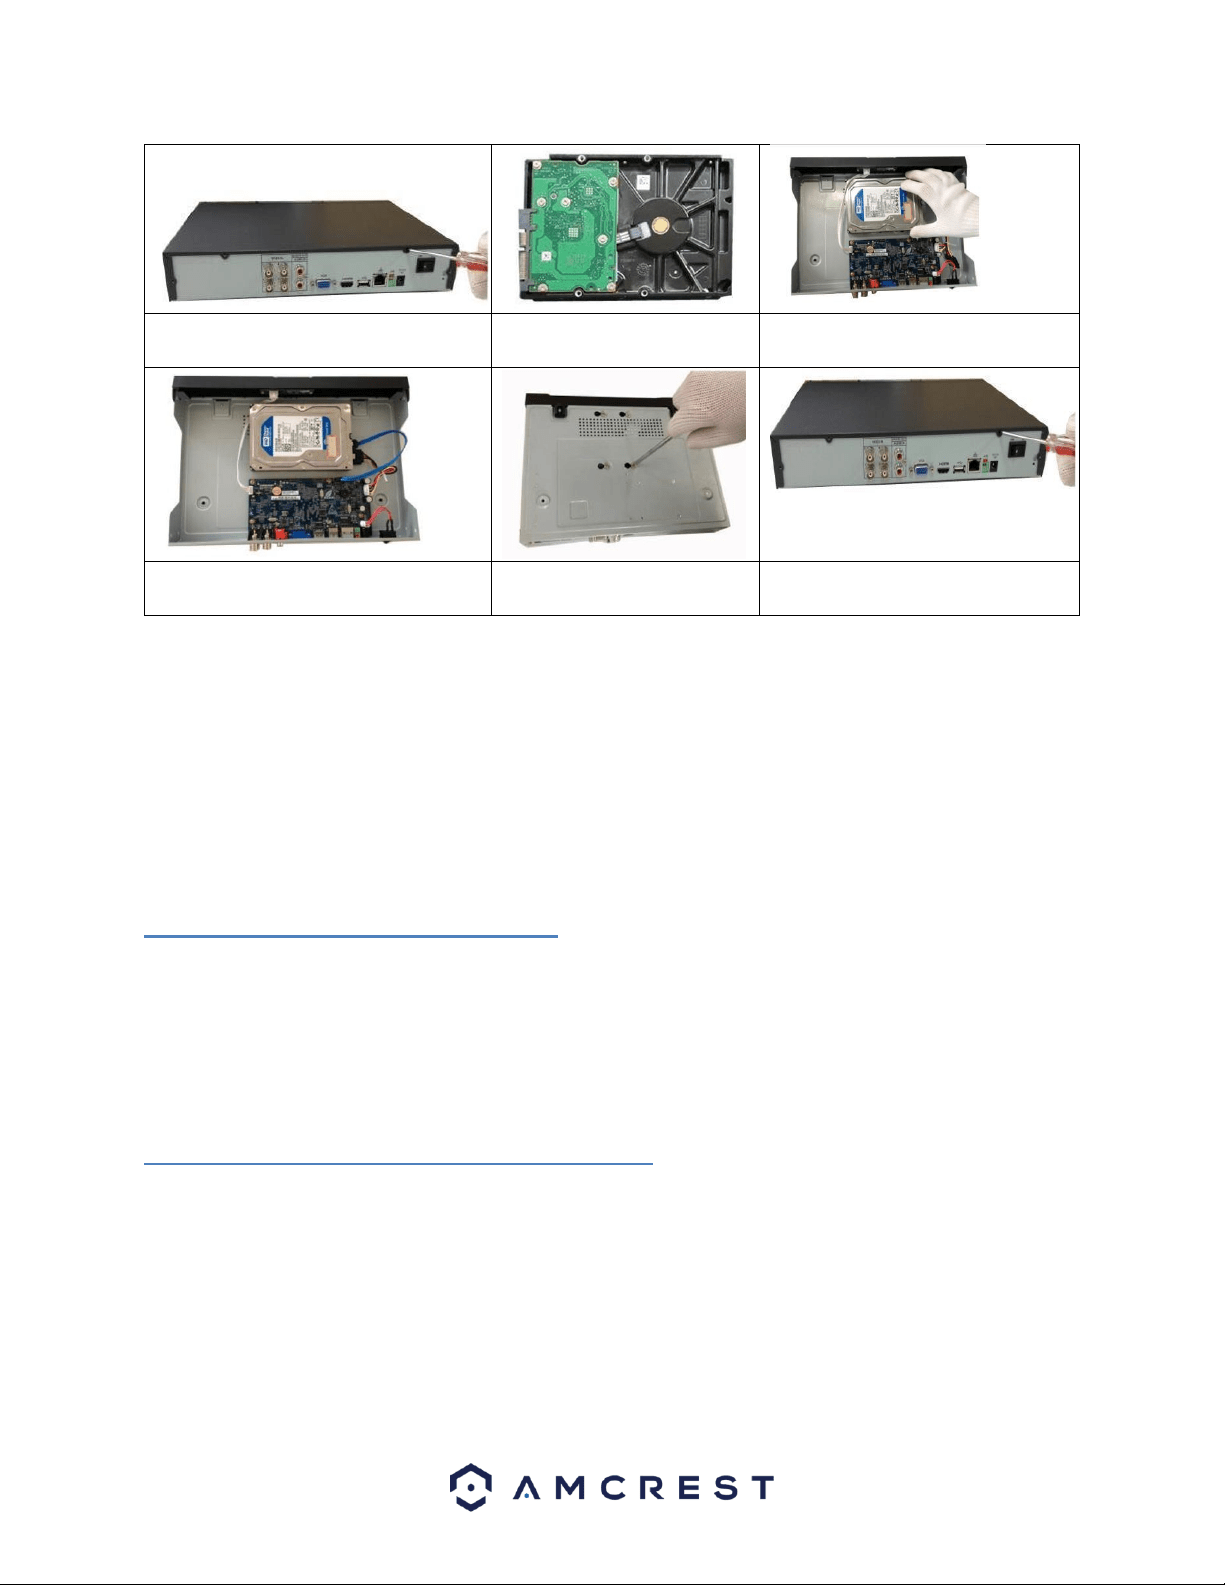
1. Loosen the screws of the upper cover
and side panel.
2. Attach four screws in the
HDD (Turn three times).
3. Place the HDD in accordance with
the four holes on the bottom.
4. Connect the HDD power and data
cable to the motherboard of the unit.
5. Secure the HDD to the unit
by tightening the four screws.
6. Place the upper cover back on the
unit and secure it to the unit.
Note:
• An HDD is NOT included with the DVR by default.
• To connect the HDD, connect the HDD data cable and the power cable before attaching the HDD in the DVR.
• To remove the front cover, push the clip first, and then slide the cover off.
3.3 Connection Port Information
3.3.1 Power Supply Connection
Please check to make sure the input voltage is correct, and the power button is in the off position when connecting
the power supply.
We recommend you use an Uninterruptible Power Supply (UPS) to guarantee steady operation of the DVR, as well
as to elongate the life span of the DVR and other peripheral equipment such as attached cameras and other
accessories.
3.3.2 Video Input/Output Connections
Video Input Connection Information
The video input interface is BNC.
The input video format includes: PAL/NTSC BNC (1.0VBP- P, B75Ω)
The video signal should comply with your national standards.
Loading ...
Loading ...
Loading ...