Loading ...
Loading ...
Loading ...
4. Focus, Exposure Compensation and Color tone Settings
95
3
Press [MENU/SET] to set.
• You can also press the shutter button halfway to set.
∫ Auto White Balance
Depending on the conditions prevailing when pictures are taken, the pictures may take on
a reddish or bluish tinge.
Please note that the White Balance may not work correctly in the cases below. In these
cases, adjust the White Balance to anything other than [AWB] or [AWBc].
– When there are multiple light sources
– When there are no colors close to white
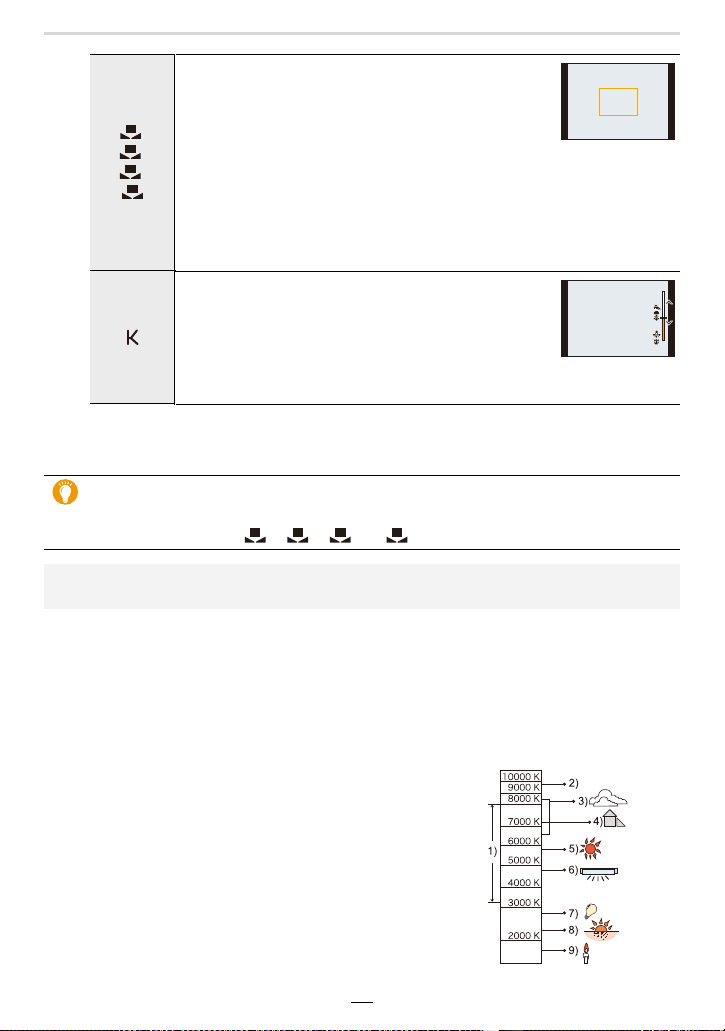
1 [AWB] will work within this range.
2 Blue sky
3 Cloudy sky (Rain)
4 Shade
5 Sunlight
6 White fluorescent light
7 Incandescent light bulb
8 Sunrise and sunset
9 Candlelight
KlKelvin Color Temperature
[]/
[]/
[]/
[]
When you wish to manually meter the light and use
the resulting setting, e.g. to achieve a white balance
precisely matching the prevailing lighting situation.
1 Press
3.
2 Place a white object such as a piece of paper
within the frame at the center of the screen, and press [MENU/
SET].
• This will set the White Balance and return you to the recording screen.
• White Balance may not be set when the subject is too bright or too dark.
Set the White Balance again after adjusting to appropriate brightness.
[]
For using a preset color temperature setting.
1 Press 3.
2 Press 3/4 to select the color temperature and
then [MENU/SET].
• You can set a color temperature from [2500K] to
[10000K].
Under fluorescent lighting, LED lighting fixture etc., the appropriate White Balance
will vary depending on the lighting type.
Use [AWB], [AWBc], [ ], [ ], [ ] or [ ].
• The White Balance may not operate correctly if you take pictures using flash and the subject
is recorded outside of the effective flash range.
1
2
3
4
5500K5500K5500K
1
2
3
4
Loading ...
Loading ...
Loading ...