Loading ...
Loading ...
Loading ...
12. Connecting to other equipment
255
Playing Back on a TV
Preparations: Turn off the camera and the TV.
1
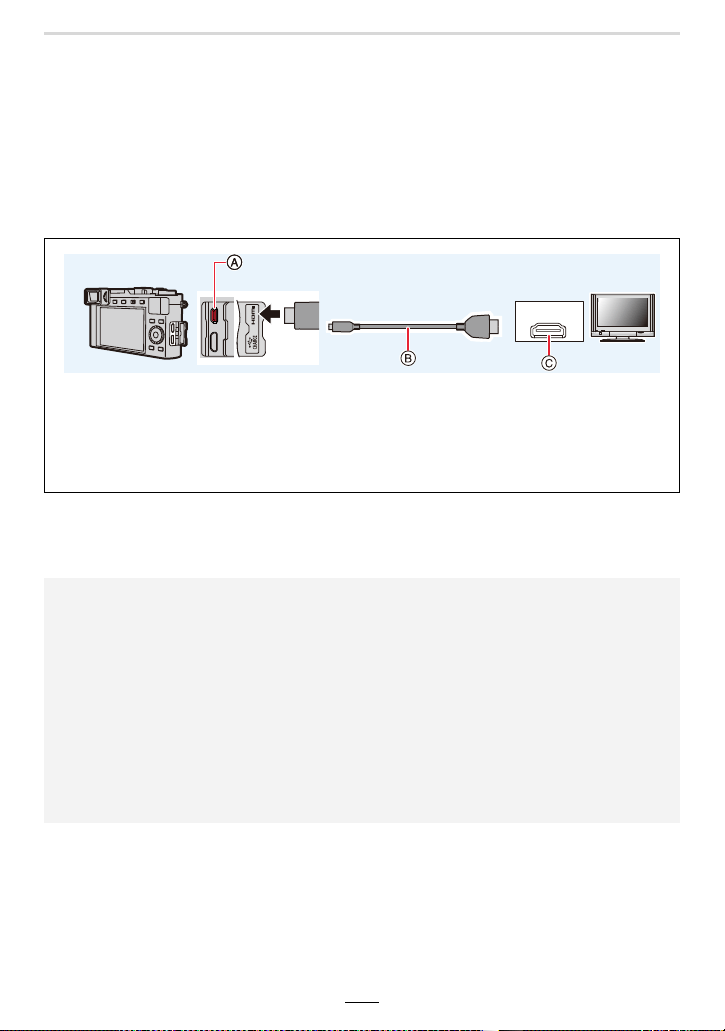
Connect the camera and the TV with an HDMI micro cable.
• Check the plugs orientations and insert them straight. (If they are inserted in the wrong
direction, the plug and socket pins could be bent and cause faulty operation.) Also, do
not insert into the wrong socket. Doing so may damage the camera.
2
Turn on the TV and select the input to match the input source in use.
3
Turn the camera on and then press [(].
A [HDMI] socket
B HDMI micro cable
C HDMI socket (on the TV)
• Use a “High Speed HDMI micro cable” with the HDMI logo.
Cables that do not comply with the HDMI standards will not work.
“High Speed HDMI micro cable” (Type D–Type A plug, up to 2m (6'6") long)
• Depending on the aspect ratio, black bars may be displayed on the top and bottom or the left
and right of the TV screen.
• Change the screen mode on your TV if the picture is displayed with the top or bottom cut off.
• Depending on the TV to be connected, video or 4K picture series files may not be played back
correctly.
• Check the [HDMI Mode (Play)]. (>201)
• To play back 24p videos, set [HDMI Mode (Play)] to [AUTO]. Otherwise, the picture is not
output at 24 frames per second.
• No image will be displayed on the monitor/viewfinder of the camera. In addition, no audio will
be output from the speaker of the camera.
• HDMI output will be canceled if a USB cable is connected simultaneously.
• Read the instructions for the TV.
HDMI
Loading ...
Loading ...
Loading ...