Loading ...
Loading ...
Loading ...
DGS-3130 Series Layer 3 Stackable Managed Switch Web UI Reference Guide
125
Parameter Description
Inner TPID Enter the inner TPID value here. This value is in the hexadecimal form. The
range is from 0x1 to 0xFFFF. The inner TPID is used to decide if the ingress
packet is C-tagged. The inner TPID can be configured per system.
Unit Select the Switch unit ID that will be used here.
From Port - To Port Select the port range that will be used here.
Outer TPID
Enter the outer TPID value here. This value is in the hexadecimal form. The
range is from 0x1 to 0xFFFF.
Click the Apply button to accept the changes made.
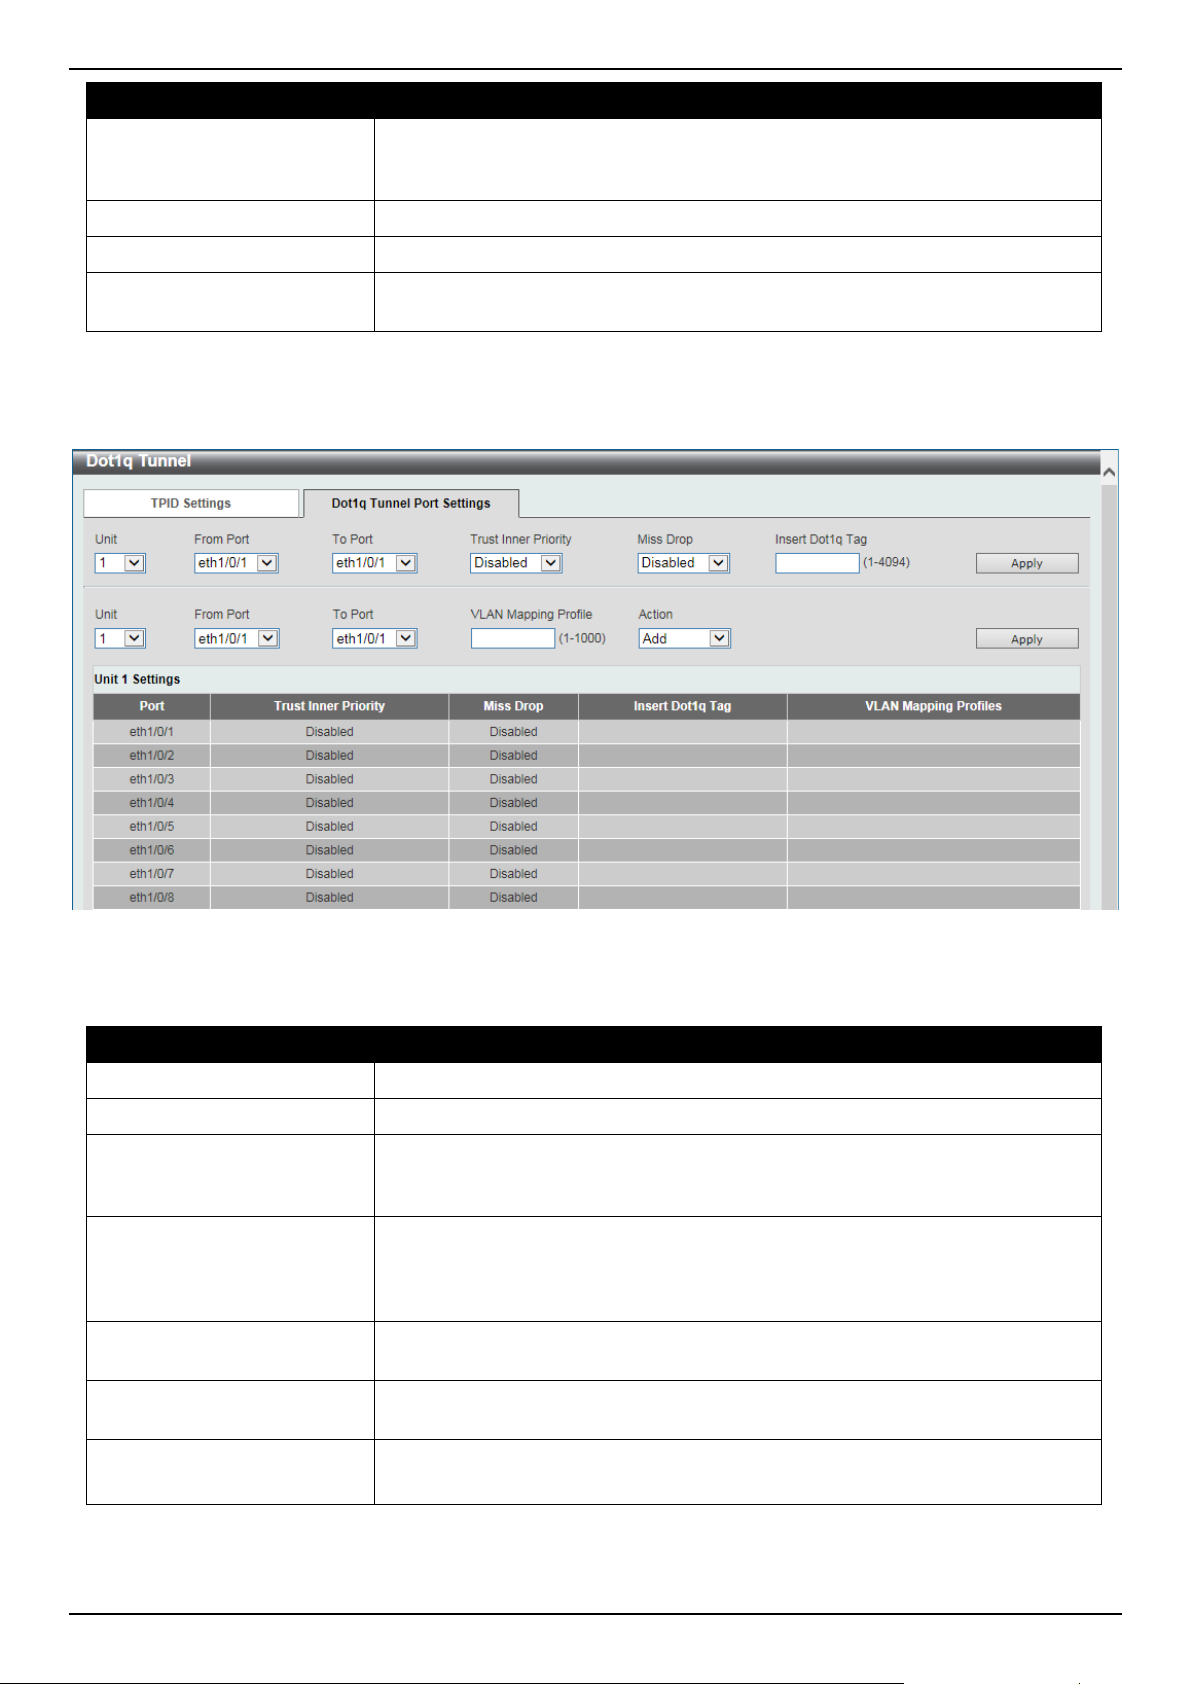
After clicking the Dot1q Tunnel Port Settings tab, the following page will appear:
Figure 5-39 Dot1q Tunnel Settings (Dot1q Tunnel Port Settings) Window
The fields that can be configured are described below:
Parameter Description
Unit Select the Switch unit ID that will be used here.
From Port - To Port Select the port range that will be used here.
Trust Inner Priority Select to enable or disable the 802.1Q Inner Trust Priority feature here. When
the trusting priority option is enabled on an 802.1Q tunnel port, the priority of
the VLAN tag in the received packets will be copied to the service VLAN tag.
Miss Drop Select to enable or disable the Miss Drop feature here. If the VLAN mapping
Miss Drop option is enabled on the receiving port, when the original VLAN of
the received packets cannot match the VLAN mapping entries or rules on this
port, the received packets will be dropped.
Insert Dot1q Tag Enter the 802.1Q VLAN ID that is inserted to the untagged packets which are
received on the 802.1Q tunnel port(s) here. The range is from 1 to 4094.
VLAN Mapping Profile Enter the ID of the VLAN mapping profile here. A lower ID has a higher priority.
The ID range is from 1 to 1000.
Action Select Add to add a new entry based in the information entered.
Select Remove to remove an entry based in the information entered.
Click the Apply button to accept the changes made.
Loading ...
Loading ...
Loading ...