
Loading ...
Loading ...
Loading ...
PERIODIC MAINTENANCE 2-45
Periodic Maintenance Procedures
•
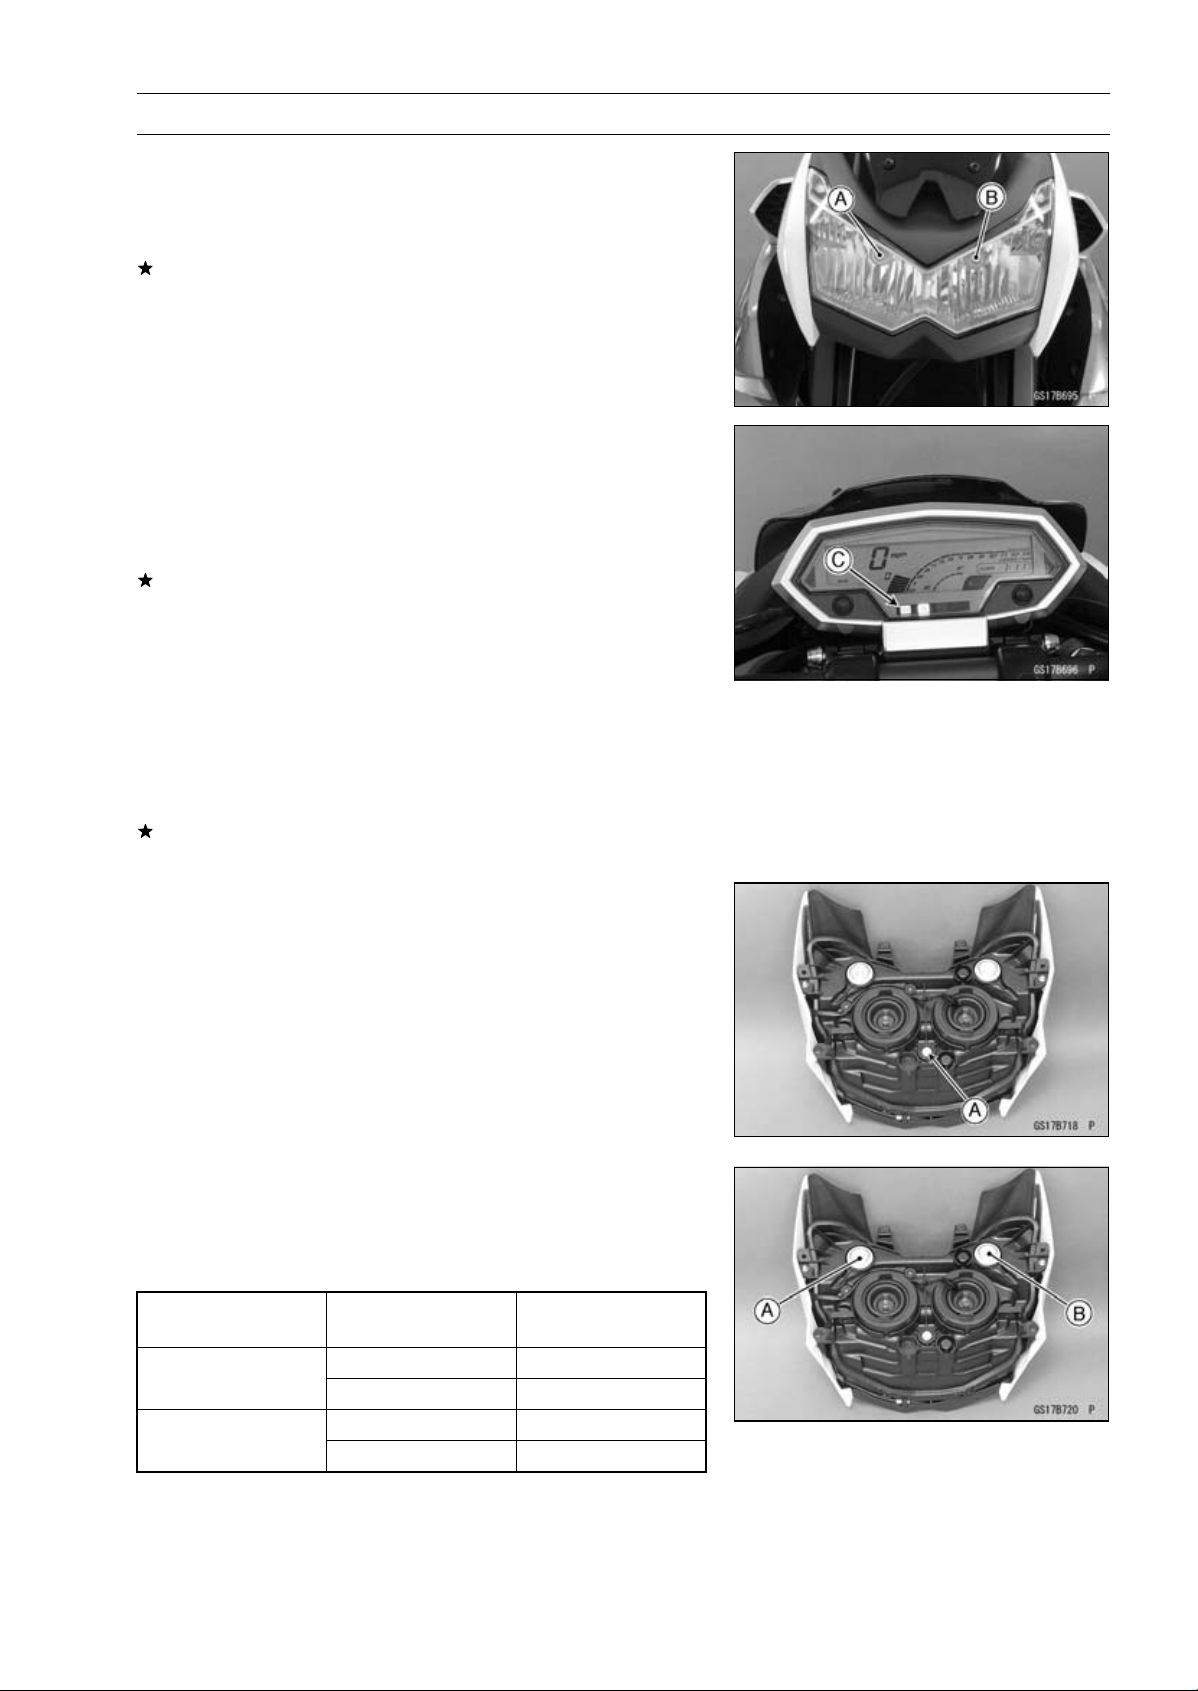
Set the dimmer switch to high beam position.
•
The low beam [A] and high beam [B] headlights should
go on.
•
The high beam indicator light (LED) [C] should go on.
If the high beam headlight and/or high beam indicator light
(LED) does not go on, inspect or replace the following
item.
Headlight High Beam Bulb (see Headlight Bulb Replace-
ment in the Electrical System chapter)
Meter Unit for High Beam Indicator Light (LED) (see Me-
ter Unit Inspection in the Electrical System chapter)
Dimmer Switch (see Switch Inspection in the Electrical
System chapter)
•
Turn off the engine stop switch.
•
The low beam and high beam headlights should stay go-
ing on.
If the headlights and high beam indicator light (LED) does
go off, inspect or replace the following item.
Headlight Relay in Relay Box (see Relay Circuit Inspec-
tion in the Electrical System chapter)
•
Turn off the ignition switch.
•
The headlights and high beam indicator light (LED) should
go off.
Headlight Aiming Inspection
•
Inspect the headlight beam for aiming.
If the headlight beam is off the point, adjust the headlight
aiming.
Headlight Aiming Adjustment
NOTE
○
Do not turn the bolt [A] because the reflector in the
headlight comes off.
(In the photo, the headlight unit has been removed for
clarity.)
NOTE
○
The left adjuster [A] and right adjuster [B] can move the
direction of the headlight beam to up, down, left and
right by turning each adjuster itself as the below table.
Turning Direction
of Adjuster
Moving Direction of
Headlight Beam
Clockwise Left and Up
Left Adjuster
Counterclockwise
Right and Down
Clockwise
Right and Up
Right Adjuster
Counterclockwise Left and Down
Loading ...
Loading ...
Loading ...