
Loading ...
Loading ...
Loading ...
9-38 CRANKSHAFT/TRANSMISSION
Transmission
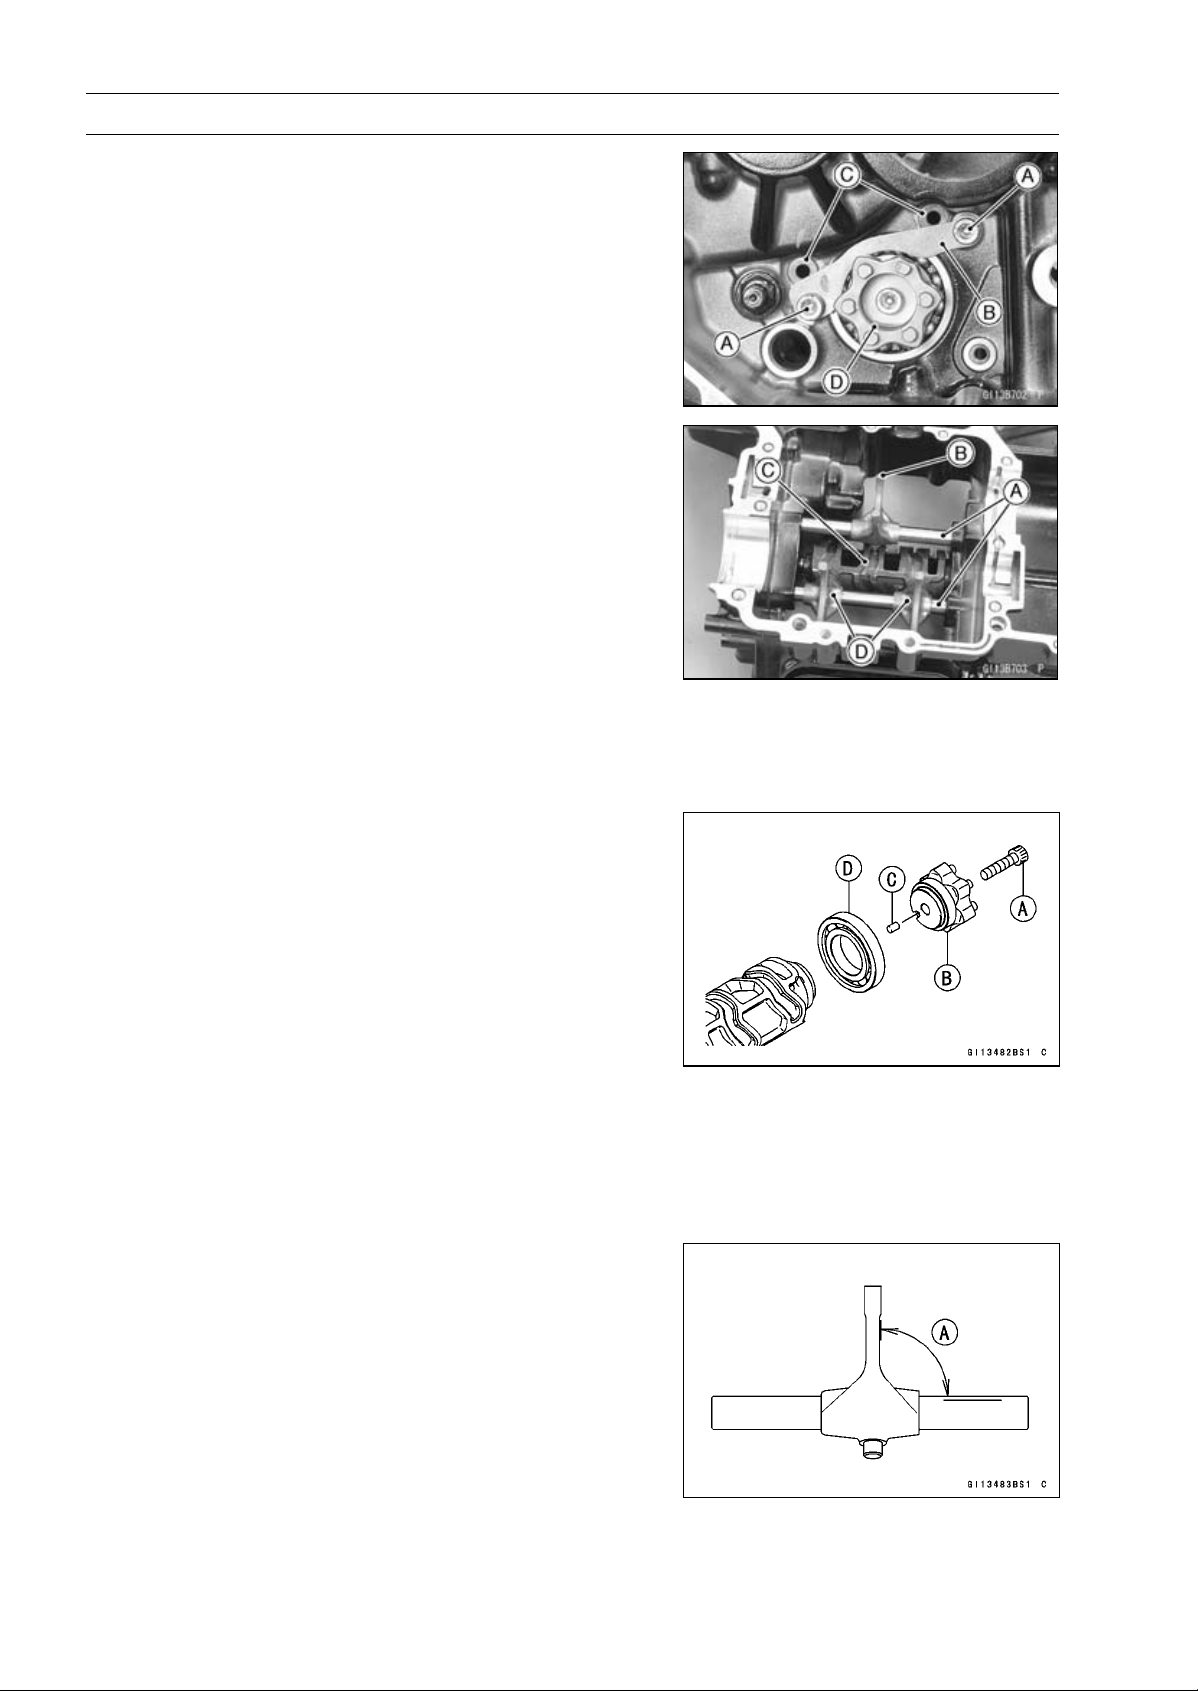
Shift Drum and Fork Removal
•
Remove:
Lower Crankcase Half (see Crankcase Splitting)
Transmission Shafts (see Transmission Shaft Removal)
Gear Positioning Lever (see External Shift Mechanism
Removal)
Bolts [A]
Shift Drum Bearing Holder [B]
•
Pull out the shift rods [C], and take off the shift forks.
•
Pull out the shift drum [D].
Shift Drum and Fork Installation
•
Apply engine oil to the shift drum, forks and rods.
•
Install the shift rods [A], noting the groove position.
○
The rods are identical.
○
Position the one with shortest ears [B] on the drive shaft
and place the pin in the center groove in the shift drum
[C].
○
The two forks [D] on the output shaft are identical.
•
Install the forks so that its “0061” and “0062” side faces
engine left side.
•
Apply a non-permanent locking agent to the threads of
the shift drum bearing holder bolts, and tighten them.
Torque - Shift Drum Bearing Holder Bolts: 12 N·m (1.2
kgf·m, 106 in·lb)
Shift Drum Disassembly
•
Remove the shift drum (see Shift Drum and Fork Re-
moval).
•
While holding the shift drum with a vise, remove the shift
drum cam bolt [A].
•
Remove:
Shift Drum Cam [B]
Dowel Pin [C]
Bearing [D]
Shift Drum Assembly
•
Be sure to install the dowel pin.
•
Apply a non-permanent locking agent to the threads of
the shift drum bearing holder bolt, and tighten it.
Torque - Shift Drum Cam Bolt: 12 N·m (1.2 kgf·m, 106 in·lb)
Shift Fork Bending Inspection
•
Visually inspect the shift forks, and replace any fork that is
bent. A bent fork could cause difficulty in shifting, or allow
the transmission to jump out of gear when under power.
90° [A]
Loading ...
Loading ...
Loading ...