
Loading ...
Loading ...
Loading ...
ENGINE REMOVAL/INSTALLATION 8-7
Engine Removal/Installation
•
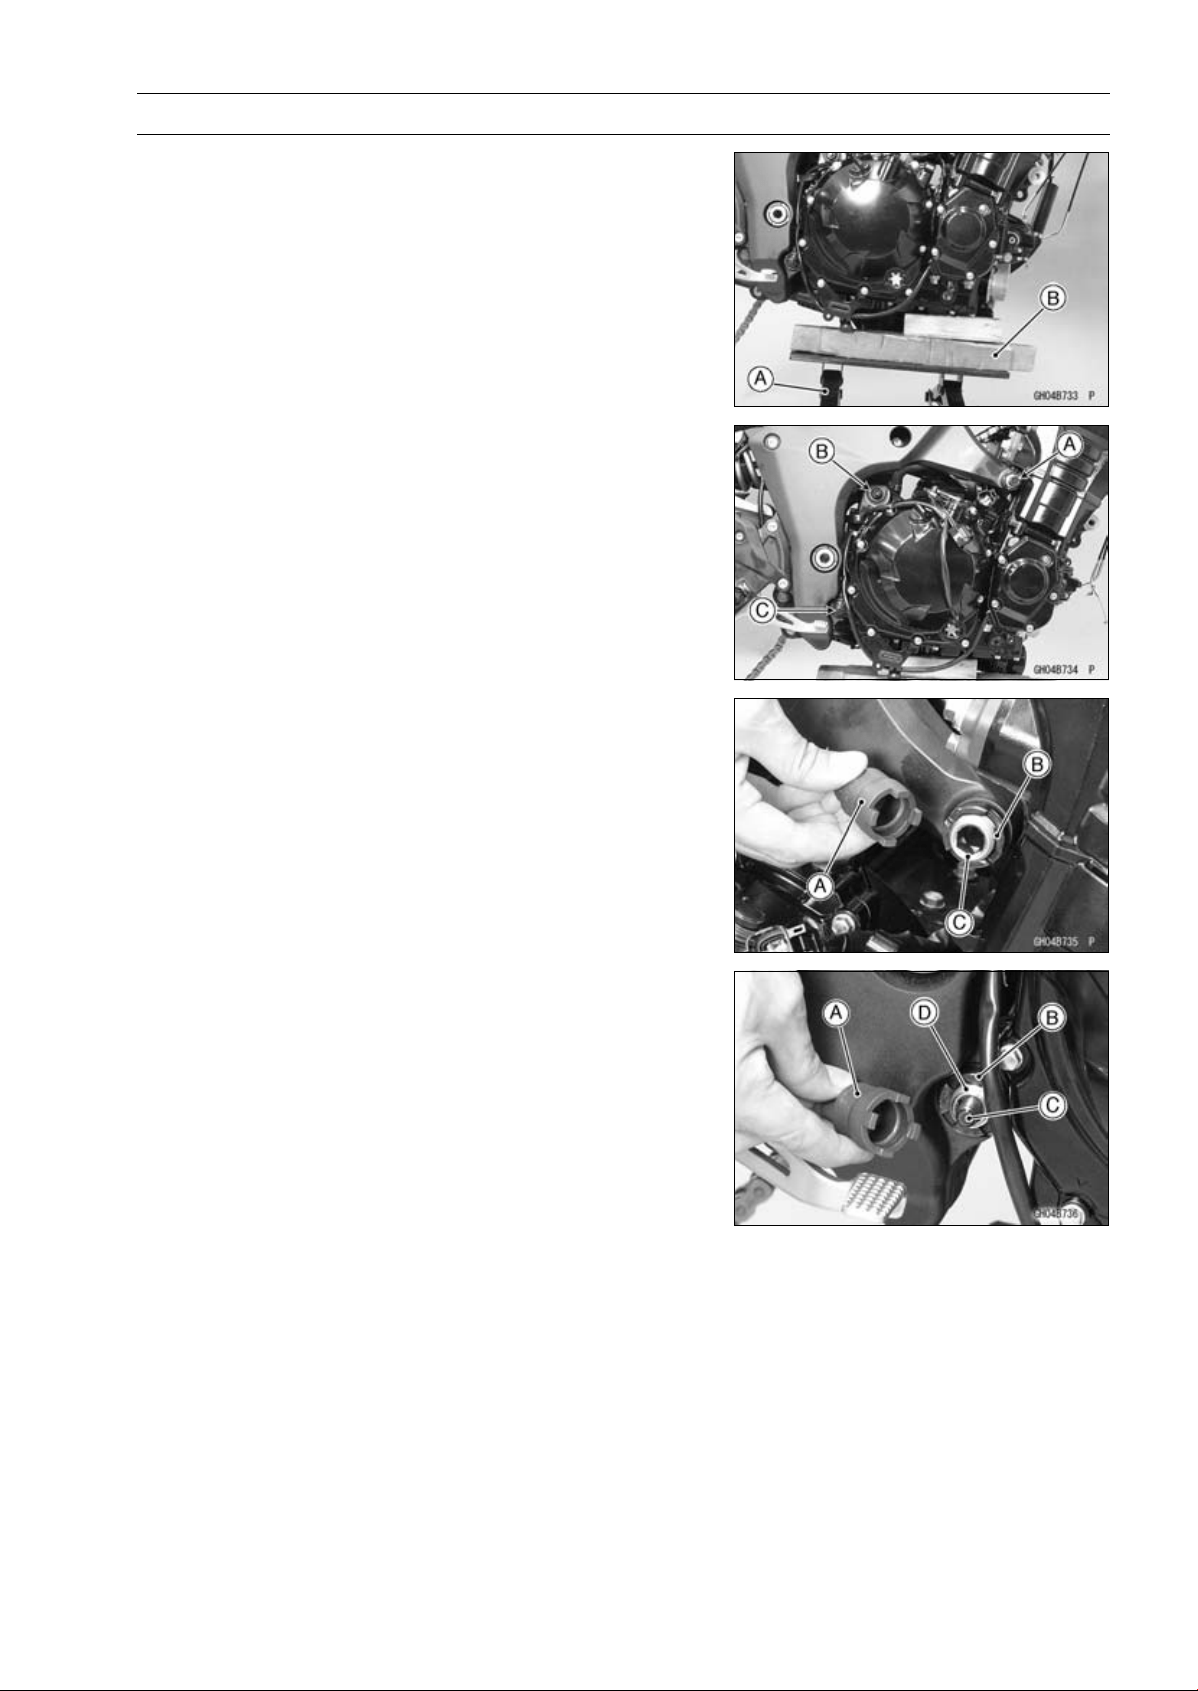
Support the engine with a suitable stand [A].
○
Put a plank [B] onto the suitable stand for engine balance.
•
Remove:
Upper Engine Mounting Bolt [A] (Both Sides)
Middle Engine Mounting Nut [B] and Bolt
Lower Engine Mounting Nut [C]
•
Using the nut wrench [A], loosen the upper adjusting collar
locknut [B].
Special Tool - Engine Mount Nut Wrench: 57001-1450
•
Using the Hexagon Wrench, turn the adjusting collar [C]
counterclockwise to make the gap between the engine
and adjusting collar.
•
Using the nut wrench [A], loosen the lower adjusting collar
locknut [B].
Special Tool - Engine Mount Nut Wrench: 57001-1450
•
Remove the lower engine mounting bolt [C].
•
Using the Hexagon Wrench, turn the adjusting collar [D]
counterclockwise to make the gap between the engine
and adjusting collar.
•
Using the stand, take out the engine.
Loading ...
Loading ...
Loading ...