Loading ...
Loading ...
Loading ...
The essentials
Removing
●
Remove the wheel cover using the wire
hook
›
›
›
Fig. 72.
●
Hook this into one of the cut-outs of the
wheel cover.
Fitting
●
Fit the wheel cover onto the wheel rim by
pressing it firmly.
●
Put pressure on the point of the cut-out for
the valve.
●
Next fit the rest of the wheel cover.
Wheel bolt caps*
Fig. 73
Wheel: wheel bolts with caps.
Removal
●
Fit the plastic clip (vehicle tools) over the
cap until it clicks int
o pl
ace
›
››
Fig. 73.
●
Remove the cap with the plastic clip.
Wheel bolts
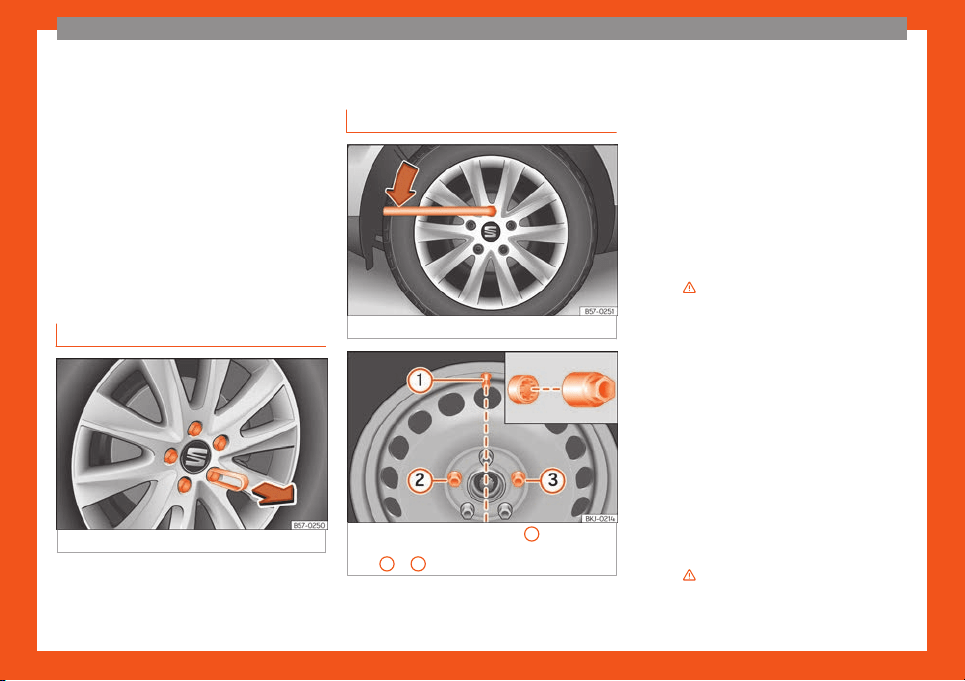
Fig. 74
Tyre change: slacken the wheel bolts.
Fig. 75
Tyre change: tyre valve
1
and the cor-
r
ect position f
or the anti-theft wheel l
ocking
bolt
2
or
3
.
Use only the wheel wrench belonging to the
car t
o l
oosen the wheel bolts.
L
oosen the wheel bolts only about one turn
before raising the vehicle with the jack.
If the wheel bolt is very tight, carefully push
on the end of the wheel wrench with your
foot. Hold on to the vehicle for support and
take care not to slip during this operation.
Loosening wheel bolts
●
Fit the wheel wrench on as far as it will go
›››
Fig. 74.
●
Hold the wrench at the end and rotate the
bolt approximately one turn anticlock-
wise
›››
in Removing and fitting the
wheel on page 56.
The caps pr
ot
ect the wheel bolts and shoul
d
be pushed fully on again after changing the
tyre.
Loosening the anti-theft wheel bolt
●
Take the adapter for the anti-theft wheel
bolts out of the vehicle tool kit.
●
Insert the adapter fully onto the anti-theft
wheel bolt
›››
Fig. 75.
●
Fit the wheel wrench as far as it will go over
the adapter.
●
Hold the wrench at the end and rotate the
bolt approximately one turn anticlock-
wise
›››
in Removing and fitting the
wheel on page 56.
54
Loading ...
Loading ...
Loading ...