Loading ...
Loading ...
Loading ...
The essentials
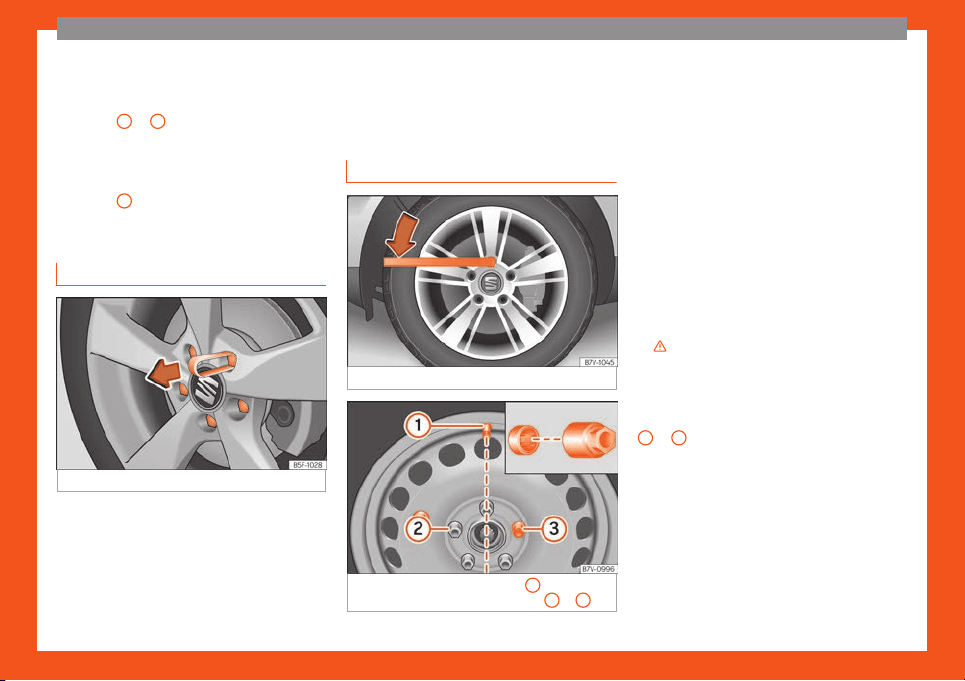
Fitting hubcaps
Bef
or
e mounting the full trim, the anti-theft
wheel l
ock must be threaded into position
›››
Fig. 70
2
or
3
. Otherwise it will not be
possibl
e t
o mount the full hubcap
.
●
Press the trim against the wheel so that the
space for the valve fits over the tyre valve
›››
Fig. 70
1
. Make sure that the hubcap is
corr
ectly fitt
ed all the w
ay around the wheel.
Wheel bolt caps
Fig. 68
Clip for removing the wheel bolt caps
Removal
●
Fit the plastic clip (vehicle tools) over the
cap until it clicks int
o pl
ace
›
››
Fig. 68.
●
Remove the cap with the plastic clip.
The caps protect the wheel bolts and should
be remounted after changing the tyre.
The anti-theft wheel locking bolt has a
special cap. This only fits on anti-theft locking
bolts and is not for use with standard wheel
bolts.
Loosening the wheel bolts
Fig. 69
Tyre change: slacken the wheel bolts.
Fig. 70 Tyre change: tyre valve
1
and posi-
tion of anti-theft wheel l
ocking bolt
2
or
3
.
Only use the tool supplied with the vehicle to
l
oosen the wheel bolts.
L
oosen the wheel bolts only about one t
urn
before raising the vehicle with the jack.
If the wheel bolt is very tight, you may be able
to loosen it by pushing down on the end of
the wheel brace carefully with your foot. Hold
on to the vehicle for support and take care
not to slip.
Loosening wheel bolts
●
Fit the wheel brace as far as it will go over
the wheel bolt
›››
Fig. 69.
●
Hold the wheel brace at the end and rotate
the bolt approximately one turn anticlockwise
›››
.
L
oosening anti-theft wheel bolts
F
or wheel
s with full trim, the anti-theft wheel
lock must be threaded into position
›››
Fig. 70
2
or
3
. Otherwise it will not be possible to
mount the entir
e hubcap
.
●
T
ake the adapter for anti-theft wheel bolts
out of the vehicle tool kit.
●
Insert the adapter onto the anti-theft wheel
bolt.
●
Fit the wheel brace onto the adapter as far
as possible.
»
49
Loading ...
Loading ...
Loading ...