Loading ...
Loading ...
Loading ...
Emergencies
1.
Pull the cover forwards, in the direction of the
arrow
›
››
Fig. 111.
2.
Unscrew the attachment screw
›››
Fig. 111
1
using the screwdriver from the vehicle tool kit
›››
page 85.
3.
Tilt the headlight slightly forward and extract it
from its lateral attachments
›››
Fig. 112 (small
arrows).
4.
Release the connector
›››
Fig. 112
1
and re-
move it.
5.
R
otate the bulb holder
›››
Fig. 112
2
to the left
all the way, in the direction of the arr
ow, and
pull it out backwards together with the bulb.
6.
Replace the faulty bulb with a new identical
bulb.
7.
Place the bulb hol
der in the headlight and ro-
tate to the right all the way.
8.
Insert the connector
›››
Fig. 112
1
on the bulb
holder
2
. The connector must audibly click in-
to place
.
9.
Place the headlight into its position
›››
Fig. 112
(small arrows) and tilt it backwards.
10.
Tighten the attachment screw
›››
Fig. 111
1
using the screwdriver.
11. Replace the cover on the bumper
›››
Fig. 111.
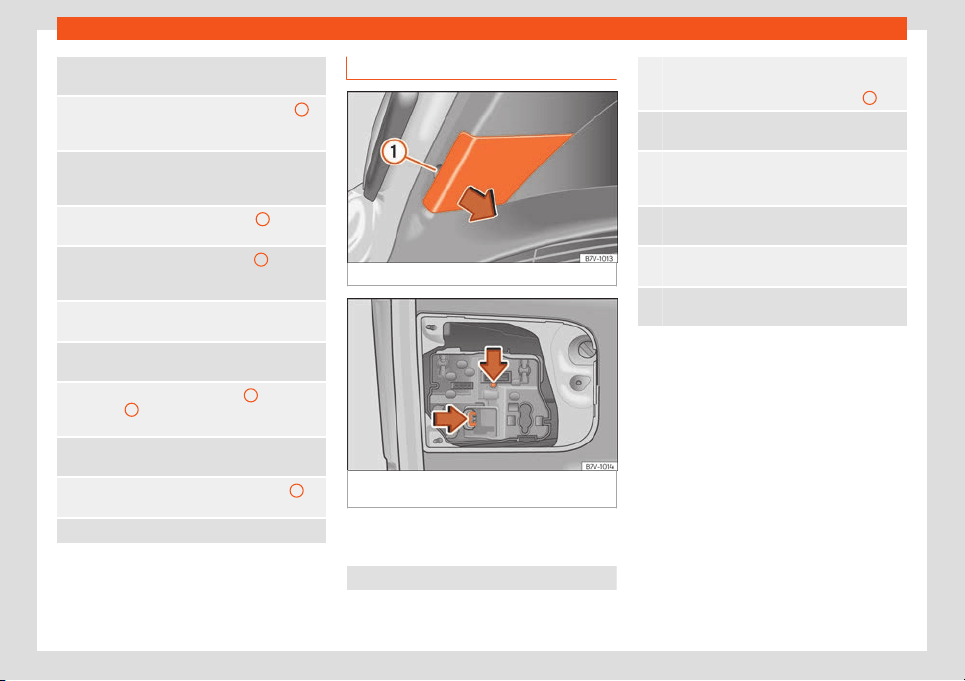
Replacing the rear lid bulbs
Fig. 113
On the rear lid: remove the cover.
Fig. 114
On the rear lid: remove the bulb hold-
er
.
Complete operations only in the sequence
giv
en:
1. Open the rear lid
›››
page 126.
2.
Extract the cover carefully using the flat part of
the screw
driver from the vehicle tool kit as a lev-
er (
›››
Fig. 102) on the indent
›››
Fig. 113
1
.
3.
Release the bulb holder connector by pulling on
the red connector bl
ock.
4.
Press on the attachment tabs in the direction of
the arrow
›
››
Fig. 114 and pull out the bulb hold-
er.
5.
Replace the faulty bulb with a new identical
bulb.
6.
Install the bulb hol
der. The attachment tabs
should audibly click into pl
ace.
7.
Insert the cover. The cover should lock into
place.
98
Loading ...
Loading ...
Loading ...