Loading ...
Loading ...
Loading ...
En
8
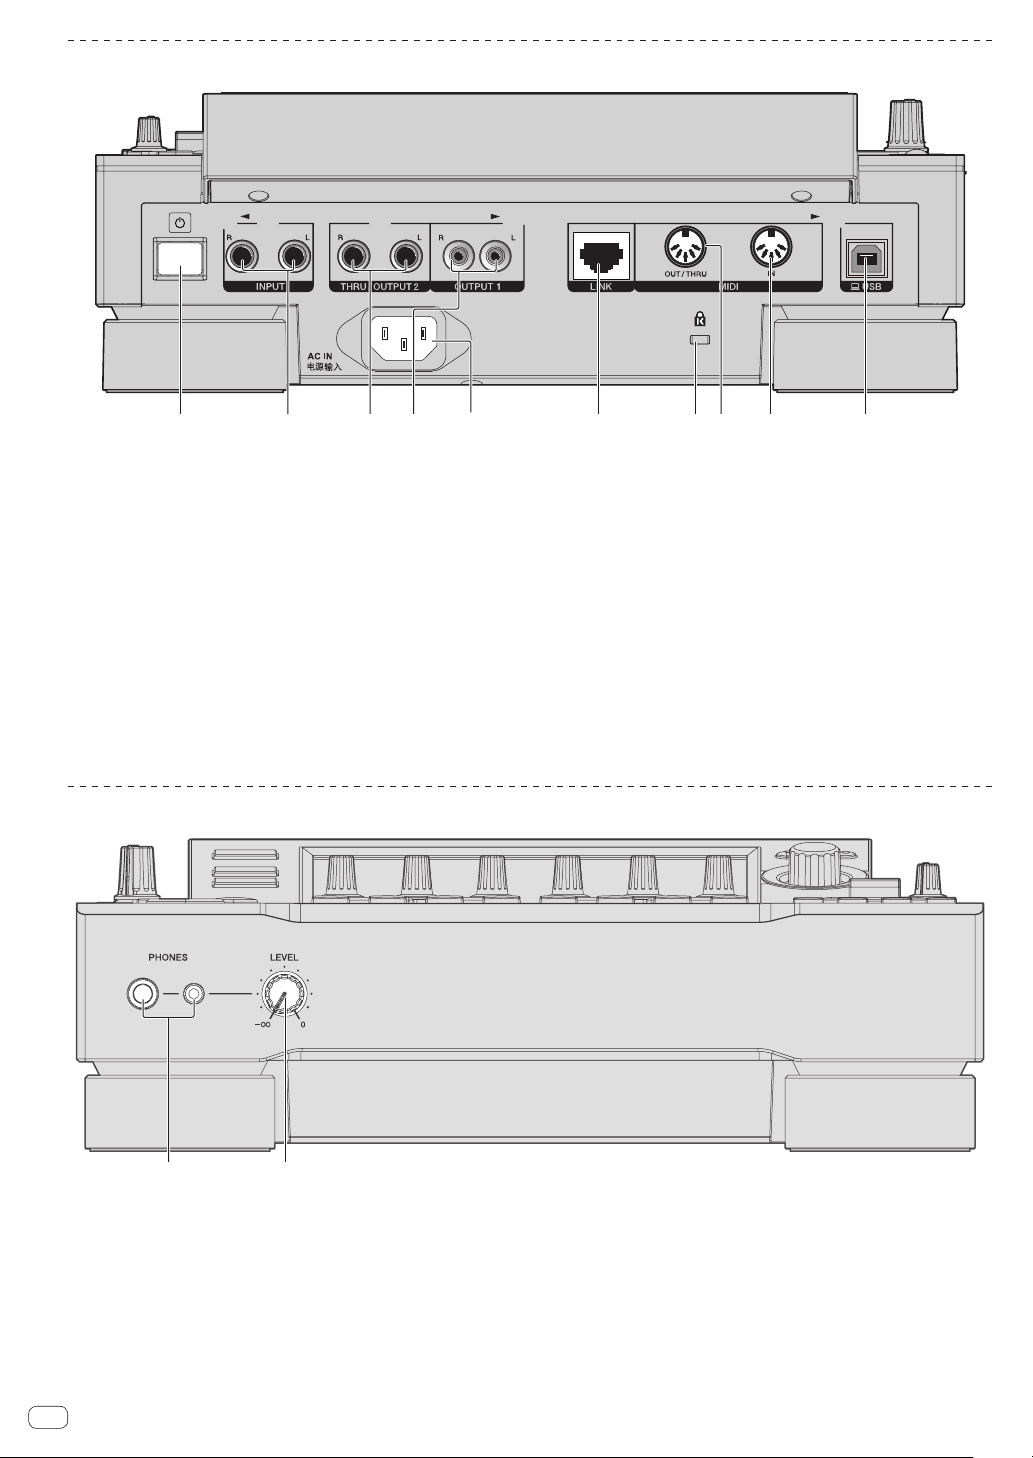
Rear panel
1
6 7 9
2
3
45
8 a
1 u switch
Turns this unit on and off.
= Starting the system (p. 10 )
2 INPUT terminals
Connect to the output terminals of another mixer or a line level out-
put component. If a cable is connected to the [L] terminal only, the
input to the [L] terminal is also input to the [R] channel.
3 THRU/OUTPUT2 terminals
4 OUTPUT1 terminals
5 AC IN
Connect to a power outlet.
! Connect the power cord to a power outlet after all the connec-
tions are completed.
! Be sure to use the supplied power cord.
6 LINK terminal
Connect a PRO DJ LINK compatible device with the LAN cable
(included).
7 Kensington security slot
8 MIDI OUT/THRU terminal
Connect a MIDI device to this DIN type terminal.
9 MIDI IN terminal
Connect a MIDI device to this DIN type terminal.
a USB-B terminal
Connect to a computer.
! A USB hub cannot be used.
! To maintain the performance, connect this unit and computer
directly using a USB cable that conforms to USB 2.0.
Front panel
2
1
1 PHONES terminals
Connect headphones. 1/4” stereo phone plugs are supported.
2 LEVEL control
Adjusts the level of sound output from the headphones.
Loading ...
Loading ...
Loading ...