Loading ...
Loading ...
Loading ...
En
11
Basic operation
Move the [TEMPO] slider forward or backward.
The tempo increases when the slider is moved to the [+] side (back-
ward), and decreases when the slider is moved to the [–] side (forward).
The rate at which the playing speed is changed is displayed on the play-
ing speed display.
To set the BPM value of the project, refer to Setting BPM (BPM) on
page 19 .
Switching the pattern
1 Press the [PATTERN] button.
The unit enters the pattern switching mode and the [PATTERN] button
lights up in white. The 16 step keys are lit in the currently selected scene
colors during pattern switching mode.
! 16 patterns can be assigned to each scene. One pattern is
assigned to each step key.
! Scenes with recorded sequences are dimly lit, scenes with no
sequences recorded are not lit, and currently selected sequences
are fully lit.
2 Press a 16-step key set with a sequence.
The pattern assigned to the button is played.
! The timing that the pattern is switched is in accordance with the
PATTERN QUANTIZE setting value set on the QUANTIZE screen.
!
The pressed step key flashes while the pattern is switched.
! Press the [PATTERN] button to exit pattern switching mode.
Switching the scene
1 Press the [SCENE] button.
The unit enters the scene switching mode and the [SCENE] button lights
up in white. The 16-step keys light up in the color set for the current
scene in scene switching mode..
! 16 scenes can be assigned to each project. One scene is
assigned to one of the 16 step keys.
! Scenes with recorded sequences are dimly lit, scenes with no
sequences recorded are not lit, and currently selected sequences
are fully lit.
2 Press a 16-step key set with a sequence.
The scene is selected, and the unit switches to the state for selecting a
pattern in that scene.
! For details on switching the pattern, refer to Switching the
pattern.
! Press the [SCENE] button to exit scene switching mode.
! The display returns to the previous scene if the mode is exited
without switching the pattern.
! Pressing and holding the [SCENE] button sets the SCENE JUMP
mode to continue the scene switching mode even if the scene
is switched. The [SCENE] button flashes in white while in the
SCENE JUMP mode.
Changing the length of a pattern
1 Press the [PATTERN] button while pressing the [SHIFT]
button.
The unit switches to pattern length setting mode, and the [PATTERN]
button blinks white. During pattern length setting mode, the 16-step key
lights white, and the measure selection key lights blue.
!
A pattern length from a minimum of 1 step to a maximum of 64
steps can be set.
2 Press a bar selection key.
Set the length of the pattern using bar units. The bar selection keys from
bar selection key [1] to the pressed bar selection key light in blue.
3 Press the 16-step keys.
Set the length of the pattern on a step level. The 16-step keys pressed
from 16-step key [1] to 16-step key [16] light in white.
! Press the [PATTERN] button to exit pattern length setting mode.
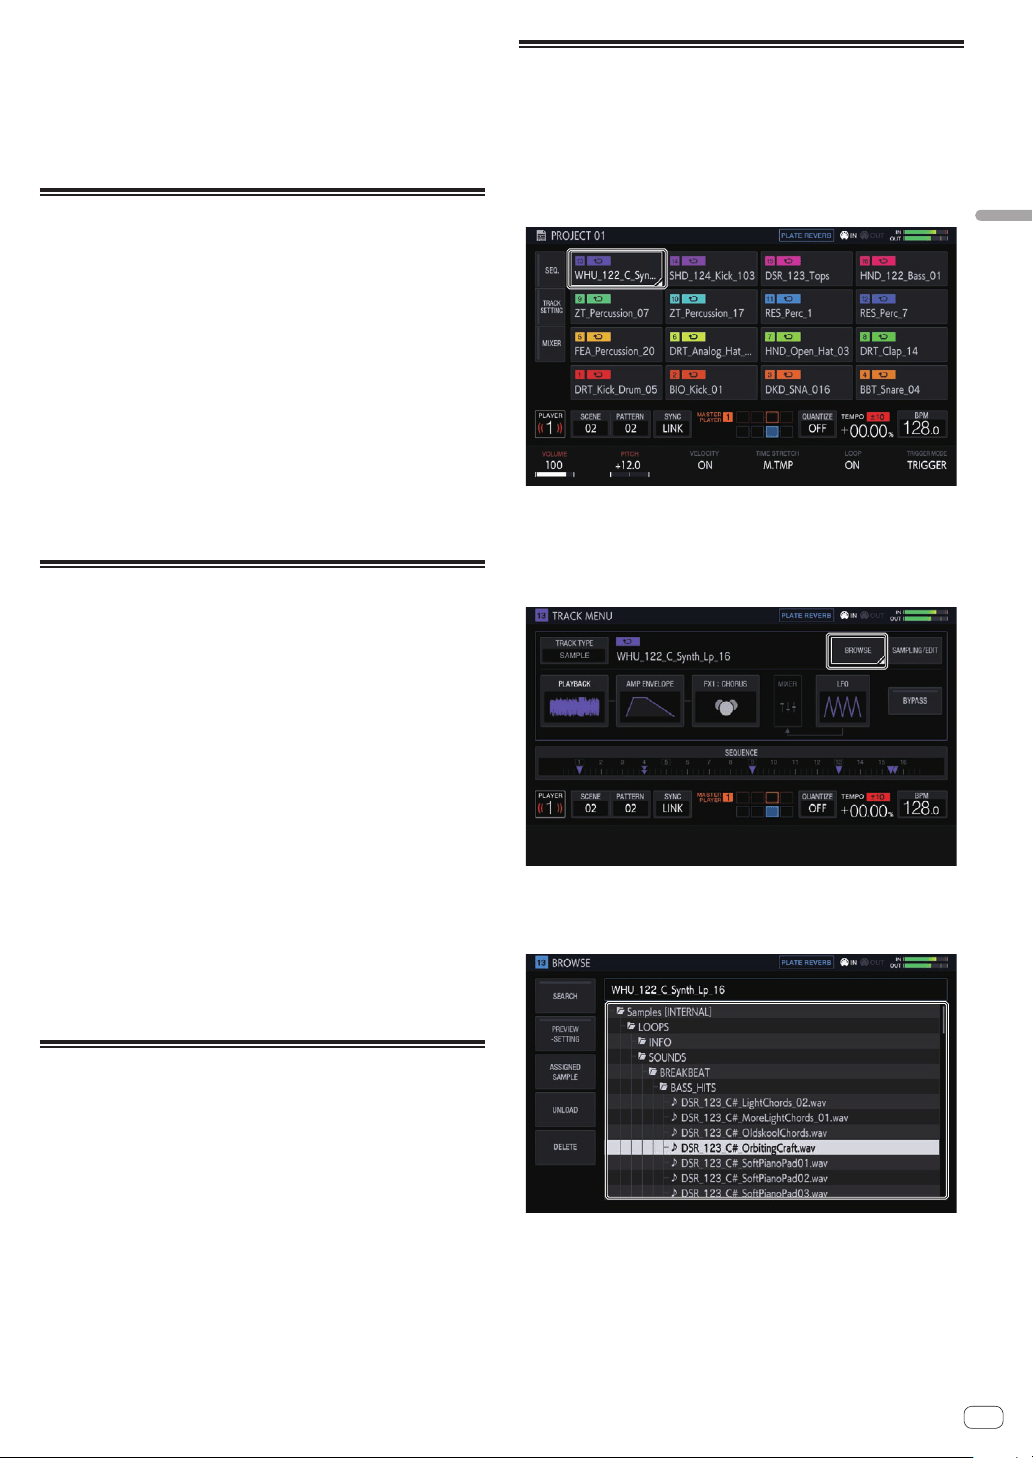
Loading a sample to a track
1 Tap the track to which you wish to load the sample
on the home screen and then tap again in the selected
state.
The track menu screen appears.
! The track menu can also be displayed by turning the rotary selector
to select a track and then pressing the rotary selector.
2 Tap [BROWSE].
The browse screen appears. You can search for samples and load sam-
ples to tracks on the browse screen.
! The browse screen can also be displayed by turning the rotary selec-
tor to select [BROWSE] and then pressing the rotary selector.
3 Turn the rotary selector to select a sample and then
press the rotary selector.
The sample is loaded to the track, and loaded on the screen.
! Select a folder and press the rotary selector to open or close the
folder.
! Turn the rotary selector while pressing the [SHIFT] button to move
the focus between folders (sample files are skipped).
Loading ...
Loading ...
Loading ...