Loading ...
Loading ...
Loading ...
En
35
Adjusting track parameters (TRACK MENU)
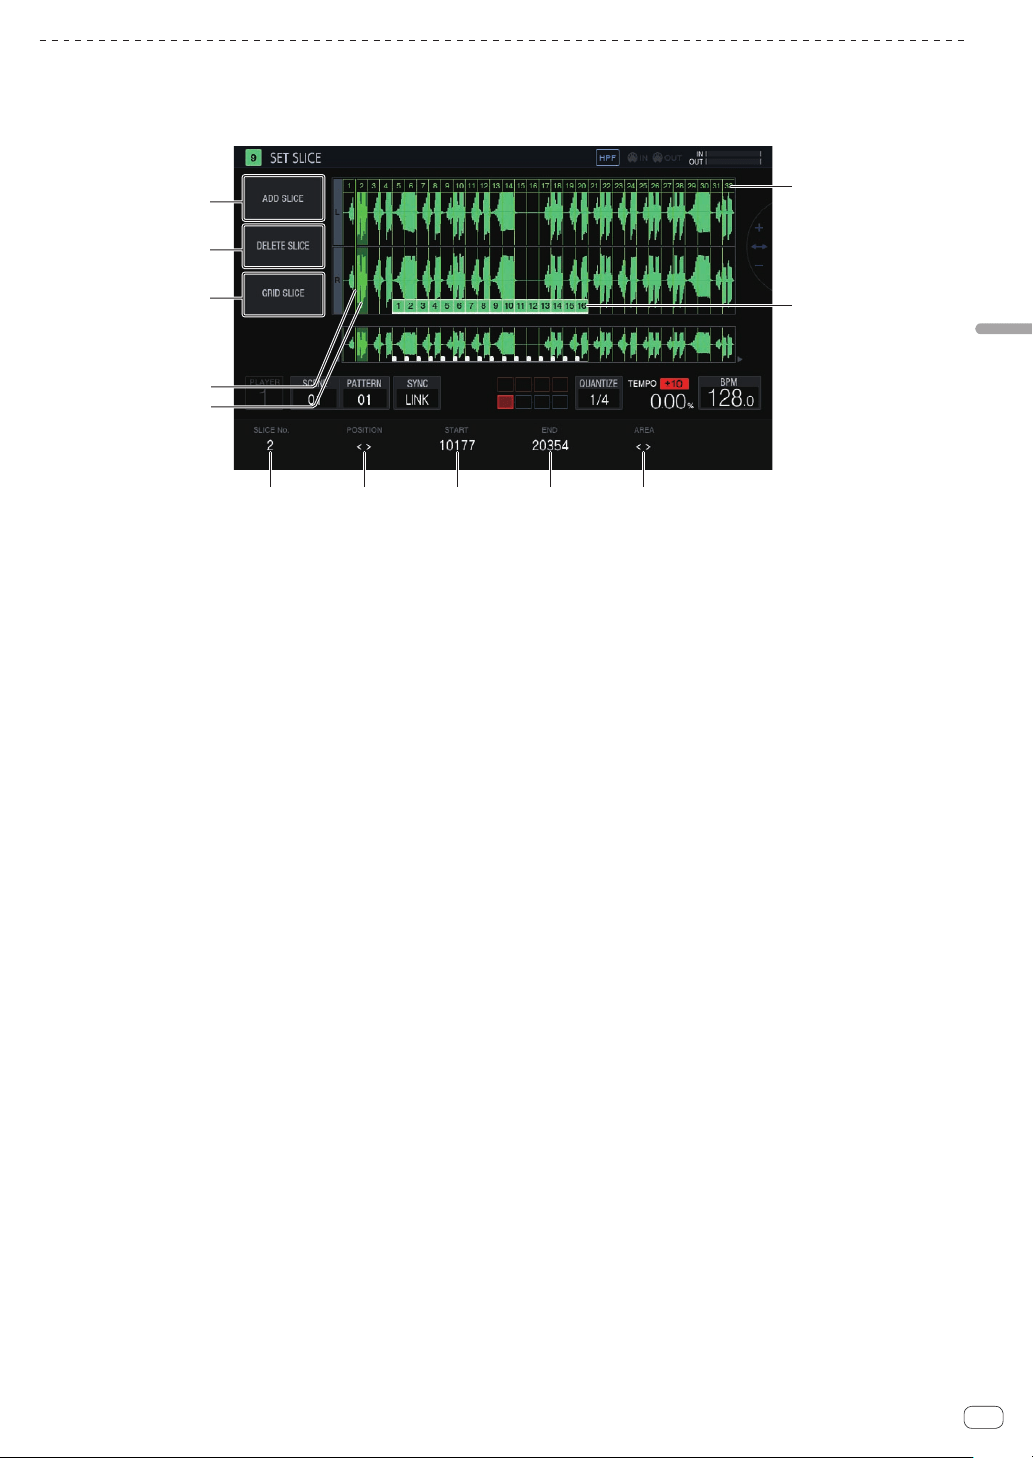
Setting parameters for slice performances (SET SLICE)
You can add and delete slices, equally slice into a specified number of slices, change the size of each slice, and set the range of the slice to assign to a
performance pad.
If you tap [SET SLICE] in the PLAYBACK screen, the unit switches to the SET SLICE screen.
4
5
6 7 8 9 a
b
c
1
2
3
1 ADD SLICE
Adds a new slice.
2 DELETE SLICE
Deletes the selected slice.
3 GRID SLICE
Equally slices into a specified number of slices.
4 POSITION display cursor
A green cursor indicates the position selected by [POSITION].
5 Selected slice indication
Transparent green on a slice indicates that the slice is selected.
6 SLICE No.
Selects a slice.
7 POSITION
Moves the selection position.
8 START
Sets the start position of the selected slice.
9 END
Sets the end position of the selected slice.
a AREA
Sets the start position of the selected slice.
b Pad markers
Pad colors on the slices indicate that the slices are assigned to
performance pads.
c Slice markers
A number is assigned and displayed for each slice.
Adding a slice
%
Tap [ADD SLICE].
A new slice is added.
The slice is added with its POSITION display cursor as the slice start
position. When the slice is added, the SLICE marker numbers are reas-
signed in order from the beginning.
! When the maximum number of slices (64) has been reached,
[ADD SLICE] is grayed out and a new slice cannot be added.
Deleting a slice
%
Tap [DELETE SLICE].
The selected slice is deleted.
! When the beginning slice is selected or there is only one slice,
[DELETE SLICE] is grayed out and the slice cannot be deleted.
Equally slicing a sample
1 Tap [GRID SLICE].
A pop-up screen for specifying the number of slices appears.
2 Turn the rotary selector to select the number of slices
and then tap [OK].
The sample is sliced equally with the specified number of slices.
Numbers are assigned to the divided slices in order from the beginning
slice, and then displayed on the slice markers.
Selecting a slice
%
Turn the parameter 1 adjustment knob to select a
slice.
The number assigned to the slice marker is displayed in [SLICE No.]. The
selected slice is indicated by transparent green.
Setting the slice position
%
Turn the parameter 2 adjustment knob to move the
POSITION display cursor.
The slice where the POSITION display cursor is located is indicated by
transparent green, and its number is displayed in [SLICE No.].
Adjusting the slice start position
%
Turn the parameter 3 adjustment knob to adjust the
start position of the selected slice.
This cannot be adjusted for the beginning slice.
Adjusting the slice end position
%
Turn the parameter 4 adjustment knob to adjust the
end position of the selected slice.
! This cannot be adjusted for the last slice.
Loading ...
Loading ...
Loading ...