Loading ...
Loading ...
Loading ...

You must configure the SNTP (network time server) or you must set the date, time and time zone correctly
on the control panel. The time must match the time used by the Kerberos Server and CIFS Server.
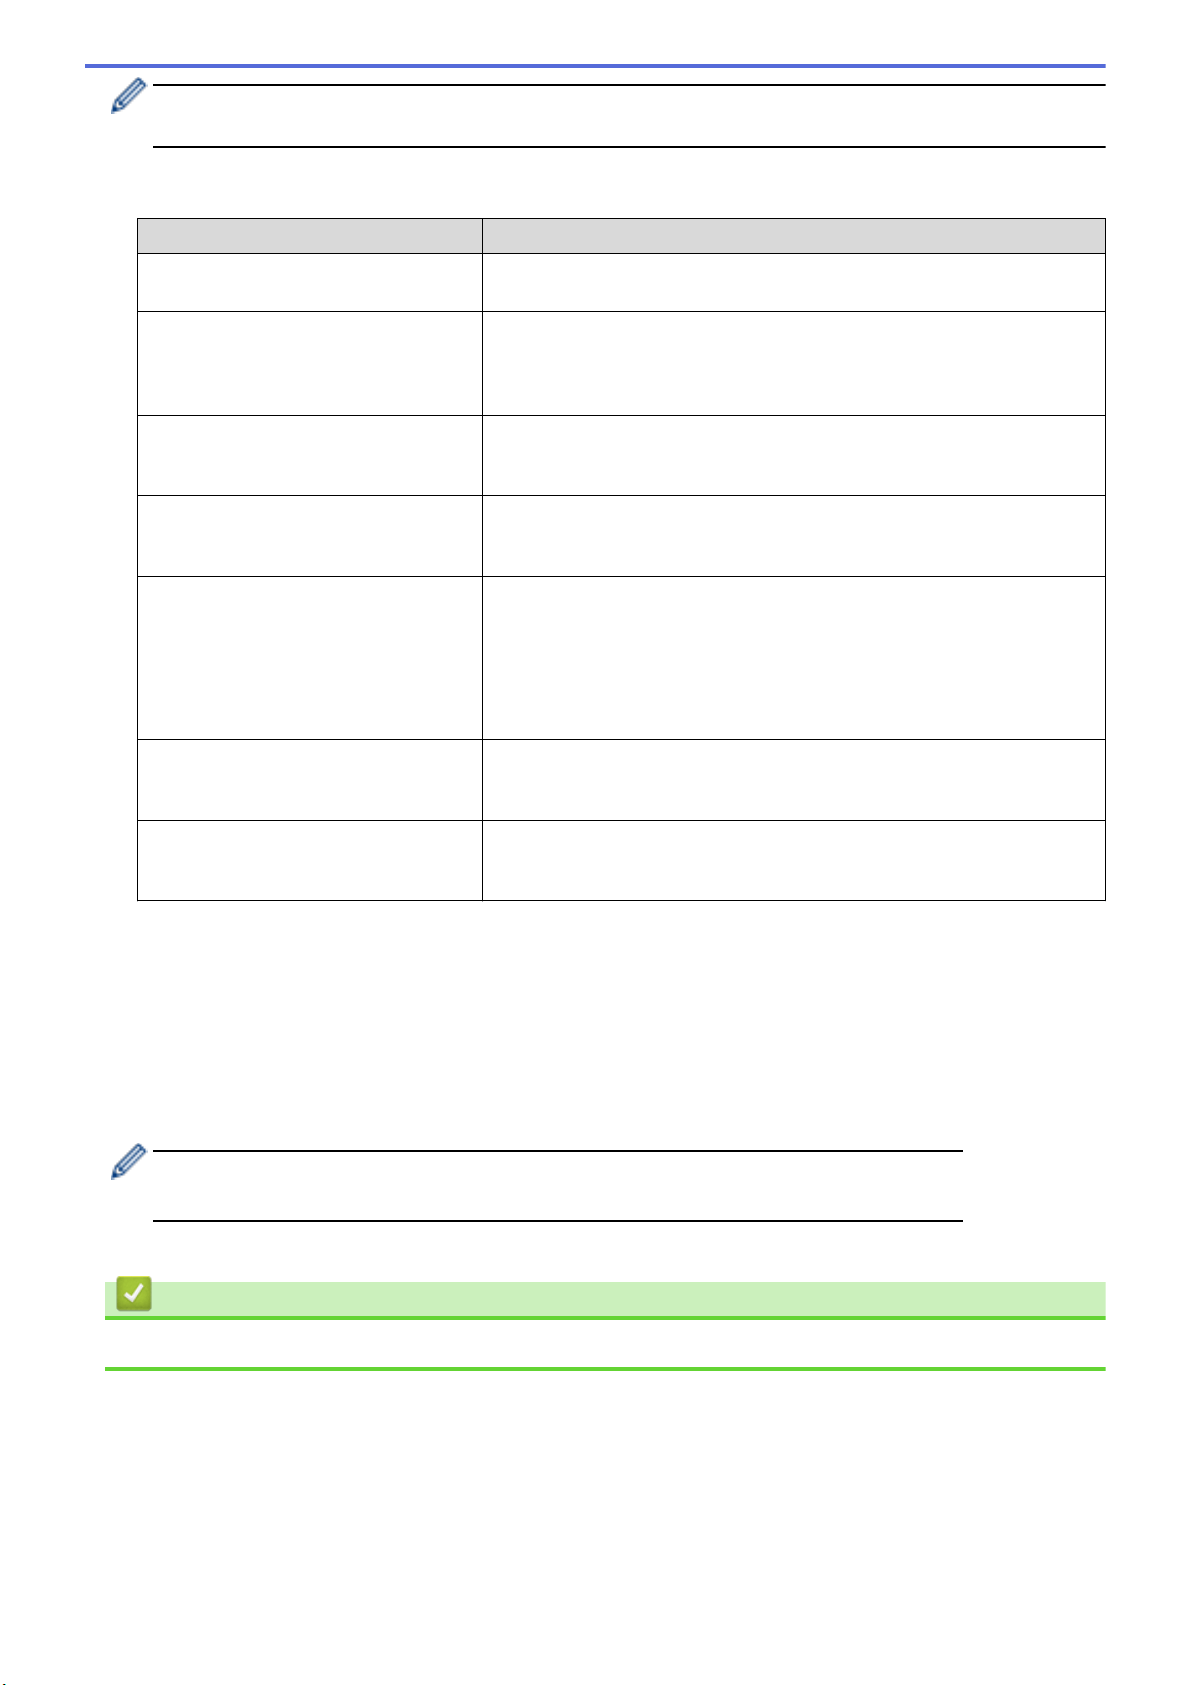
SharePoint
Option Description
Profile Name Type a name for this server profile (up to 15 alphanumeric characters).
The machine will display this name on the LCD.
SharePoint Site Address Copy and paste the full destination address shown in the address bar of
your browser (for example: http://SharePointSiteAddress/Shared
%20Documents/Forms/AllItems.aspx) or the IP address (for example:
http://192.168.0.1/Shared%20Documents/Forms/AllItems.aspx).
SSL/TLS If the address in the SharePoint Site Address field starts with "https://",
you can verify the server certificate by selecting the Verify Server
Certificate checkbox.
Auth. Method To set your authentication method, select Auto, NTLMv2, Kerberos, or
Basic. If you choose Auto, the authentication method will be detected
automatically.
Username Type the user name (up to 96 characters) of a user that has permission
to write data to the folder specified in the SharePoint Site Address
field. If the user name is part of a domain, enter the user name in one of
the following styles:
• user@domain
• domain\user
Password Type the password (up to 32 characters) associated with the user name
you entered in the Username field. Type the password again in the
Retype password field.
Kerberos Server Address When you select Kerberos for the Auth. Method option, you must type
the Kerberos Server Address (for example: kerberos.example.com; up
to 64 characters).
8. Click Submit.
9. To set the Fax Forward feature, go to the navigation menu, and then click Fax > Remote Fax Options.
10. Select Forward to Network from the Fwd/Store/Cloud/Network drop-down list.
11. Select the file type you want to use.
12. To print a backup copy of incoming faxes, select On for Backup print.
13. Select the profile you want to use from the Network Profile drop-down list.
14. Type a three-digit Remote Access Code in the Remote Access Code field, if needed.
• You can use the numbers 0 through 9, *, or # for the Remote Access Code.
• The Remote Access Code must be different from the remote codes for the Fax features.
15. Click Submit.
Related Information
• Network Features
334
Loading ...
Loading ...
Loading ...
