Loading ...
Loading ...
Loading ...
3
41
Recording
Recording Video and Photos
This section explains the basics of recording clips* and photos. For details on recording audio, refer to Recording
Audio (A 87).
* “Clip” refers to a single movie unit recorded with a single recording operation. You can also include metadata with the clip.
Recording
* Can be assigned to function as a REC button (A 105).
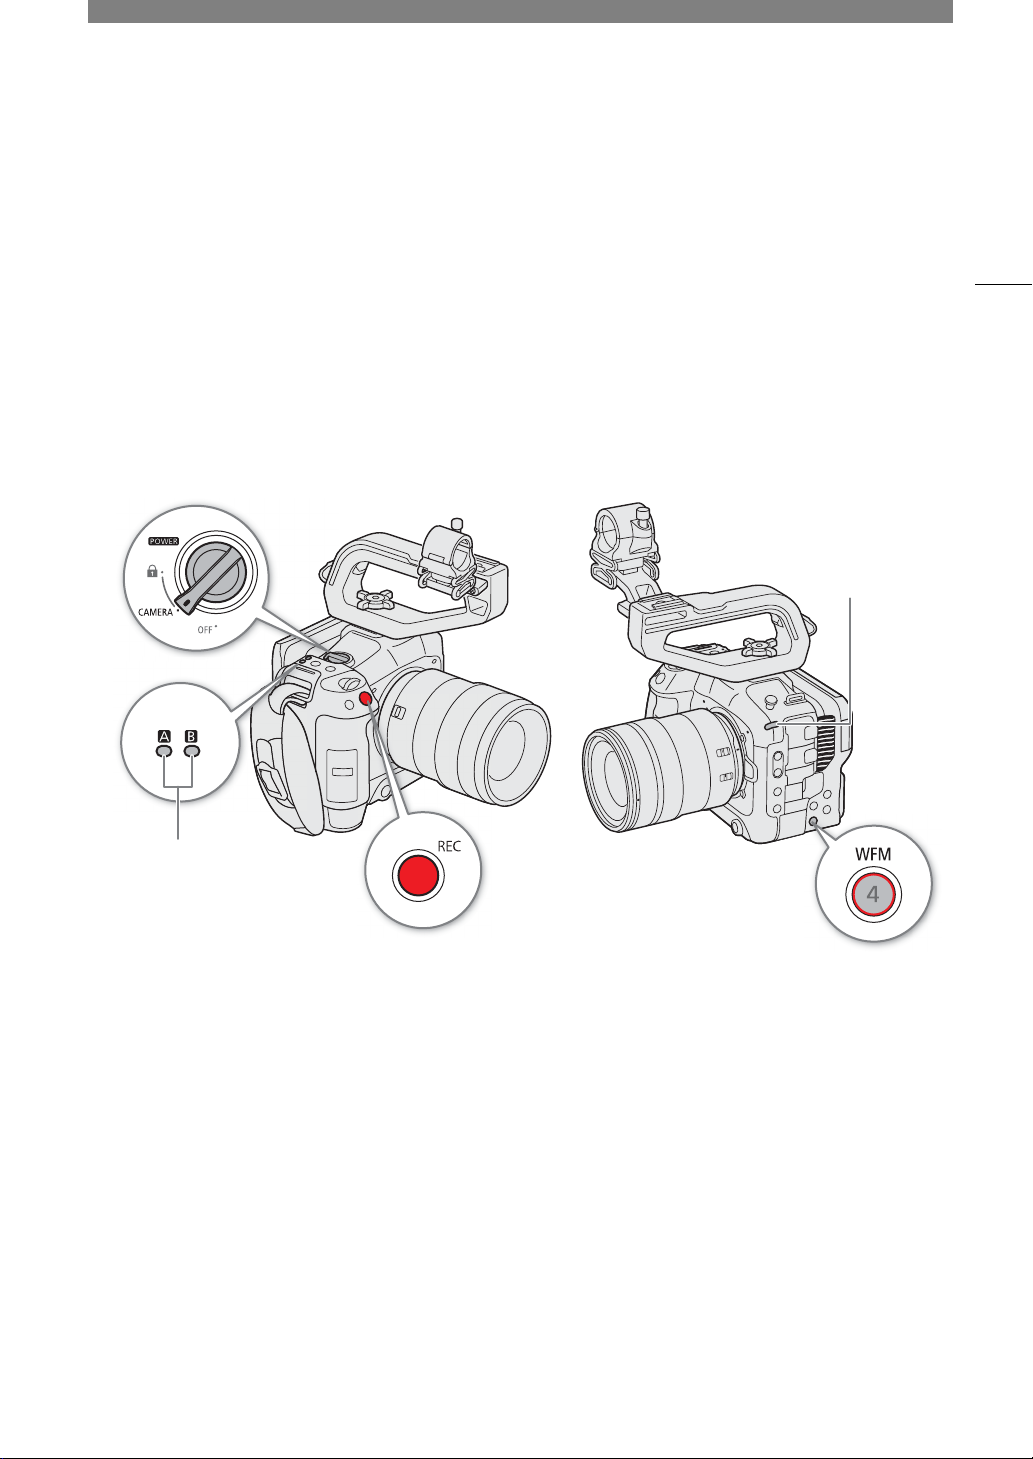
1 Set the
Q
switch to CAMERA.
• The camera turns on in CAMERA mode and enters record standby mode ([STBY]). The power indicator (tally
lamp) illuminates in green.
• The access indicators of card slots with a card inserted will illuminate momentarily in red. Then, the access
indicators of cards selected for recording will change to green.
2Press the REC button to begin recording.
• Recording starts. The tally lamp changes from green (power indicator) to red and the recording indicator at
the top of the screen changes from [STBY] to [ÜREC].
• The access indicator of cards used for recording will illuminate in red.
• You can also perform this function remotely using Browser Remote on a connected network device (
A
160).
3Press the REC button to stop recording.
• The clip is recorded and the camera enters record standby mode. The tally lamp changes from red to green
(power indicator).
• The access indicator of cards selected for recording will change back to green.
*
SD card access
indicator
Power indicator/
Ta l l y l a m p
Loading ...
Loading ...
Loading ...