Loading ...
Loading ...
Loading ...
15
Names of Parts
IMPORTANT
• Do not use tripods and other accessories with mounting screws exceeding the depth of the screw holes on
the camera as this may damage the camera.
• Mounting the camera on a tripod using only one of the 1/4"-20 screw holes for tripod reinforcement may
damage the camera.
Locking the camera’s controls (key lock)
You can set the
Q
switch to
C
(key lock) to lock all the camera’s buttons* and switches. This is useful
in preventing settings from being changed due to inadvertently pressing one of the buttons. Set the
Q
switch back to CAMERA to reactivate the controls.
When the camera’s controls are locked, you can still operate the camera using an RC-V100 Remote
Controller or the Browser Remote application.
* REC buttons are not locked by default but you can choose to lock them too (A 171).
1
23
87
9
10
11
4
5
6
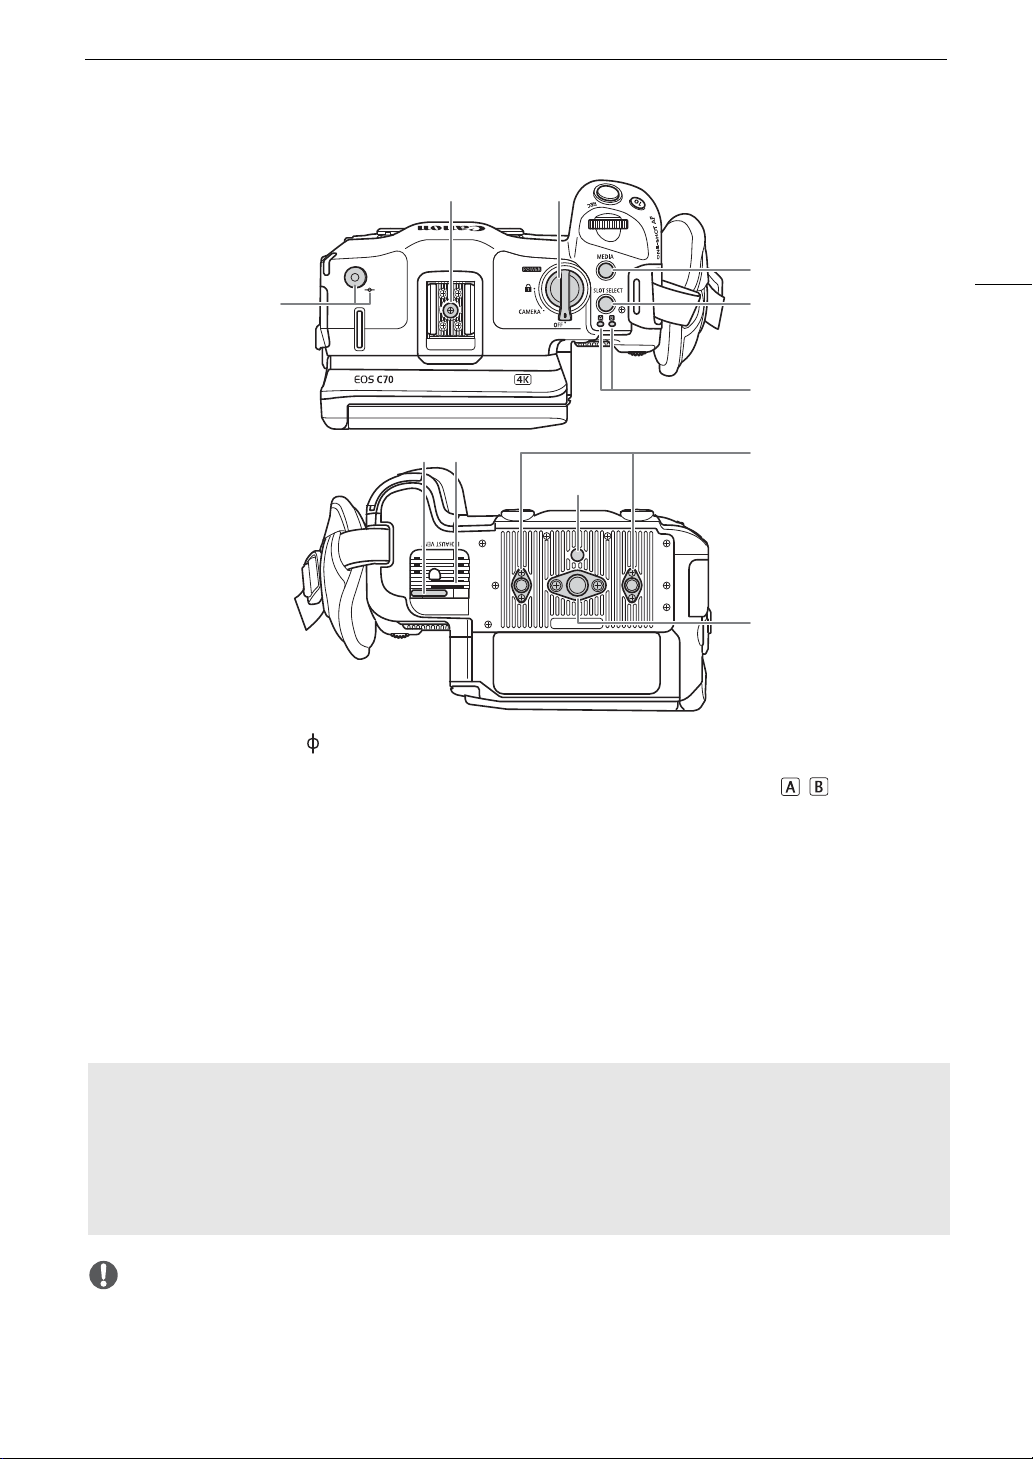
1 Tape measure hook and focal plane mark
Use the hook to accurately measure the distance
from the focal plane.
2 Accessory shoe with socket for 1/4"-20 mounting
screws (9.2 mm (0.36 in.) deep)
3
Q
switch
Set to CAMERA to turn on the camera (the power
indicator/tally lamp illuminates in green) or to OFF
to turn it off
(the power indicator/tally lamp goes
out).
4 MEDIA button (A 119)
When the camera is on, press to toggle the
camera between CAMERA mode (shooting) and
MEDIA mode (playback).
5 SLOT SELECT (card selection) button (A 33,
120)
6 SD CARD access indicator: / (A 32)
7 Power cord clamp (unplugging prevention)
(A 20)
8 Exhaust ventilation outlet (A 39)
9 Socket for tripod’s anti-rotation pin
(5.6 mm (0.22 in.) deep)
10 Screw holes for tripod reinforcements and
accessories with 1/4"-20 mounting screws
(8.9 mm (0.35 in.) deep, x2)
11 Screw hole for 3/8"-16 mounting screws
(10 mm (0.39 in.) deep)
Loading ...
Loading ...
Loading ...