Loading ...
Loading ...
Loading ...
65
2
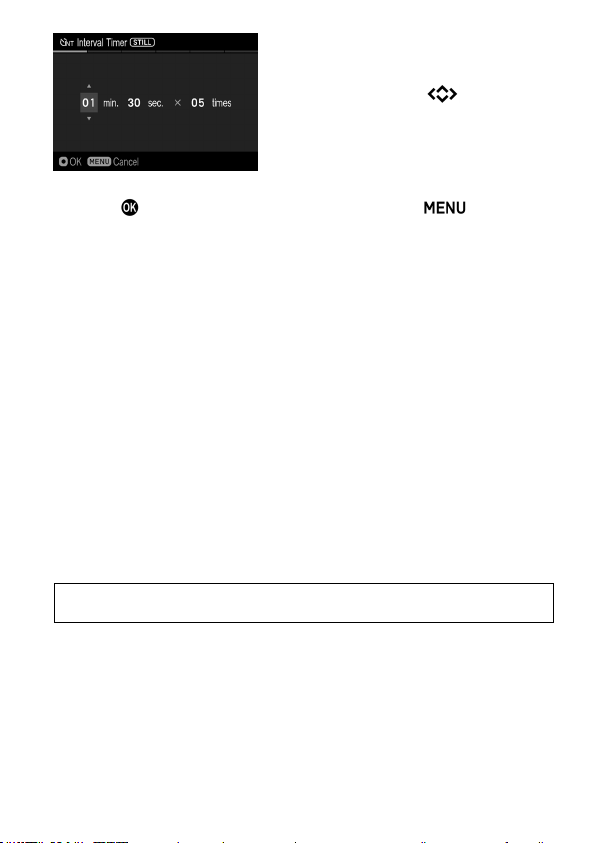
Set the desired interval and number of
exposures by using the
buttons.
(Interval can be set from 1 seconds to 60
minutes. The number of exposures can be
set between 2~99 times, or unlimited (∞).)
3
Press the
button to apply the setting, and press the
button to go
back to shooting mode.
4
Press the shutter button to start the interval timer shooting.
During the interval timer shooting, the next exposure interval begins and
the numbers of remaining exposures will be displayed.
When the focus mode is set to AF, the AF will be locked at the first frame.
From the second frame, pictures will be taken with the same focus
position as the first frame.
If the selected interval is short, the camera may start to take the next
image before the display returns to the shooting mode.
Exposure value is measured at each interval shooting. If you wish to take
pictures with the same exposure value, set the Exposure Mode to Manual
Exposure or fix the exposure value by pressing the AEL Button before
shooting.
To terminate the interval timer shooting, press the Shutter button.
WARNING
The following functions or settings cannot be used in combination.
Bracketing,
HDR, Fill Light,
Flash photography,
ISO sensitivity settings added with the [Composite Low ISO Expansion]
The interval timer shooting will be terminated automatically if the battery
is empty. We recommend using the AC adapter “SAC-7P” (sold
separately) (P.159).
Once you set the Interval Timer, the camera will continuously hold that
Interval Timer. To dismiss the Interval Timer, switch to another modes in
[Drive Mode].
Depending on the settings, it takes time process the image. It may make
the actual interval time longer than the selected time.
Loading ...
Loading ...
Loading ...