Loading ...
Loading ...
Loading ...
USING THE TABLET
OBD2 Diagnostics
Back to return to the OBD2 Menu.
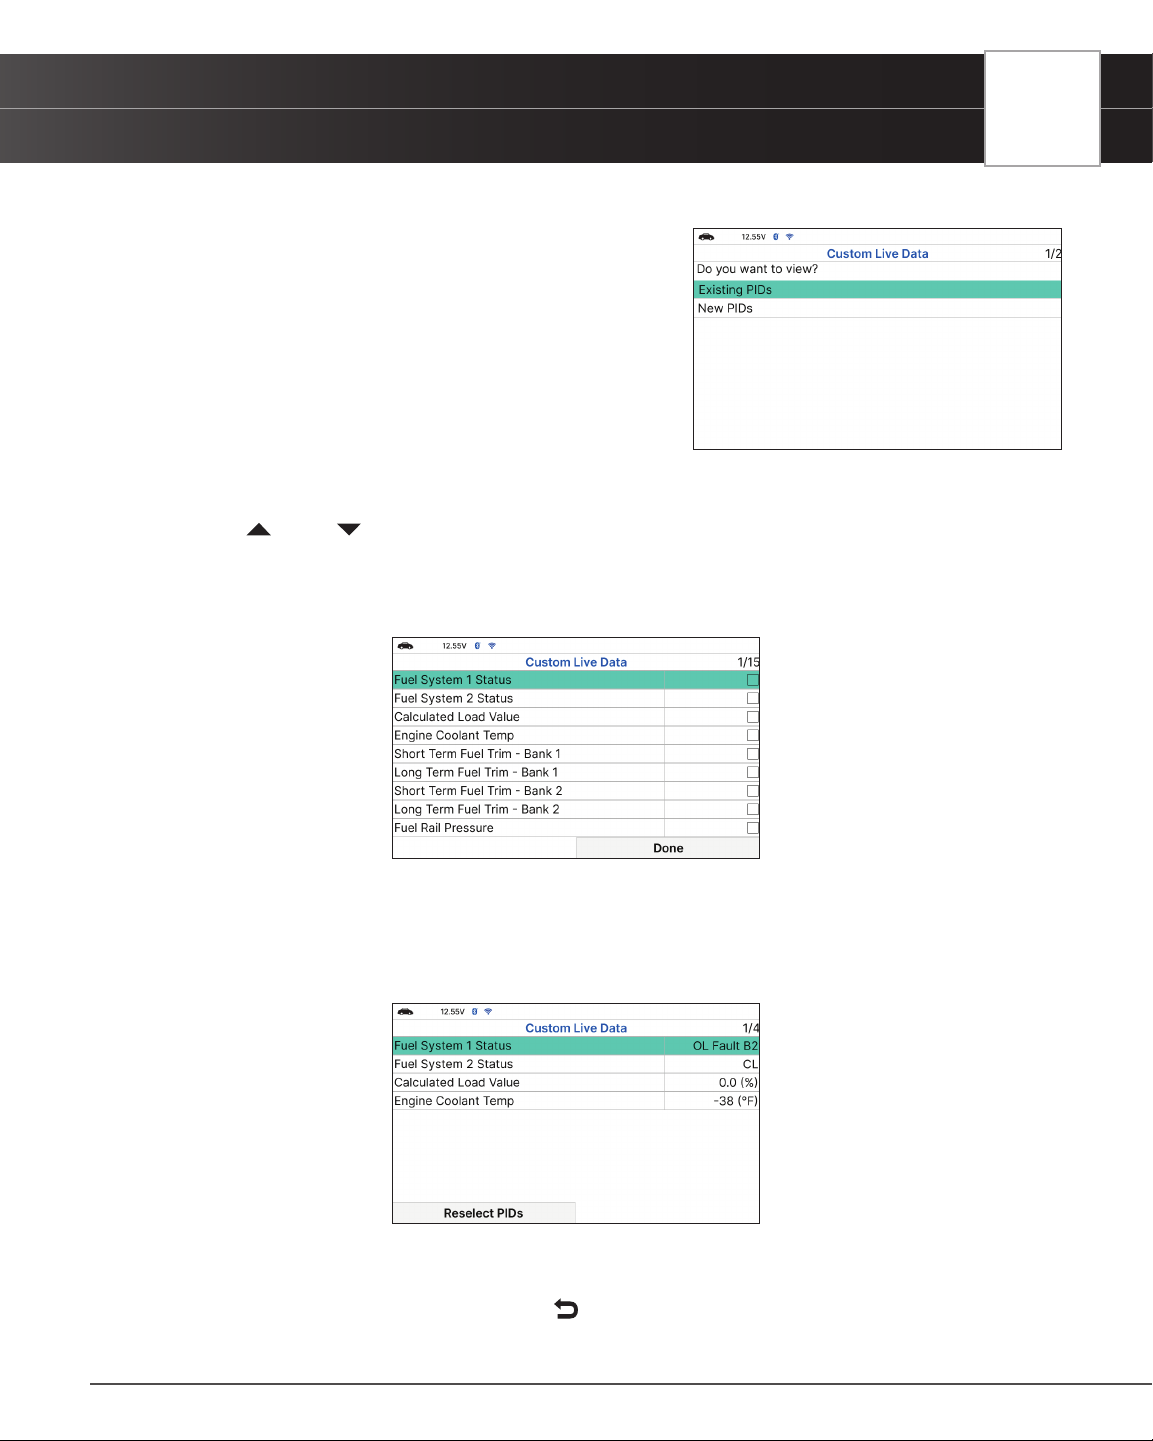
n If custom Live Data was previously congured, the
Select PIDs to Use screen displays.
━ To use the existing custom Live Data selections,
select Existing PIDs, then press OK. Proceed to
step 5.
━ To congure new custom Live Data, select New
PIDs, then press OK. The Custom Live Data menu
displays. Proceed to step 2.
n If custom Live Data was not previously selected, the Custom Live Data menu displays. Proceed
to step 2.
2. Press
UP and DOWN to scroll through the available PIDs. When a PID you wish to display is highlighted,
press OK (a “check-mark” shows to conrm your selection). Repeat until only the PIDs you want to display
are selected.
n To deselect a PID, highlight the PID, then press OK. The check-mark is removed.
3. When you are nished making your selection(s), choose Done to continue.
n If no PIDs have been selected, an advisory message display. Press OK to return to the Custom
Live Data menu.
4. The Tablet is now in “Custom Live Data” mode. Only the PIDs you selected are shown.
n To change the current custom Live Data selections, select Reselect PIDs, then press OK to
return to the Custom Live Data menu. Repeat step 2.
5. To exit the “Custom Live Data” mode, press
Back to return to the Live Data Menu.
23
Loading ...
Loading ...
Loading ...