Loading ...
Loading ...
Loading ...
93
Creating Design for Multi-Position
Hoops
Tutorial 8: Creating Design for
Multi-Position Hoops
This program enables you to create multi-position designs that you can stitch in any multi-position hoop
attached to your embroidery machine.
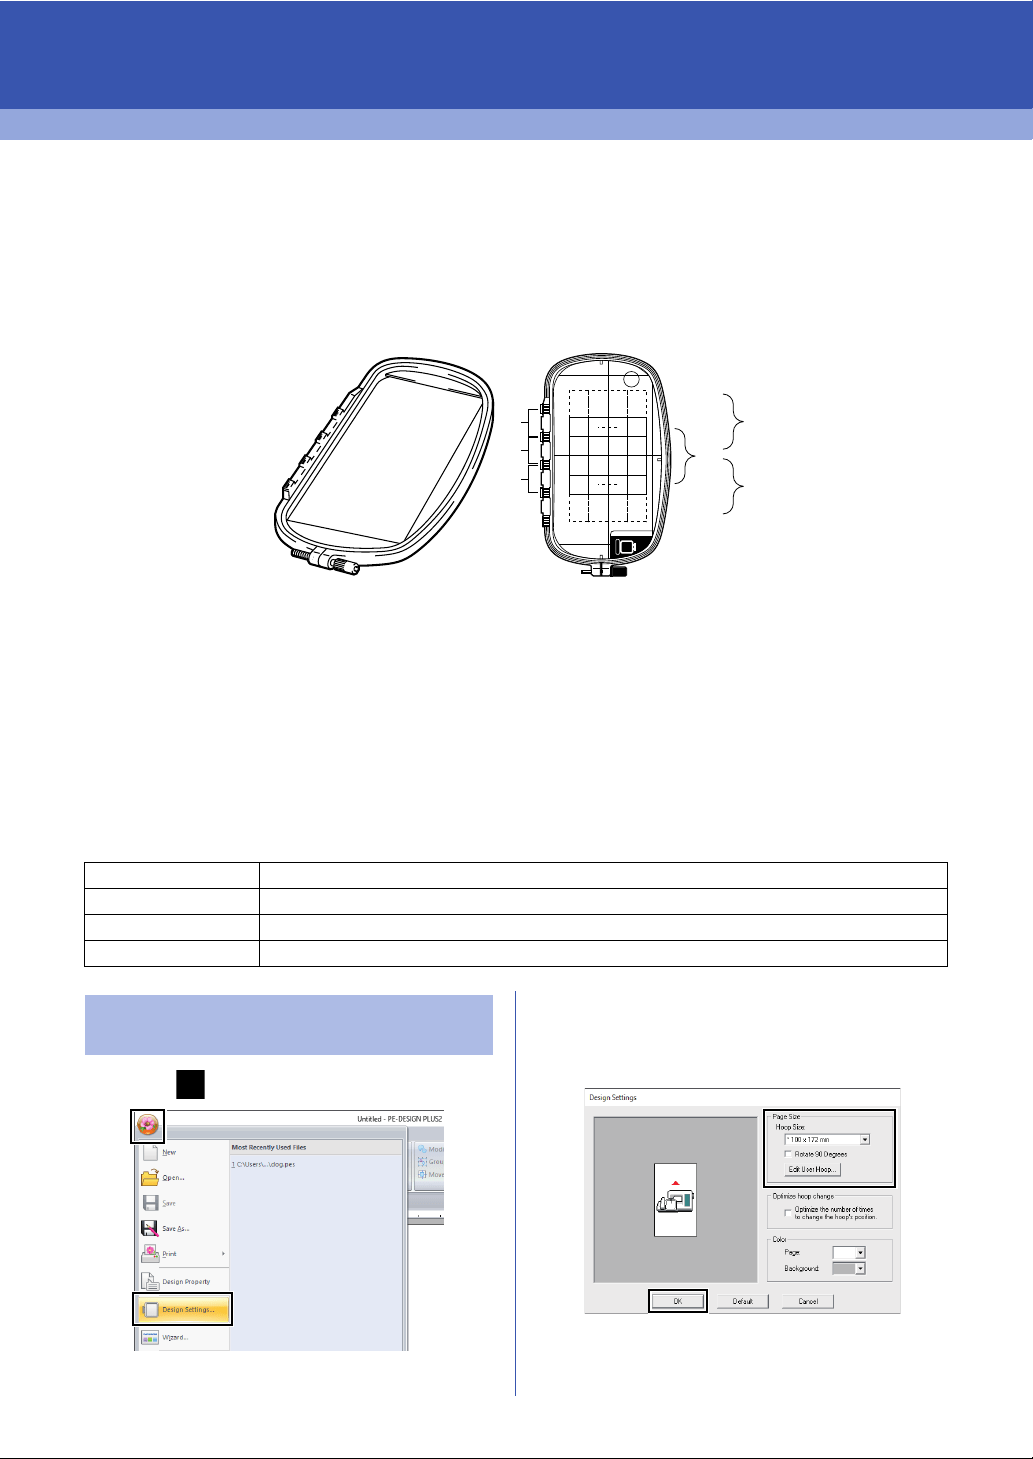
Example of multi-position hoop: 100 × 172 mm hoop
Although the size of the design that can be embroidered using an multi-position hoop is 130 × 180 mm (or 100
× 100 mm, depending on the sewing area of the embroidery machine), first determine which of the three
installation positions (indicated as a, b, and c in the illustration above) the multi-position hoop will be installed
at and determine the orientation of the design.
When creating the design, each design section can only be as large as the sewing area of the embroidery
machine.
The sample file for this tutorial is located at:
Documents (My documents)\PE-DESIGN PLUS2\Tutorial\Tutorial_8
1 Click , then [Design Settings].
2 Select [Hoop Size] and choose a Design
Page size of [*100 × 172 mm] or [*130 ×
300 mm] from the selector. For this example,
select [*100 × 172 mm]. Then, click [OK].
Step 1 Selecting the Design Page size
Step 2 Creating the design
Step 3 Optimizing hoop changes
Step 4 Checking the pattern
a
b
c
a
b
c
ABC
Step 1 Selecting the Design Page
size
Loading ...
Loading ...
Loading ...