Loading ...
Loading ...
Loading ...
74
Tutorial 7-1: Auto Punch
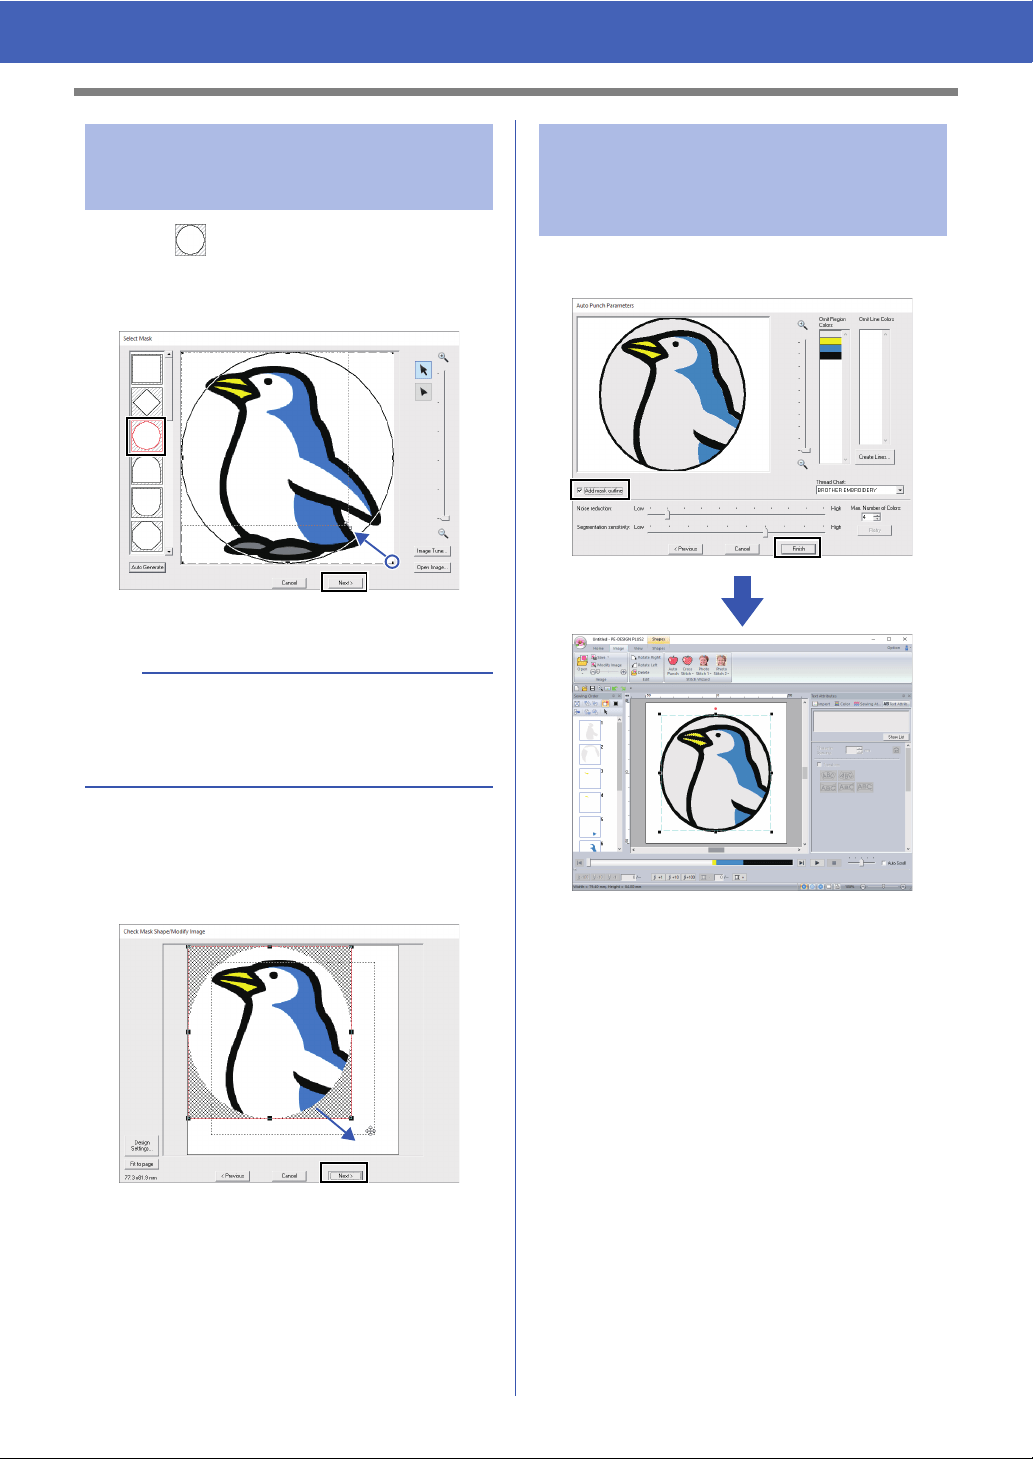
1 Click to select the circle mask.
Drag handle to adjust the size of the mask,
and drag the mask to adjust its position.
Click [Next].
cc "Select Mask dialog box" on page 87.
2 Drag the image to adjust its output location
and size. The white background indicates the
sewing area in the Design Page.
Click [Next].
cc "Check Mask Shape/Modify Image dialog
box" on page 88
Select the [Add mask outline] check box, check
the preview image, and then click [Finish].
The image is automatically hidden and
stitches are automatically input.
Step 3 Applying an image mask
and adjusting its size and
position
b
The mask outline selected here can be used as
line data (border) in "Step 4 Creating a border from
the mask outline and converting to an embroidery
pattern" on page 74.
Step 4 Creating a border from the
mask outline and
converting to an
embroidery pattern
Loading ...
Loading ...
Loading ...