Loading ...
Loading ...
Loading ...
87
Advanced Stitch Wizard Operations
Advanced Stitch Wizard Operations
Click in the [Quick Access Toolbar] to display
the Startup Wizard, and then click [Auto Punch /
Cross Stitch / Photo Stitch]. If an image has been
imported, the next dialog box appears.
a Sample image before being converted
b Sample image of embroidery pattern
after being converted
c Select the conversion method.
d Description of conversion method
e Click to continue to the next step.
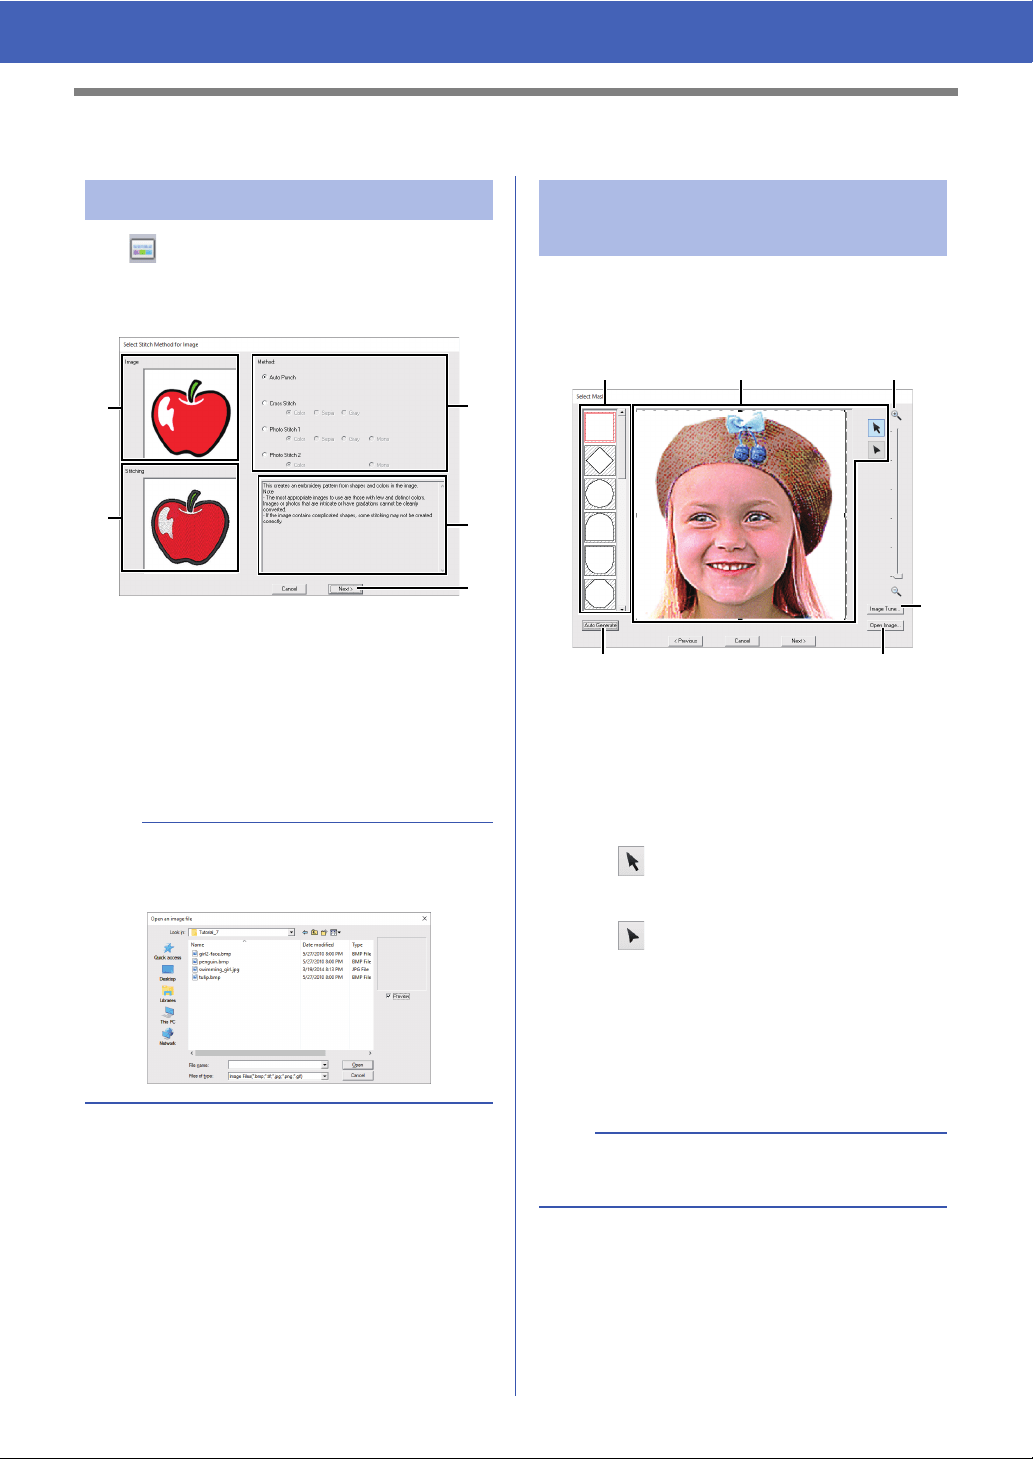
■ Select Mask dialog box
The [Select Mask] dialog box appears no matter
which conversion method was selected.
a Mask shapes
The image will be masked with the
selected shape.
b The mask can be reshaped or
repositioned. Select the tool appropriate
for the operation to be performed.
: Drag the handles to enlarge/
reduce the mask. Drag the mask
to adjust its position.
: Points can be entered, moved and
deleted to create a mask with the
desired shape.
To add points, click the outline of
the mask. To move a point, select
the point, and then drag it. To
delete points, select the point, and
then press the <Delete> key.
Image To Stitch Wizard
b
If no image has been imported into the Design
Page, the [Open an image file] dialog box
appears.
a
b
c
d
e
Adjusting the Mask and
Image
a
With a small original image, it may not be possible
to reduce the size of the mask.
a b d
e
fc
Loading ...
Loading ...
Loading ...