Loading ...
Loading ...
Loading ...
17
Tutorial 1: Making a Quilt Using an Embroidery Pattern
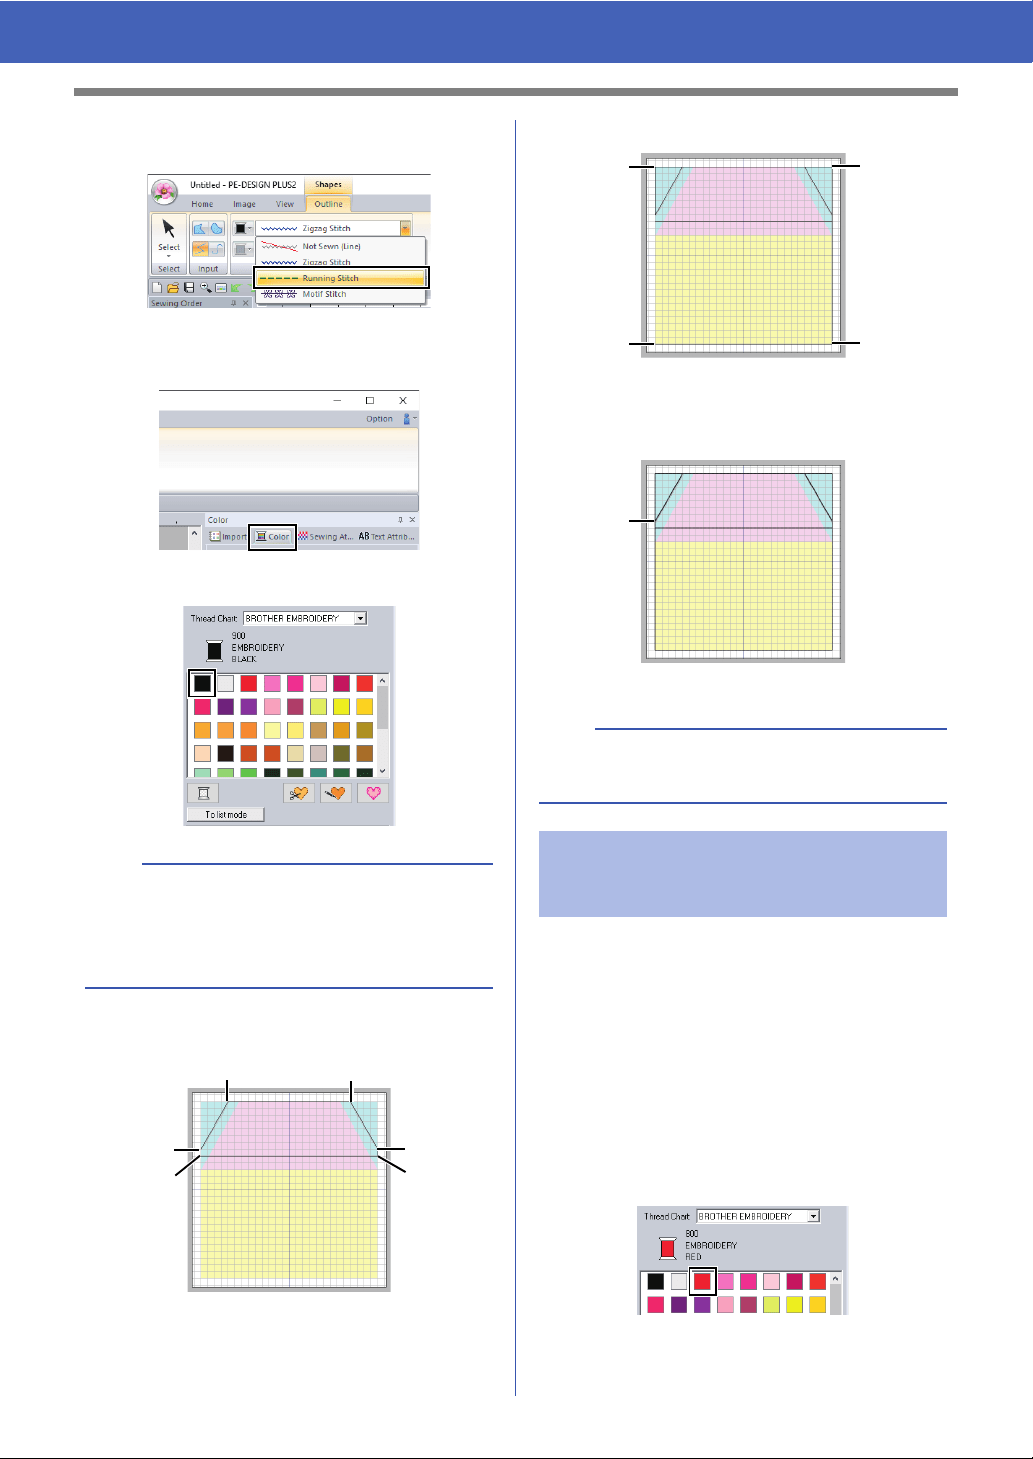
3 Click the [Line sew type] selector, and then
select [Running Stitch].
4 Click the [Color] tab to display the color
palette.
5 Click [BLACK].
6 Click points a through j.
7 Double-click end point k.
We will draw lines at the positions where the
machine will sew. The machine will sew the fabric in
the order that the lines are drawn.
A different color must be specified for each line.
1 Repeat 1 through 4 under "Step 5 Drawing
straight lines for positioning fabric" on
page 16.
2 Specify a line color different from what is
already selected.
For this example, select [RED].
b
To view the thread colors in a list so that the
desired color can more easily be found, click [To
list mode].
cc "Setting the thread color" on page 61
e
d
f
a
c
b
b
The color, sewing attributes and size can also be
changed after the shape is drawn.
Step 6 Drawing straight lines for
stitching fabrics with right
sides together
g
h
j
i
k
Loading ...
Loading ...
Loading ...