Loading ...
Loading ...
Loading ...
29
Tutorial 4: Editing an Imported Shape to Create an Embroidery Design for an
Appliqué
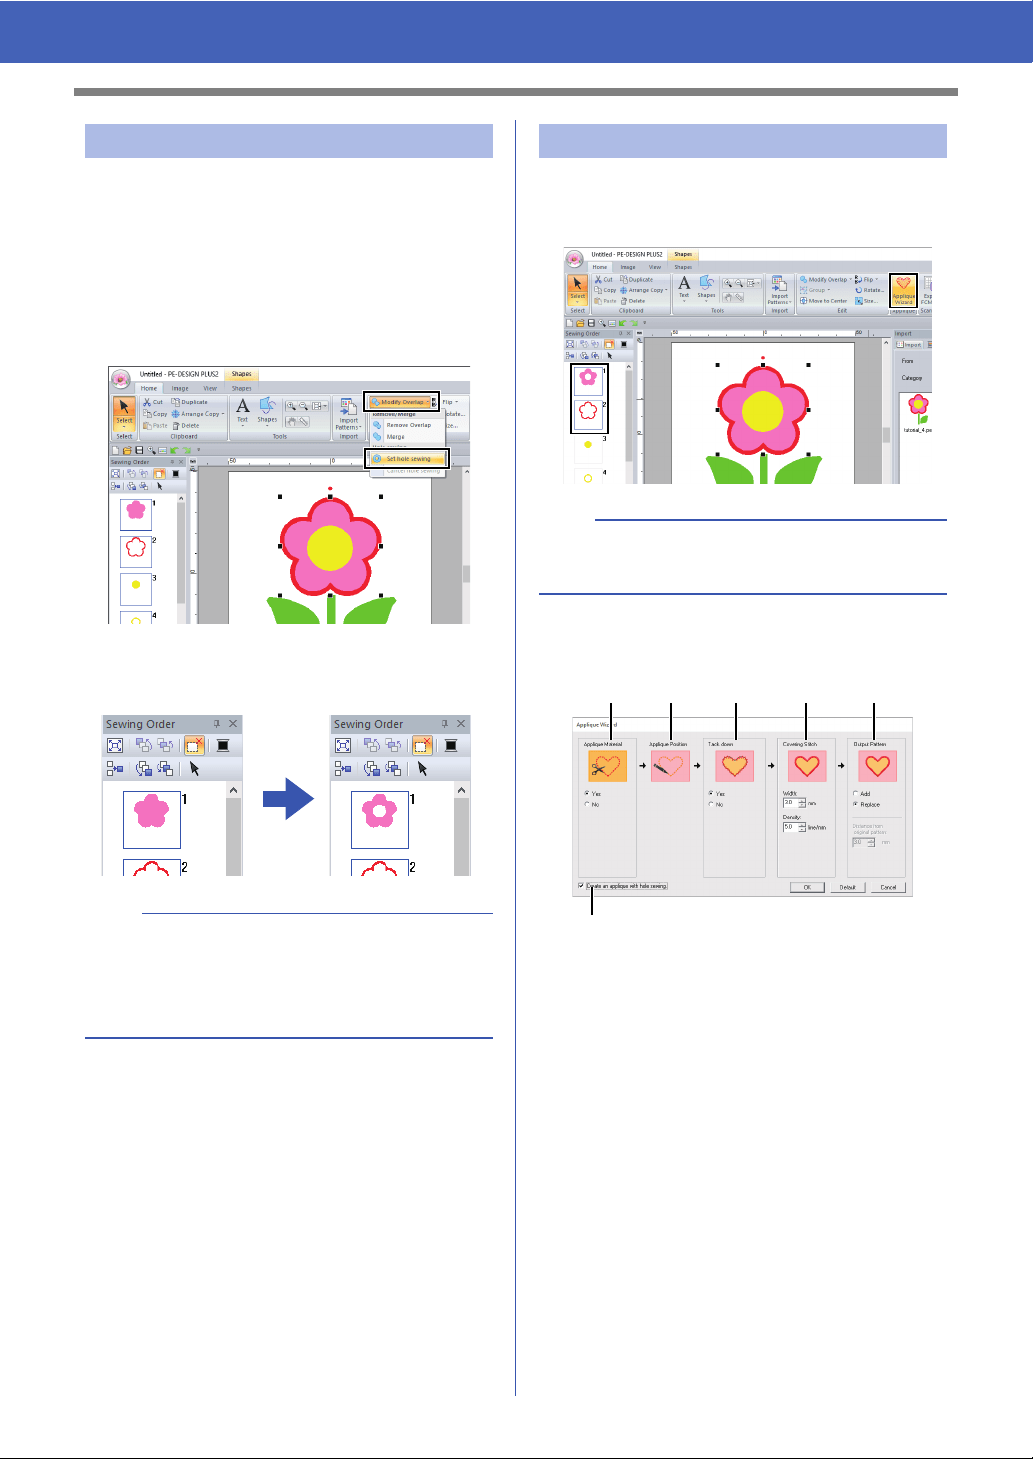
Now, we will apply a setting so that the overlapping
areas are not sewn twice.
1 While holding down the <Ctrl> key, click the
circle, then the flower.
2 Click the [Home] tab, then click [Modify
Overlap] in the [Edit] group, and then click
[Set hole sewing].
When hole sewing is specified, the pattern
displayed in the [Sewing Order] pane
changes.
1 Select the outer pattern, and then click
[Applique Wizard] in the [Home] tab to start
the [Applique Wizard] dialog box.
2 Specify settings in the [Applique Wizard]
dialog box in the following order
a - f.
a Applique Material
Specify cutting lines for the appliqué.
The outline of the appliqué can be sewn
as running stitches to be sewn onto the
appliqué fabric as a guide for cutting it out.
For this example, select [Yes].
b Applique Position
The guideline for attaching the appliqué
piece is set to be sewn automatically.
c Tack down
Specify basting of the appliqué.
The appliqué piece can be basted onto
the base fabric.
For this example, select [Yes].
Step 4 Specifying hole sewing
a
Hole sewing cannot be applied if one of the
patterns is not completely enclosed within the
other pattern.
cc "Hole sewing" on page 56.
Step 5 Creating appliqués
b
Be sure to select the outer pattern before starting
the [Applique Wizard].
ab c d e
f
Loading ...
Loading ...
Loading ...