Loading ...
Loading ...
Loading ...
Configure Switching
91
ProSAFE 10-Gigabit Smart Managed Switch XS728T and XS748T User Manual
3. In the address field of your web browser, enter the IP address of the switch.
If you do not know the IP address of the switch, see Change the Default IP Address of the
Switch on page 10.
The login window opens.
4. Enter the switch’s password in the Password field.
The default password is password.
The System Information page displays.
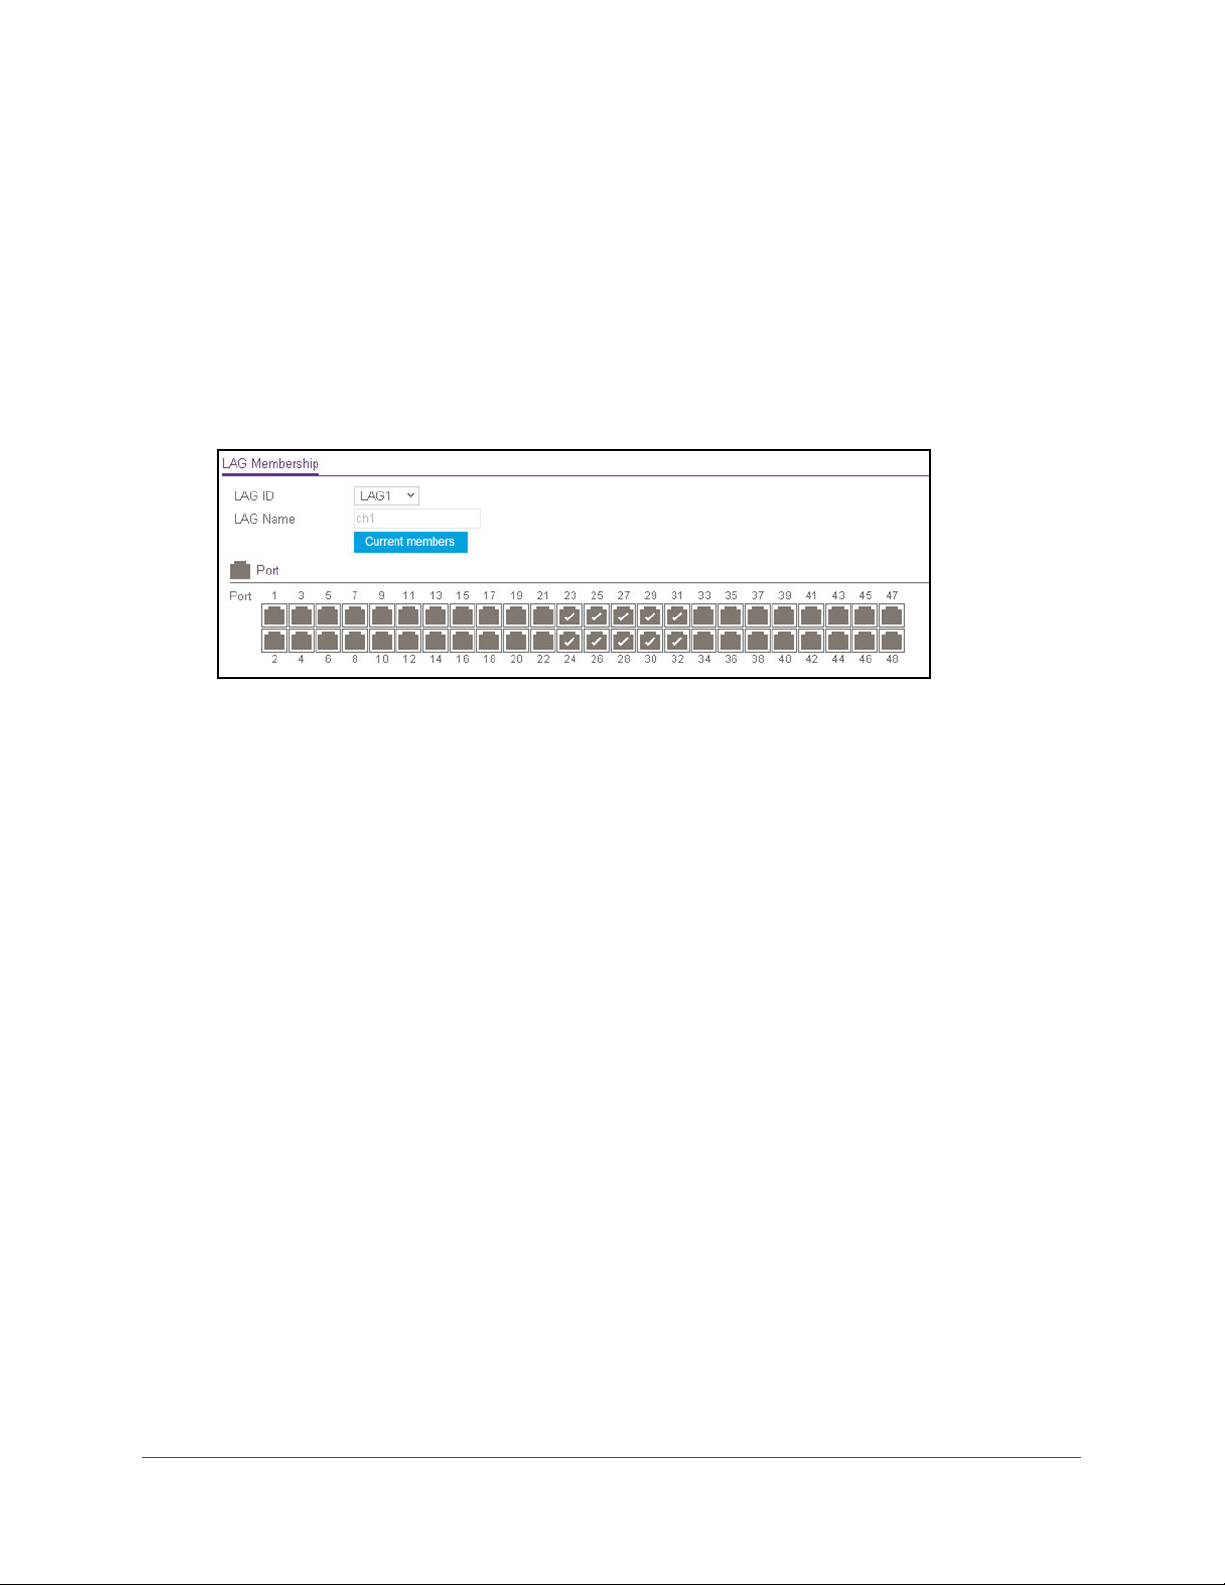
5. Select Switching> LAG > Basic > LAG Membership.
6. From the LAG ID menu, select the LAG ID.
The LAG Name field shows the name that is assigned to the LAG. You cannot change
this name.
For model XS728T, the names are ch1, ch2, and so on through ch12.
For model XS748T, the names are ch1, ch2, and so on through ch24.
7. To display the ports that are members of a LAG, click the Current members button.
A pop-up window opens and shows the ports that are members of the LAG, if any.
8. In the Ports table, click each port that you want to include as a member of the selected
LAG.
A selected port is displayed by a check mark.
9. Click the Apply button.
The updated configuration is sent to the switch. Configuration changes take effect
immediately.
Set the LACP System Priority
The LACP configuration page is used to set the LACP system priority.
To configure LACP:
1. Connect your computer to the same network as the switch.
You can use a WiFi or wired connection to connect your computer to the network, or
connect directly to a switch that is off-network using an Ethernet cable.
Loading ...
Loading ...
Loading ...