Loading ...
Loading ...
Loading ...
Configure Routing
181
ProSAFE 10-Gigabit Smart Managed Switch XS728T and XS748T User Manual
If you do not know the IP address of the switch, see Change the Default IP Address of the
Switch on page 10.
The login window opens.
4. Enter the switch’s password in the Password field.
The default password is password.
The System Information page displays.
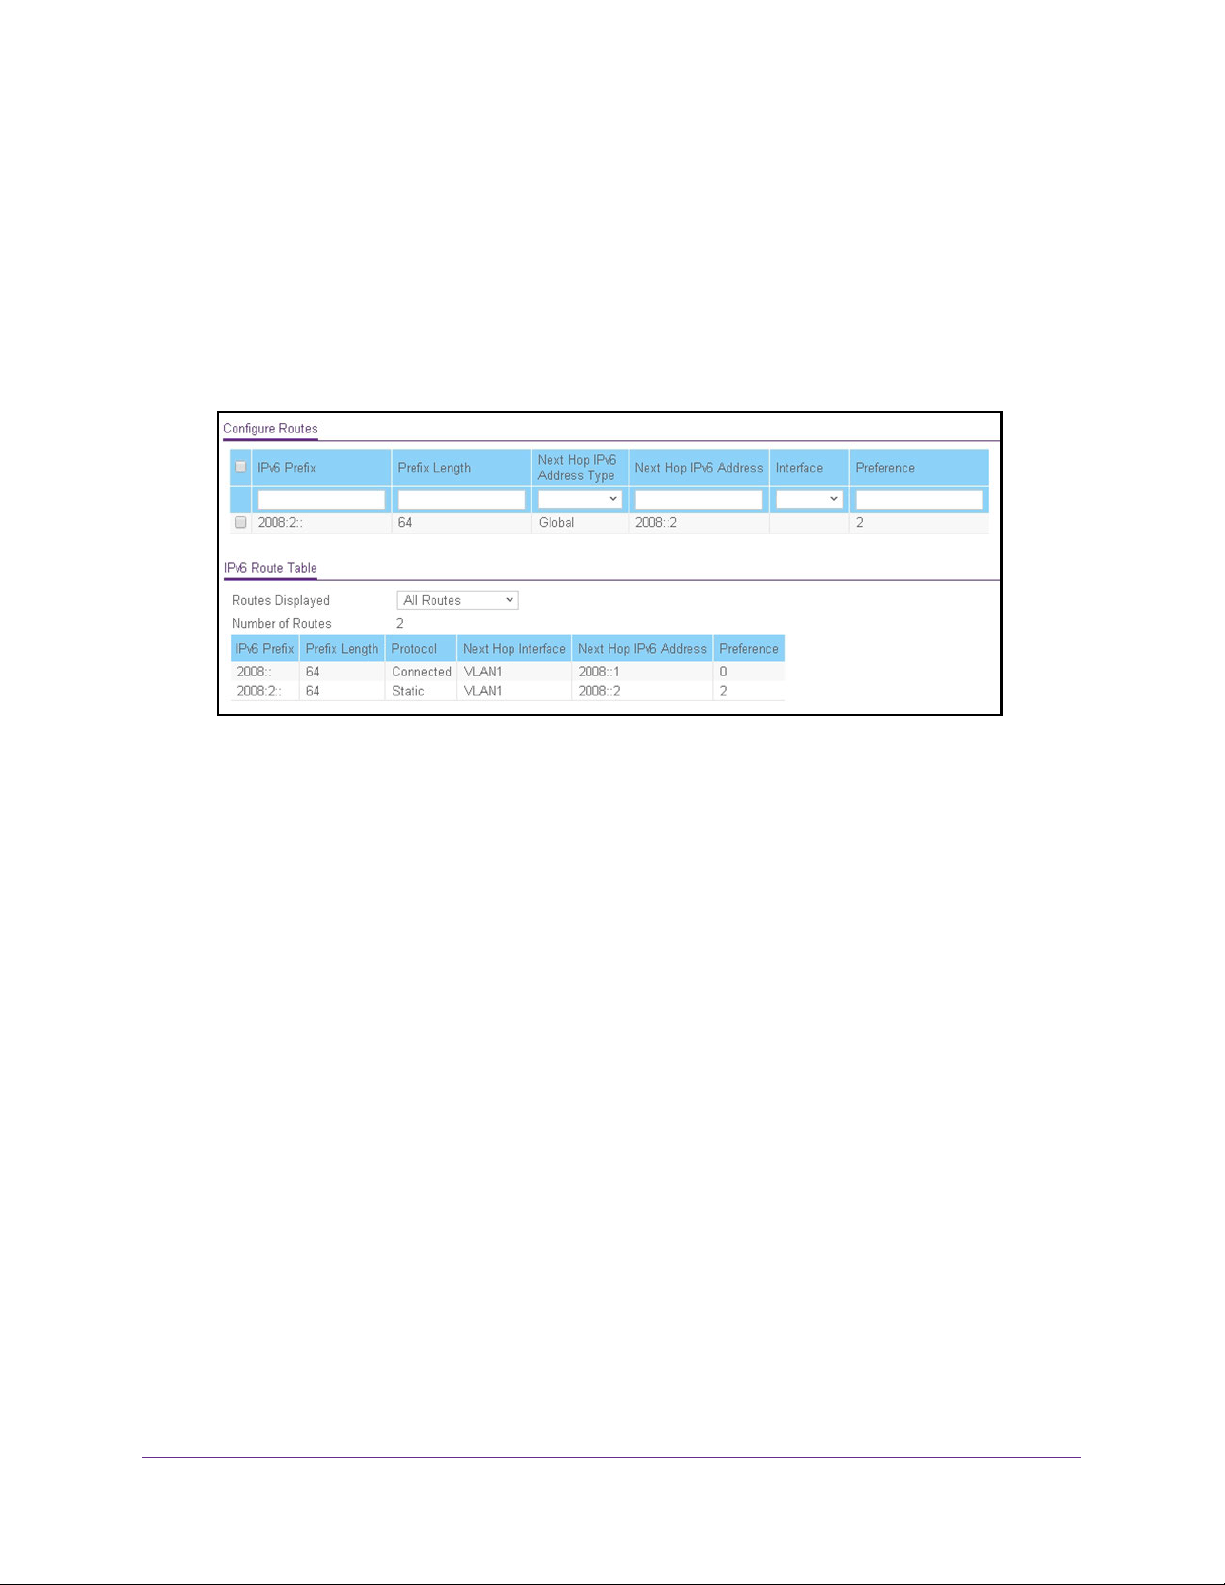
5. Select Routing> IPv6 > Basic > Route Table.
6. In the IPv6 Prefix field, specify the IPv6 network prefix for the destination.
7. In the Prefix Length field, specify the IPv6 prefix length for the destination.
8. In the Next Hop IPv6 Address Type menu, select one of the following types of IPv6
address for the next hop router:
• Link Local. A link-local IPv6 address over a specified interface. With this selection,
you must select an interface from the Interface menu.
• Global. A global IPv6 address. With this selection, the Interface menu becomes
unavailable.
9. In the Next Hop IPv6 Address field, specify the outgoing router IPv6 address to use when
forwarding traffic to the next router (if any) in the path toward the destination.
The next router is always one of the adjacent neighbors or the IPv6 address of the local
interface for a directly attached network.
10. In the Interface menu, select the outgoing IPv6 routing VLAN interface that must be used to
forward traffic to the destination.
Selecting an interface applies only when the selection in the Next Hop IPv6 Address
Type menu is Link Local.
11. In the Preference field, specify the router preference.
12. Click the Add button.
The route is added to the switch.
Loading ...
Loading ...
Loading ...