Loading ...
Loading ...
Loading ...

Installation
General Remarks
General Remarks
Read the instructions provided in this chapter thoroughly before installing the camera.
NOTE! This camera must be installed by qualified personnel and the installation must conform to
all local codes.
NOTE! Observe the MOBOTIX MOVE Installation Hints document to ensure optimum performance
of the camera features.
Camera Installation
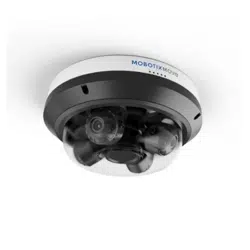
The 20MPMultisensor IRVideo Analytics Camera can be mounted to walls or ceilings without
accessories. Using accessories (such as a pendant mount, for example) will increase the application
scenarios for this camera. Please refer to Accessories, p. 13 to find the type of mount that is suitable
for your situation.
To install the camera using one of these accessories, please refer to the corresponding Quick Install-
ation document available on www.mobotix.com> Support> Download Center> Marketing &
Documentation> Manuals in the MOBOTIX MOVE Accessories section.
Installing to a Ceiling or Wall Without Accessories
1. Loosen the four security screws on the camera with the supplied security torx and open the
dome cover.
2. Use a screwdriver to loosen the screws connecting the camera and the camera base.
3. Place the camera base at the desired installation location. Mark the placement of the four screw
holes and the back conduit entry (for cable entry) on the ceiling/wall.
4. Drill the cable entry hole (back conduit entry) on the ceiling/wall.
5. Drill a hole slightly smaller than the supplied plastic screw anchor on each marked screw hole.
Then insert the plastic screw anchors into the drilled holes.
6. Thread the cables through the cable entry hole. Match the four screw holes on the camera base
with the plastic screw anchors at the installation location. Fasten the camera base with the sup-
plied self-tapping screws.
26 / 120
Loading ...
Loading ...
Loading ...