
Loading ...
Loading ...
Loading ...
CLUTCH 6-13
Clutch
•
Install the friction plates and steel plates, starting with a
friction plate and alternating them.
NOTE
○
Install the both ends marked two friction plates at dis-
assembled to the their original position.
○
When replace the friction plates with new ones, mark
the both ends two friction plates so that the two kinds of
friction plates do not mix up at opening the package.
NOTICE
If new dry friction plates and steel plates are in-
stalled, apply engine oil to the surfaces of each
plate to avoid clutch plate seizure.
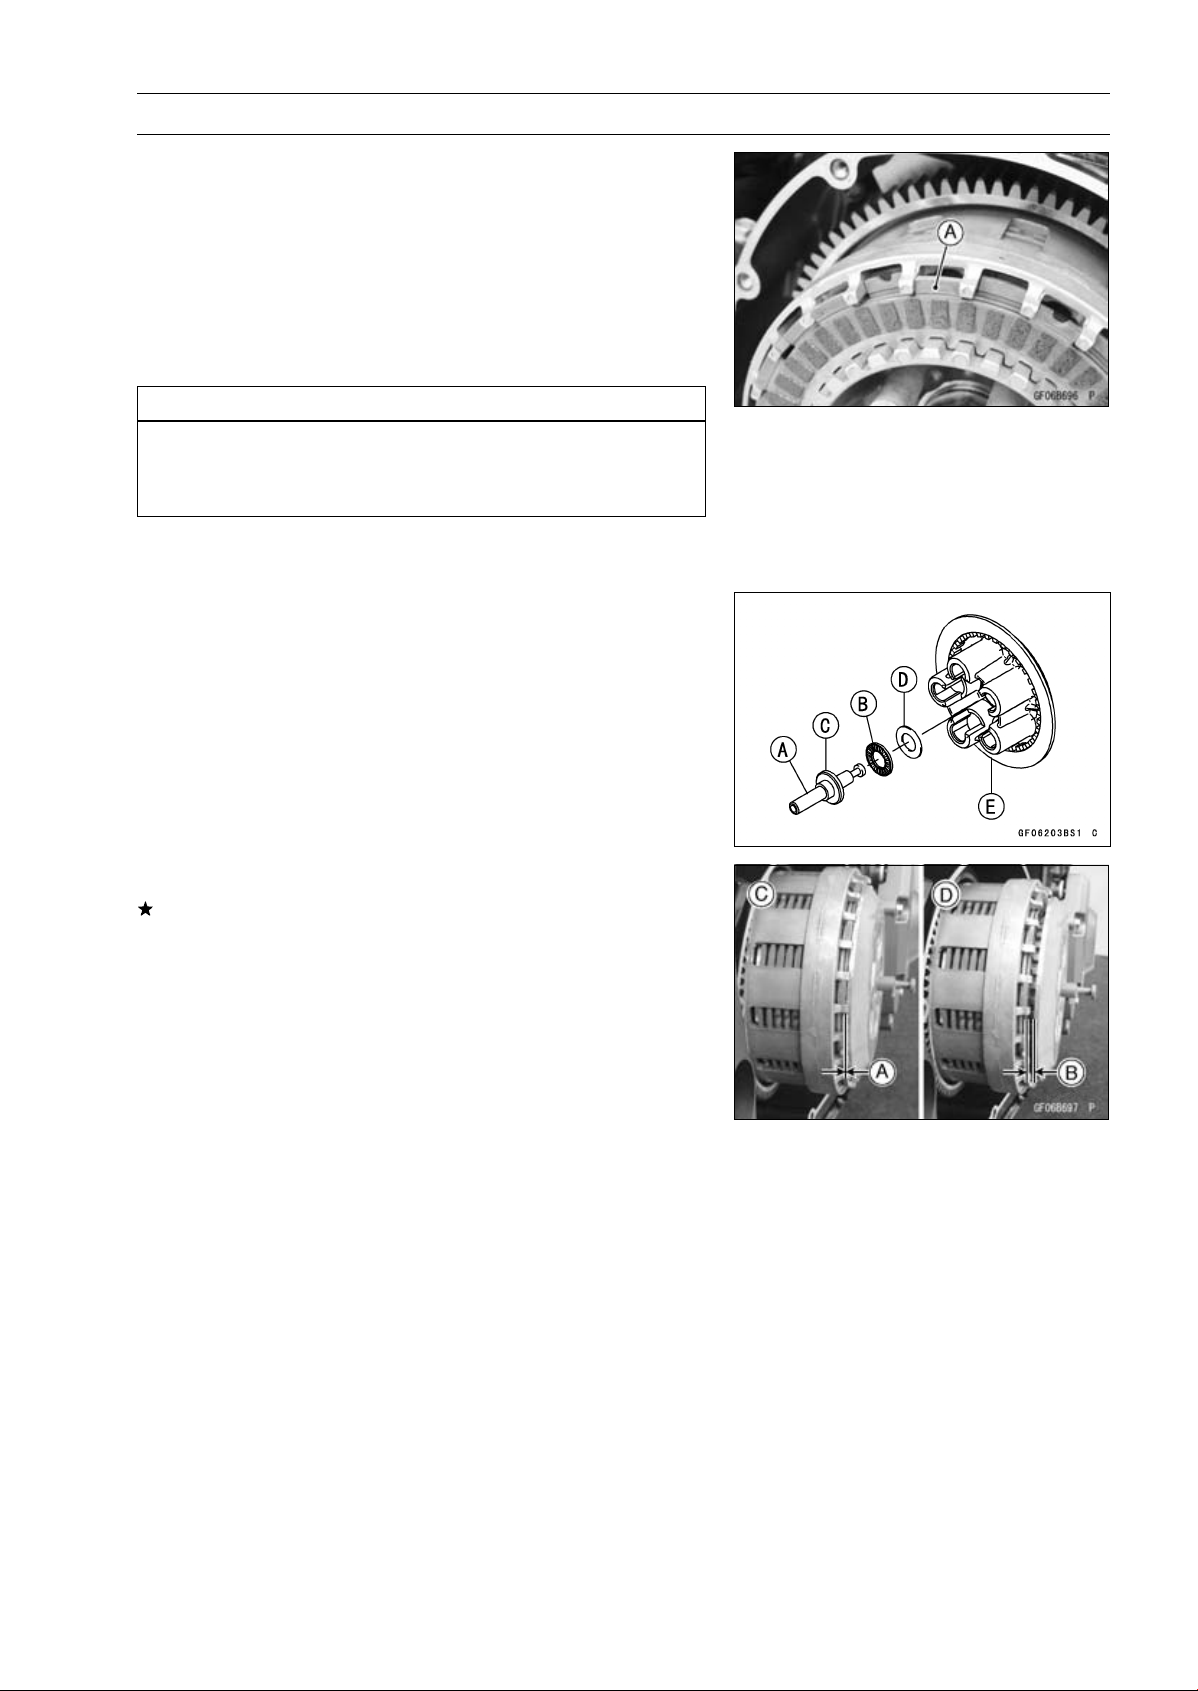
Install the last friction plate [A] fitting the tangs in the
grooves in the housing as shown.
•
Apply molybdenum disulfide grease to the pusher shaft
[A].
•
Apply engine oil to the needle bearing [B].
•
Install the pusher [C], needle bearing and washer [D] in
the clutch spring plate [E].
•
Install the clutch spring plate so that there are no gap [A].
If it has gap [B], turn the clutch spring plate to install it
again.
Correct [C]
Wrong [D]
•
Install:
Clutch Springs
•
Tighten:
Torque - Clutch Spring Bolts: 8.8 N·m (0.90 kgf·m, 78 in·lb)
•
Install the clutch cover (see Clutch Cover Installation).
Loading ...
Loading ...
Loading ...