Loading ...
Loading ...
Loading ...
• Putthe blade inthe in-rippositionbetweenthe
motorand the column.Release theyoke look
handle and pivottheyoketo the left,withthe yoke
pivot latch onthe rightsideof the arm. (Use the
out-rip position only for rlpa 12 in. or more in
width; pivot the yoke to the right so the motor
is between the blade and column.)
• Loosenthe cardagelookknob. Place thebladethe
dghtdistancefrom thefencefor thecut and lock
the knob.
• Cut a kerf.Turn the saw onwiththe switchonthe
arm. Lowerthe bladeabout1/16 in.intothe tableto
cut a shallowgroove.Turnthe sew offand remove
theyellowkey.
• Positionthe workpieceagainstthe blade,from the
frontofthe table. Lowerthe hold-downinfrontof
the bladetojustclearthe workpiece.(For a bevel
rip cut, place the workplece directly under the
guard rather than beside the blade.)
• Loosenthe pawlsand rivingknife.Lowerthe dving,
knifeto thetable. Slidetheworkpiecebackand
lowerthe pawlsso thatone set restsonthe work-
piece. Lockthe rivingknifeand pawlsin place.(For
a bevel rip cut, place the workplece under the
lower set of pawls.)
• Remove theworkpiecefromthe table. Set thepush
block,featherboard,or pushsticknearby.
• Set uptable extension(s)and supports.
_i, WARNING: Never usea persontosupport
workpieces.Thiscan cause kickbackand
sedous injury.Never have someonestand at the
outfeed side.
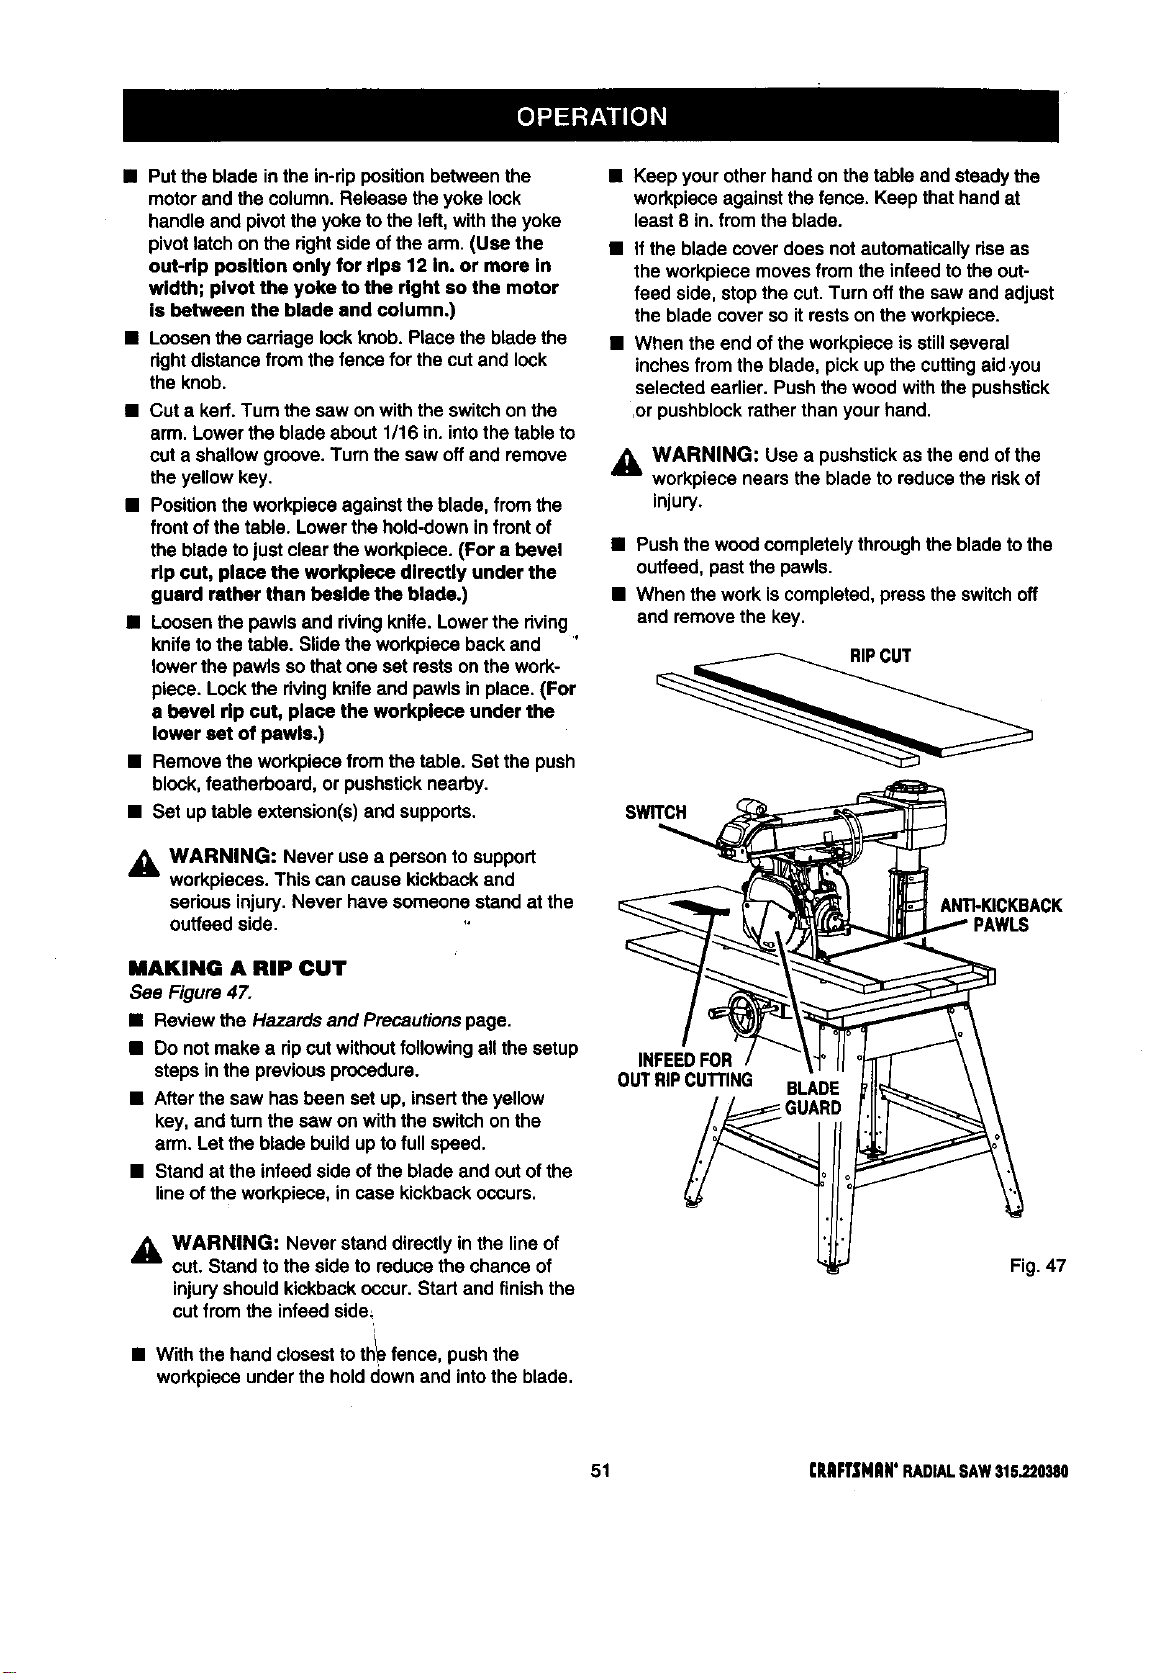
MAKING A RIP CUT
See Figure47.
• Reviewthe Hazards and Precautionspage.
• Do not make a dp cutwithoutfollowingallthe setup
stepsinthe previousprocedure.
• Afterthe saw hasbeen set up,insertthe yellow
key, and turnthe saw on withthe switchon the
arm. Lettheblade buildup tofullspeed.
• Stand at the infsedsideof the bladeand out ofthe
lineof theworkpiece,incase kickbackoccurs.
_i WARNING: Never stand directlyin the lineof
cut. Stand tothe side to reducethe chance of
injuryshouldkickbackoccur. Startand finishthe
cutfrom the infeedside=
/
• Withthe handclosestto th_fence, pushthe
workpieceunderthe holddownand intothe blade.
• Keep yourotherhandon the table andsteadythe
workpieceagainstthefence. Keep thathandat
least8 in.fromthe blade.
• if theblade cover does notautomaticallydsa as
the workpiecemovesfrom the infeedtothe out-
feed side, stopthe cut.Turn offthe saw and adjust
the bladecover so itrestson theworkpiece.
• When the end ofthe workpieceis stillseveral
inchesfrom the blade, pick upthe cuttingaid .you
selected earlier. Pushthe woodwiththe pushstick
,orpushblockratherthan yourhand.
_k WARNING: Use a pushstickas the end ofthe
workpiecenears the bladeto reducethe riskof
injury.
• Push thewoodcompletelythroughthe bladetothe
ouffeed,pastthe pawls.
• When thework iscompleted,presstheswitchoff
and removethe key.
SWITCH
ANTkKICKBACK
PAWLS
INFEEDFOR
OUTRIPCUTrlNG BLADE
Fig. 47
51 CRRFI"$NRN'RADIALSAW315.220380
Loading ...
Loading ...
Loading ...