Loading ...
Loading ...
Loading ...
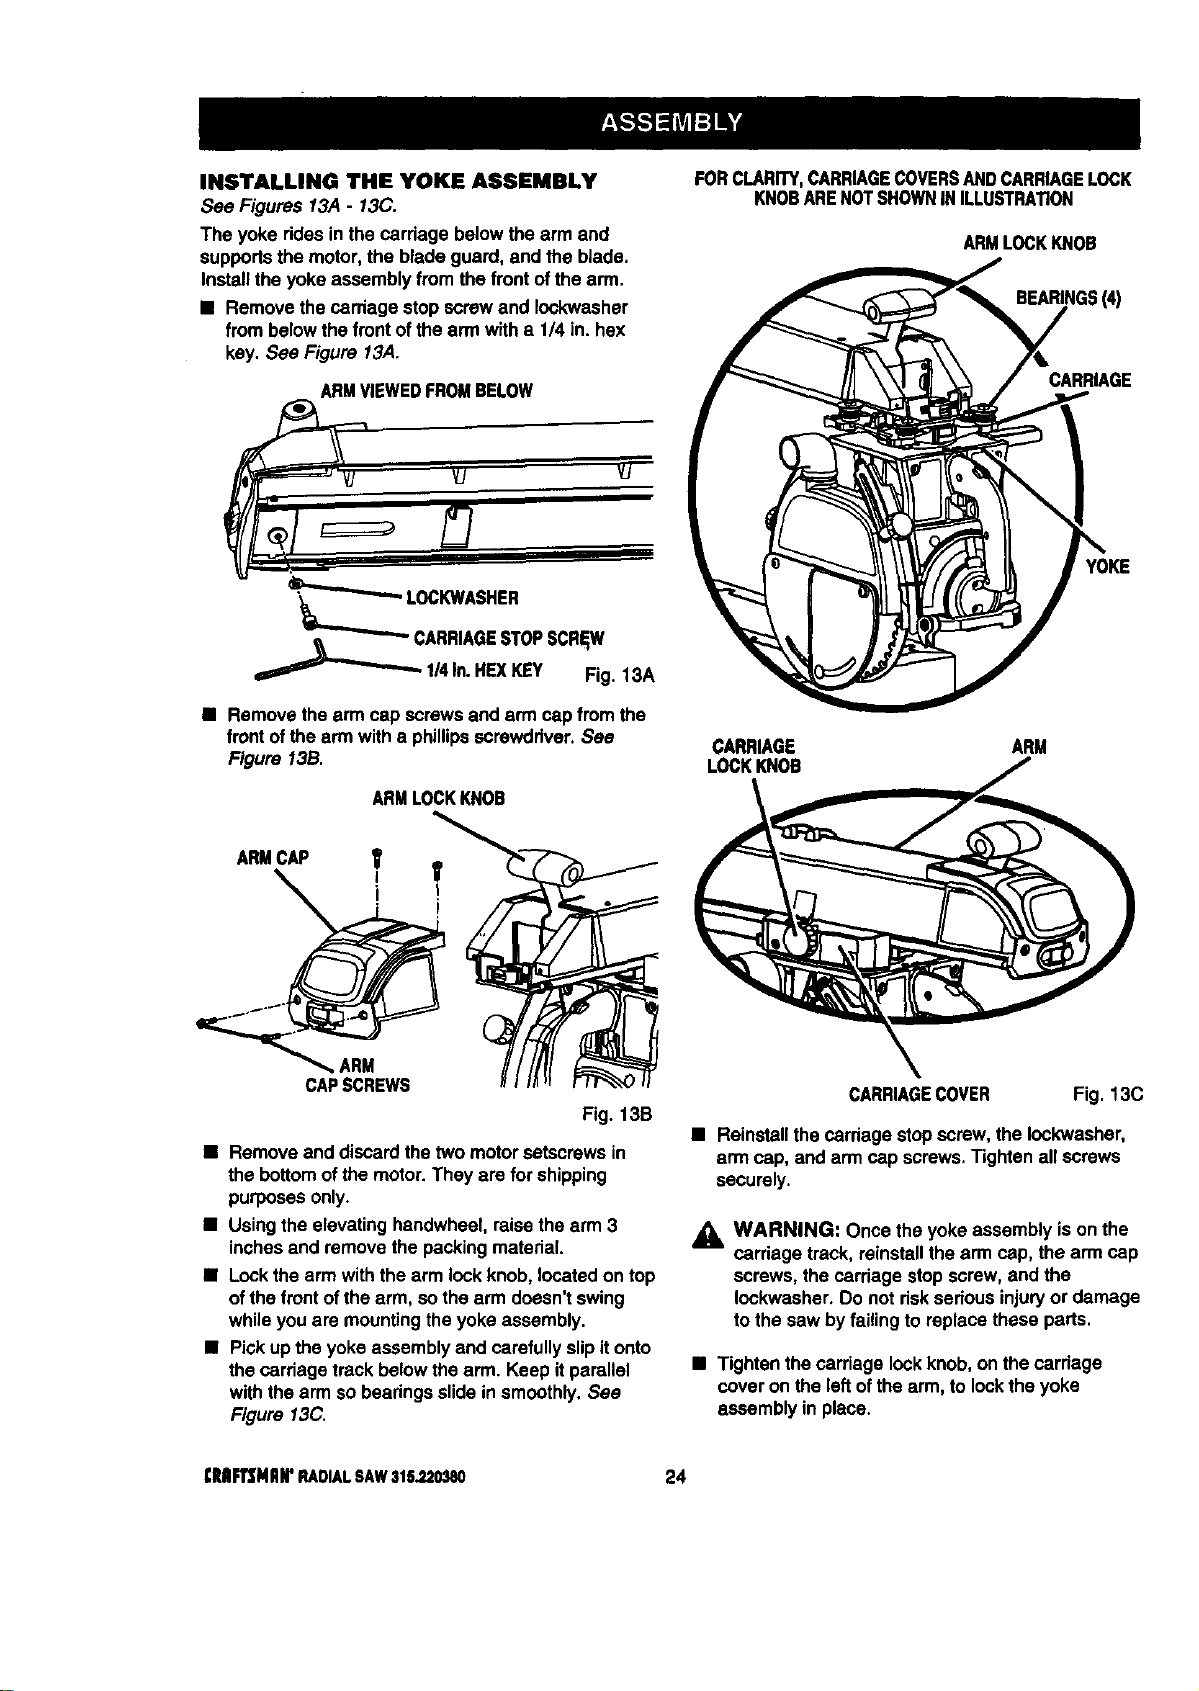
INSTALLING THE YOKE ASSEMBLY
See Figures 13A - 13C.
The yoke ridesin the carriage belowthe armand
supportsthe motor,the blade guard,and the blade.
Installthe yokeassembly fromthe frontofthe arm.
• Removethe carriage stop screwand Iockwasher
from belowthe frontof thearm witha 1/4 in.hex
key.See Figure 13A.
ARMVIEWEDFROMBELOW
FORCLARITY,CARRIAGECOVERSANDCARRIAGELOCK
KNOBARENOTSHOWNINILLUSTRATION
ARMLOCKKNOB
BEARINGS(4)
CARRIAGE
_CARRIAGE STOPSCREW
1/4In.HEXKEY Fig. 13A
• Removethe arm cap screws and arm capfromthe
frontofthe armwith a phillipsscrewdriver, See
Figure 13B.
ARMCAP
ARM
CAPSCREWS
ARMLOCKKNOB
Fig. 13B
• Remove and discardthetwo motorsetscrewsin
thebottomof themotor.They arefor shipping
purposesonly.
• Usingthe elevatinghandwheel,raisethe arm 3
inchesand removethe packingmaterial.
• Lockthe armwiththe arm lockknob,locatedon top
ofthe front ofthe arm, so thearm doesn'tswing
whileyouare mountingthe yokeassembly.
• Pickupthe yokeassemblyand carefullyslipit onto
thecarriage track belowthearm. Keep itparallel
withthe arm sobearingsslidein smoothly,See
Figure 13C.
YOKE
CARRIAGE ARM
LOCKKNOB
CARRIAGECOVER Fig. 13C
• Reinstallthe cardage stopscrew,the Iockwasher,
armcap, and armcap screws,Tightenall screws
securely.
_IL WARNING: Oncethe yoke assemblyis onthe
carriage track, reinstallthearm cap, thearm cap
screws, the carriagestop screw,and the
Iockwasher.Do not riskserious injuryor damage
to the saw byfailingtoreplace these parts.
• Tightenthecarriage lockknob,on thecarriage
cover on the leftofthearm, to locktheyoke
assembly in place.
[Rlllrl3MIIIr RADIALSAW316_20380 24
Loading ...
Loading ...
Loading ...