Loading ...
Loading ...
Loading ...
THUMBSCREW
CLAMP
BRACKET
SQUARENUT
I
CUP
WASHER
RECTANGLE
HOLE
CUP
TO WASHER
LOOSEN
TO
TIGHTEN
SCREW
(IIRFT|MIIW RADIAL SAW 315.220380
CLAMPSHOWN
ASSEMBLED
SLOT
F .25B
TABLE
SUPPORT
Fig. 25C
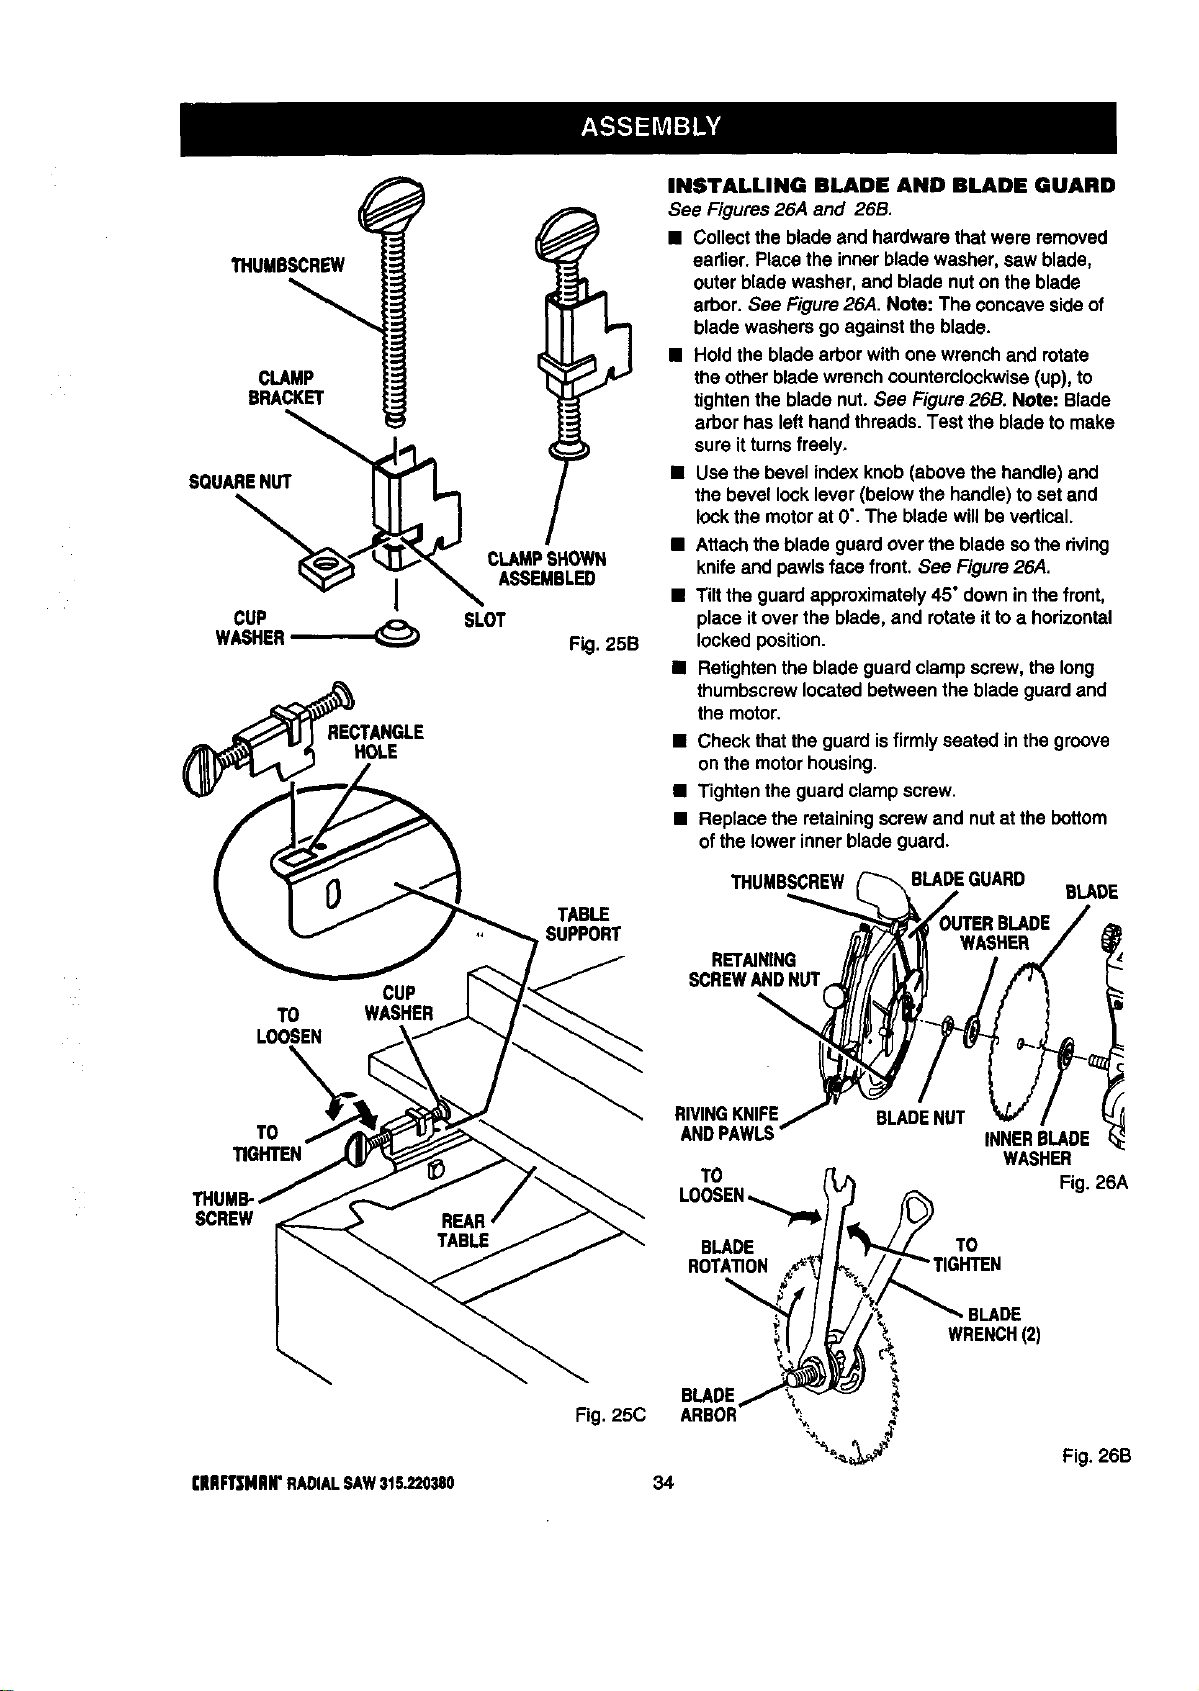
INSTALLING BLADE AND BLADE GUARD
See Figures26,4 and 26B.
• Collectthe bladeand hardwarethatwere removed
eadier. Placethe inner bladewasher,saw blade,
outerbladewasher,and blade nuton theblade
arbor. See Figure26A. Note: The concavesideof
bladewashersgo againstthe blade.
• Holdthe bladearborwithone wrenchand rotate
theotherbladewrenchcounterclockwise(up),to
tightenthe bladenut.See Figure26B. Note: Blade
arborhas lefthandthreads.Testthe bladetomake
sure itturnsfreely,
• Usethe bevel indexknob(abovethe handle)and
the bevel locklever(belowthe handle)to set and
lockthe motorat 0".The bladewillbevertical.
• Attachthe bladeguardover theblade sothe riving
knifeand pawlsface front. See Figure26A.
• Tiltthe guard approximately45°downinthe front,
place itover the blade, and rotateittoa horizontal
lockedposition.
• Retightanthe bladeguardclamp screw,thelong
thumbscrewlocatedbetweenthe bladeguardand
the motor.
• Check thatthe guardisfirmly seatedin the groove
onthe motorhousing.
• Tightentheguard clampscrew.
• Replacethe retainingscrewand nutat the bottom
ofthe lowerinnerbladeguard.
THUMBSCREW
BLADE
RET_NING
SCREWANDNUT
RIVINGKNIFE
ANDPAWLS
TO
BLADENUT
INNERBLADE
WASHER
Fig. 26A
BLADE
ROTATION
TO
34
BLADE
BLADE
WRENCH(2)
Fig. 26B
Loading ...
Loading ...
Loading ...