Loading ...
Loading ...
Loading ...
Assemblyisbestdone in the areawhere thesaw will
be used. When you removethe saw and hardware
fromthe packingmatedals, carefullycheckthe items
withthe Loose Partslist.If you are unsureabout the
descriptionof any part,refer to theirillustrations.For
yourconvenience,all fasteners have been drawn
actual size. Ifany pads are missing,delay assembling
untilyou have obtainedthe missingpart(s).
Yourradial arm saw iscapable ofa wide varietyof
operations,and thus requiresa numberof initialsetup
adjustments.However, once the saw isset up,you
cancheck yoursaw in aboutten minutesand correct
any misalignmentwiththe proceduresin the Adjust-
mentsection.
CAUTION: Performall the proceduresin both
the Assemblyand Adjustmentssectionsbefore
usingthe saw. Runa checkon yoursaw
frequently,referringtothe Adjustmentssection.
Failureto performthe adjustmentsin the initial
set up or on a frequentbasiscan resultinpoor
performanceor machinedamage.
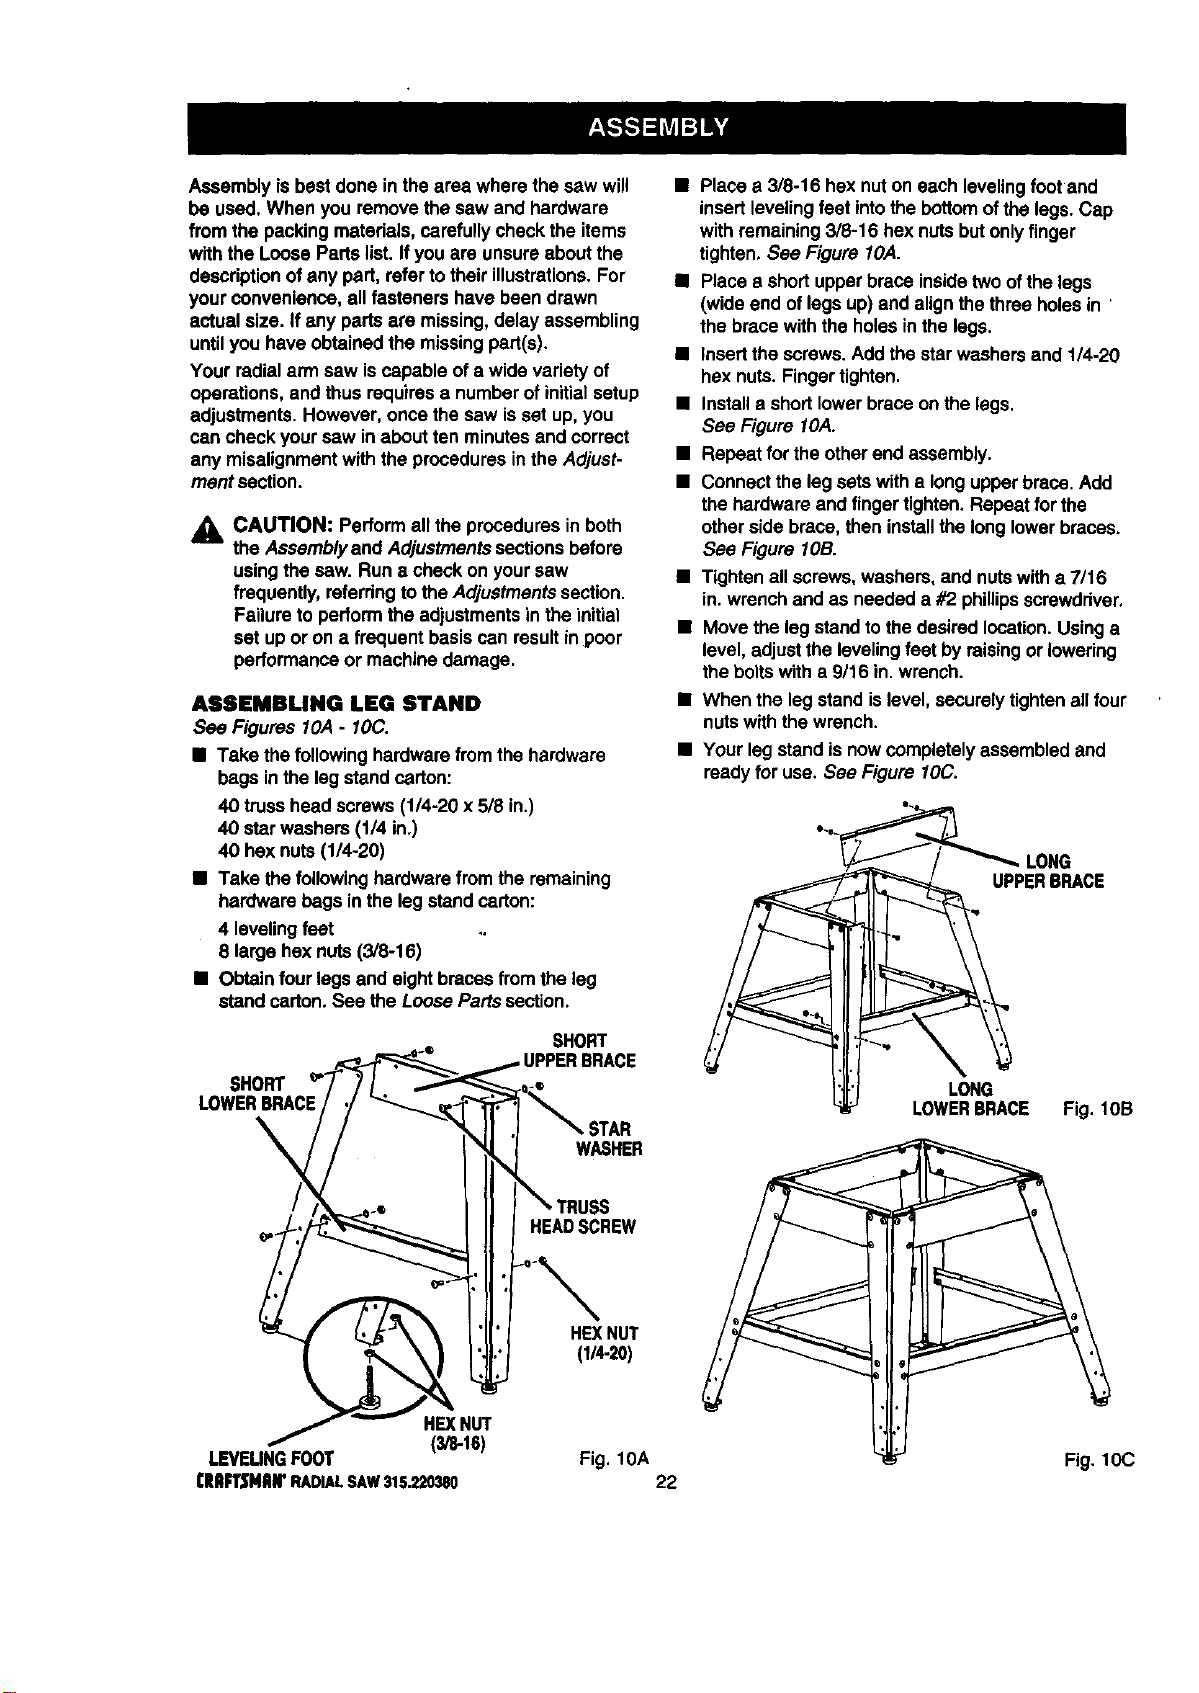
ASSEMBLING LEG STAND
See Figures 10,4- IOC.
• Take the followinghardwarefromthe hardware
bags inthe leg standcarton:
40 trusshead screws(1/4-20 x 5/8 in.)
40 starwashers(1/4 in.)
40 hex nuts(1/4-20)
• Take thefollowinghardwarefromthe remaining
hardwarebags in the legstand carton:
4 levelingfeet
8 largehex nuts(3/8-16)
• Obtainfourlegsand eightbraces fromthe leg
stand carton. See theLoosePartssection.
• Placea 3/8-16 hex nuton each levelingfootand
insertlevelingfeet intothe bottom ofthe legs.Cap
with remaining3/8-16 hex nutsbutonlyfinger
tighten.See Figure 10,4.
• Place a shortupperbrace insidetwoof thelegs
(wideend oflegs up)and alignthethree holesin
the brace withthe holesinthe legs.
• Insertthe screws.Addthe starwashersand 1/4-20
hex nuts.Fingertighten.
• Installa shortlowerbrace onthe legs.
See Figure IOA.
• Repeat forthe otherend assembly.
• Connectthe leg setswith a longupperbrace.Add
the hardwareand finger tighten.Repeat for the
otherside brace,then installthe longlowerbraces.
See Figure lOB.
• Tightenall screws,washers,and nutswitha 7/16
in.wrenchand as needed a #2 phillipsscrewdriver.
• Move the leg standtothe desiredlocation.Usinga
level,adjustthe levelingfeet by raisingorlowering
theboltswitha 9/16 in. wrench.
• When the leg stand islevel,securelytighten all four
nutswiththe wrench.
• Your legstand isnowcompletelyassembledand
readyfor use. See Figure 10C.
LONG
UPPERBRACE
SHORT
SHORT
LOWERBRACE
;TAR
WASHER
HEADSCREW
HEXNUT
(1_-20)
HEXNUT
(3/8-16)
I.EVEUNGFOOT Fig. 10A
I:RIIR3MIIWRADIALSAW315.220380 22
LONG
LOWERBRACE Fig. lOB
Fig. 10C
Loading ...
Loading ...
Loading ...