Loading ...
Loading ...
Loading ...
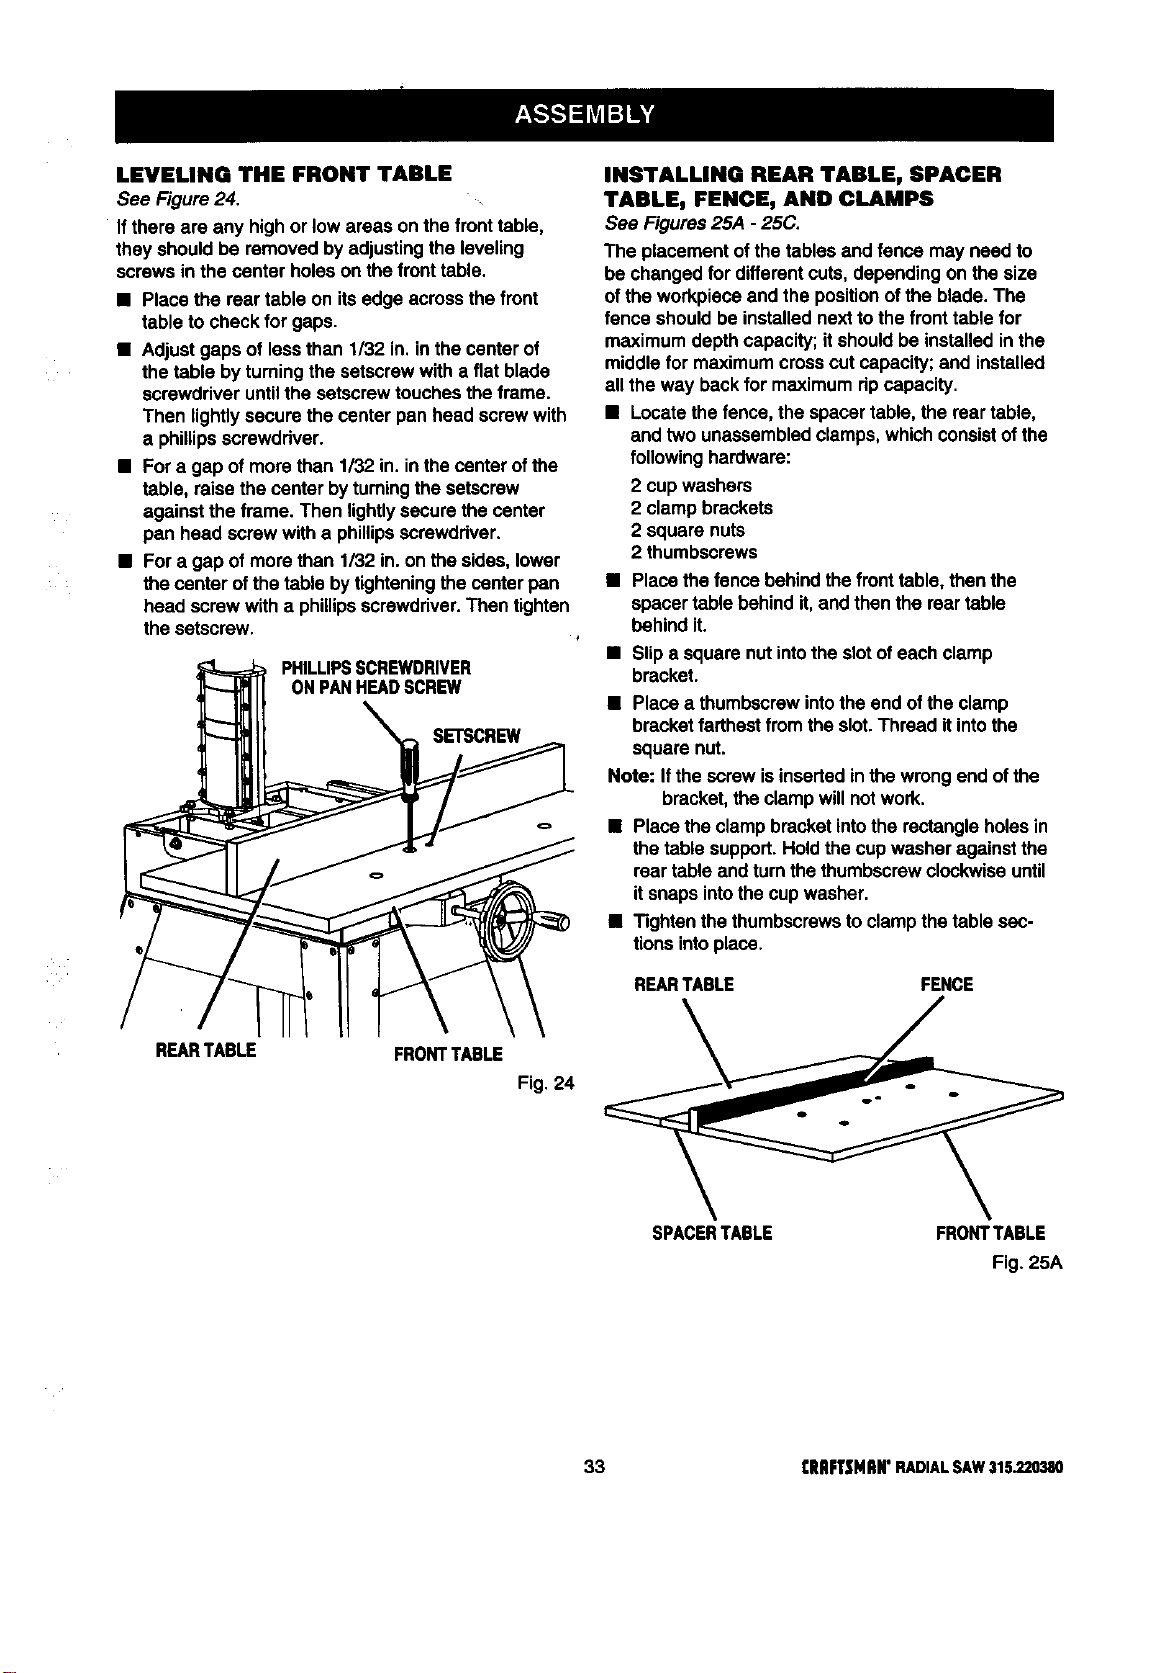
LEVELINGTHE FRONTTABLE
See Figure24.
Ifthere are any high or lowareas onthe fronttable,
they shouldbe removed byadjustingthe leveling
screwsin thecenter holeson thefronttable.
• Placethe rear table on itsedge acrossthe front
table to check for gaps.
• Adjust gaps of lessthan 1/32 in.in the center of
the table bytuming the setscrewwith a fiat blade
screwdriveruntilthe setscrewtouchestheframe.
Then lightlysecure the center pan head screwwith
a phillipsscrewdriver.
• Fora gap ofmore than 1/32 in.in thecenterof the
table, raisethe center byturningthe setscrew
againstthe frame. Then lightlysecurethe center
pan head screw witha phillipsscrewdriver.
• Fora gap ofmore than 1/32 in.on the sides,lower
the center ofthe table bytighteningthecenter pan
head screwwitha phillipsscrewdriver.Then tighten
thesetscrew.
INSTALLING REAR TABLE, SPACER
TABLE, FENCE, AND CLAMPS
See Figures25A - 25C.
The placementofthe tablesand fence may need to
be changed for differentcuts,dependingon the size
ofthe workpieceand the positionofthe blade.The
fence shouldbe installednextto the front table for
maximumdepthcapacity;it shouldbe installedinthe
middle for maximumcrosscut capacity;and installed
all the way backfor maximumripcapacity.
• Locatethe fence, the spacertable,the rear table,
and two unassembledclamps,whichconsistof the
following hardware:
2 cup washers
2 clamp brackets
2 square nuts
2 thumbscrews
• Placethe fence behindthe fronttable,then the
spacertable behindit, and thenthe reartable
behindit.
• Slipa squarenutintothe slotofeach clamp
PHILLIPSSCREWDRIVER bracket.
ONPANREADSCREW
_ll _% SETSCREW • Place a thumbscrewintothe end ofthe clamp
bracketfarthestfromthe slot.Thread it intothe
enut
Note: If thescrew isinsertedinthe wrongend ofthe
bracket,the clampwillnotwork.
• Placethe clampbracketintothe rectangleholesin
___ REARTABLE FENCEthe table support.Heldthe cupwasher against the
reartable and turnthethumbscrewclockwiseuntil
itsnaps intothecup washer,
• Tightenthe thumbscrewstoclampthe table sec-
tionsintoplace.
REARTABLE FRONTTABLE Fig 24
SPACERTABLE FRONTTABLE
Fig. 25A
33 [RRFTSNRWRADIALSAW315.220380
Loading ...
Loading ...
Loading ...