Loading ...
Loading ...
Loading ...
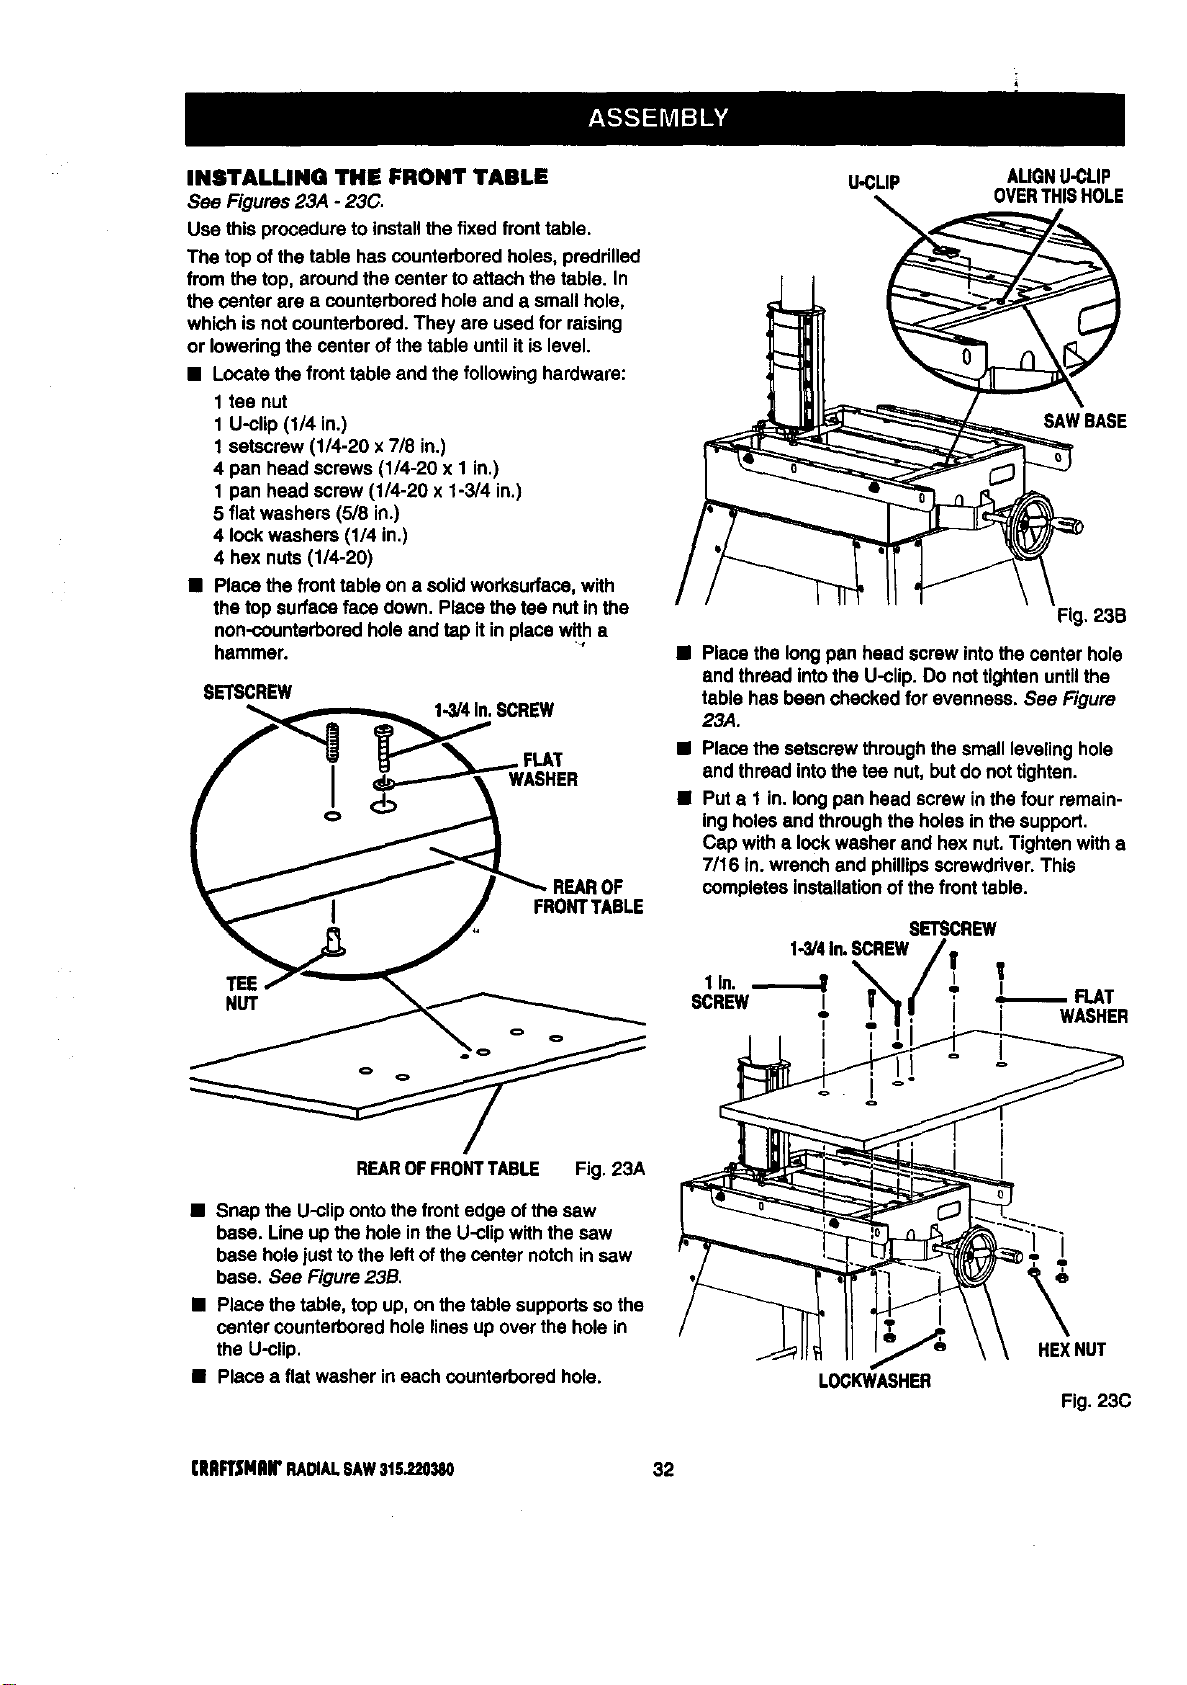
INSTALLING THE FRONT TABLE
See Figures23,4 - 23C.
Use thisprocedureto installthe fixed fronttable.
The top ofthe table hascounterboredholes, preddlled
from thetop, aroundthe center toattach the table. In
the center are a counterboredholeand a smallhole,
whichis not counterbored.They are used for raising
or loweringthe center of thetable until itislevel.
• Locate the fronttable and thefollowinghardware:
1 tee nut
1 U-clip (1/4 in.)
1 setscrew(1/4-20 x 7/8 in.)
4 pan head screws (1/4-20 x 1 in.)
1 pan head screw (1/4-20 x 1-3/4 in.)
5 fiatwashers (5/8 in.)
4 lockwashers (1/4 in.)
4 hex nuts(1/4-20)
• Placethe fronttable on a solidworksurfoce,with
the top surfaceface down. Placethe tee nutin the
non-counterboredhole andtap it inplace with•
hammer.
SETSCREW
1.3/4In.SCREW
FLAT
WASHER
TEE
NUT
REAROFFRONTTABLE Fig. 23A
• Snap the U-clipontothefrontedge ofthe saw
base. Lineup the hole inthe U-clipwiththe saw
base holejusttothe leftofthe center notchin saw
base. See Figure23B.
• Place the table, top up, onthe table supportssothe
center counterboredholelinesup over the holein
the U-clip.
• Placea flatwasher in eachcounterboredhole.
U-CLIP AUGNU-CLIP
OVERTHISHOLE
Fig, 23B
B Placethe longpan head screw intothe center hole
and threadintothe U-clip.Do nottightenuntilthe
table has been chockedfor evenness.See Figure
23,4.
• Placethe setscrewthroughthesmall levelinghole
end threadintothetee nut,butdo nottighten.
• Puta 1 in. longpan head screwin the fourremain-
ingholesend throughthe holesin the support.
Cap with• lockwasher end hexnut,Tightenwitha
7/16 in.wrenchand phillipsscrewdriver.This
completesinstallationofthe fronttable.
SETSCREW
1-3/4In.SCREW
l
SCREwlln"_1 ; ,I°_ FLAT
I I WASHER
LOCKWASHER
HEXNUT
Fig.23C
[ERFTSMRWRADIALSAW315.220380 32
Loading ...
Loading ...
Loading ...