Loading ...
Loading ...
Loading ...
92
CONTENTS
SETTING UP
SEWING
UTILITY
STITCHES
MY CUSTOM
STITCH
TM
(CREATE YOUR OWN
STITCH DESIGNS)
EMBROIDERING
MAINTENANCE
ERROR
MESSAGES
SEWING CHART
PATTERNS
(PROGRAMMED
IN MACHINE)
1
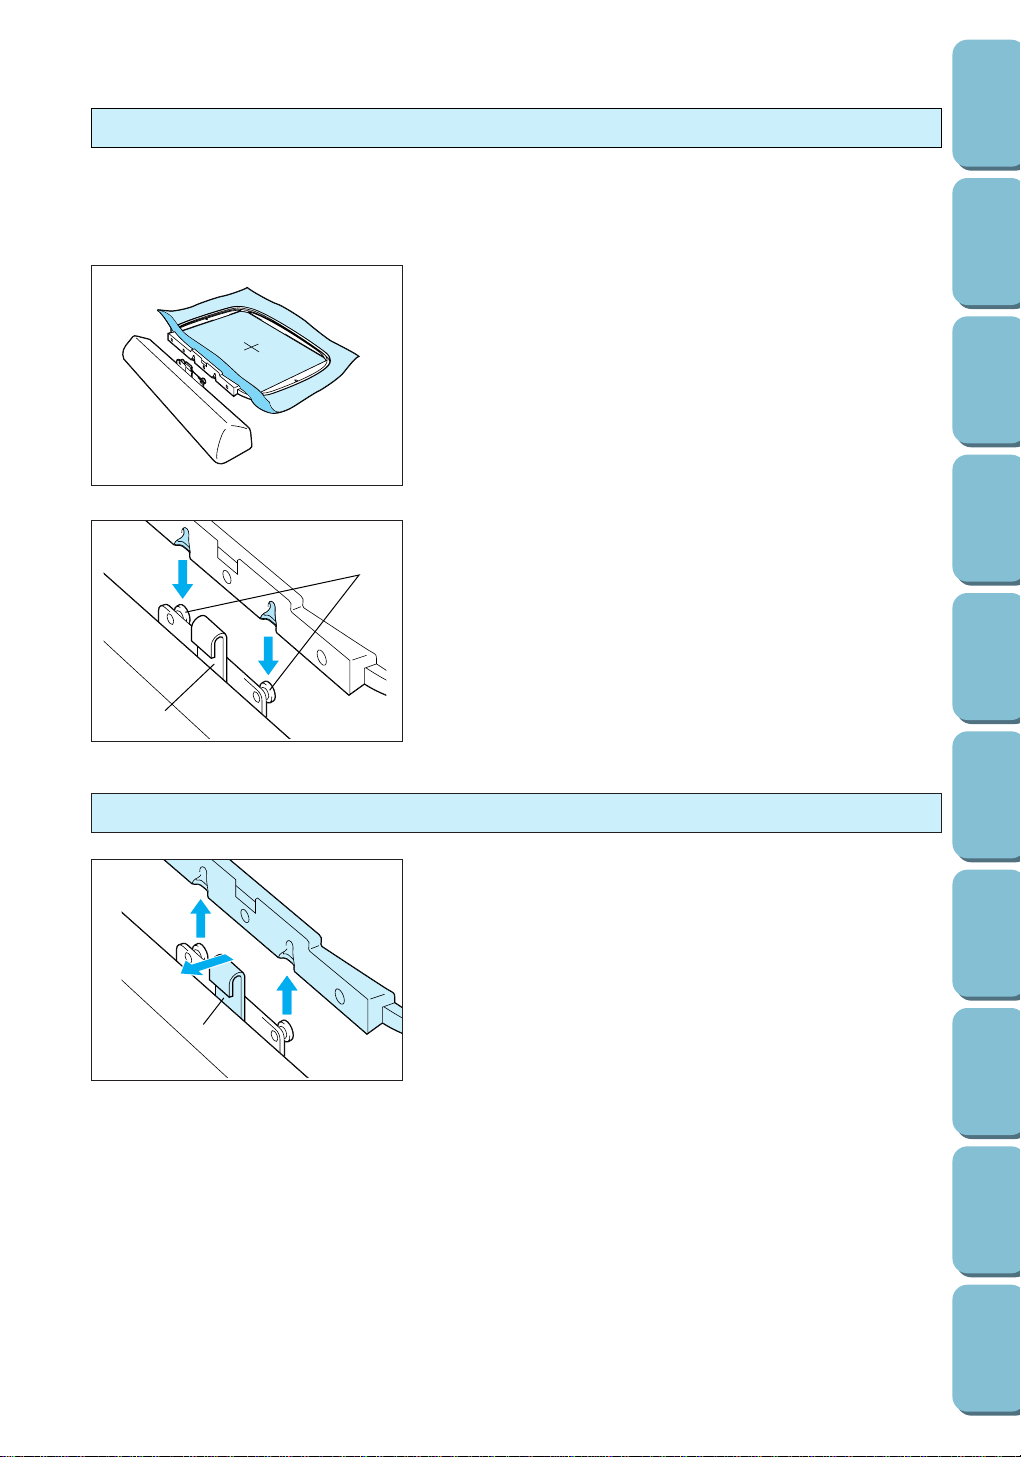
While pushing the release lever on the frame holder to the left,
lift the embroidery frame up to remove it.
1 Release lever
Removing the embroidery frame from the embroidery arm
2
1
2. Align the slots in the mounting bracket of the frame with the
two knobs on the frame holder of the embroidery arm, and
then press the frame onto the frame holder so that it clicks
into place.
1 Frame holder on embroidery arm
2 Knobs
Note
Be sure that the mounting bracket on the embroidery frame is
attached to both knobs. If it is attached to only one knob, the
pattern may not be embroidered correctly.
1. Raise the presser foot lever to its highest position, and then
pass the embroidery frame under the presser foot, making
sure that the mounting bracket of the frame is on the left
side and the right side of the fabric is facing up.
CAUTION
Be sure to wait until the embroidery unit has finished initializing before trying to attach the
embroidery frame. (Refer to page 87.)
Attaching the embroidery frame to the embroidery arm
Loading ...
Loading ...
Loading ...