Loading ...
Loading ...
Loading ...
39
CONTENTS
SETTING UP
SEWING
UTILITY
STITCHES
MY CUSTOM
STITCH
TM
(CREATE YOUR OWN
STITCH DESIGNS)
EMBROIDERING
MAINTENANCE
ERROR
MESSAGES
SEWING CHART
PATTERNS
(PROGRAMMED
IN MACHINE)
1
5
3
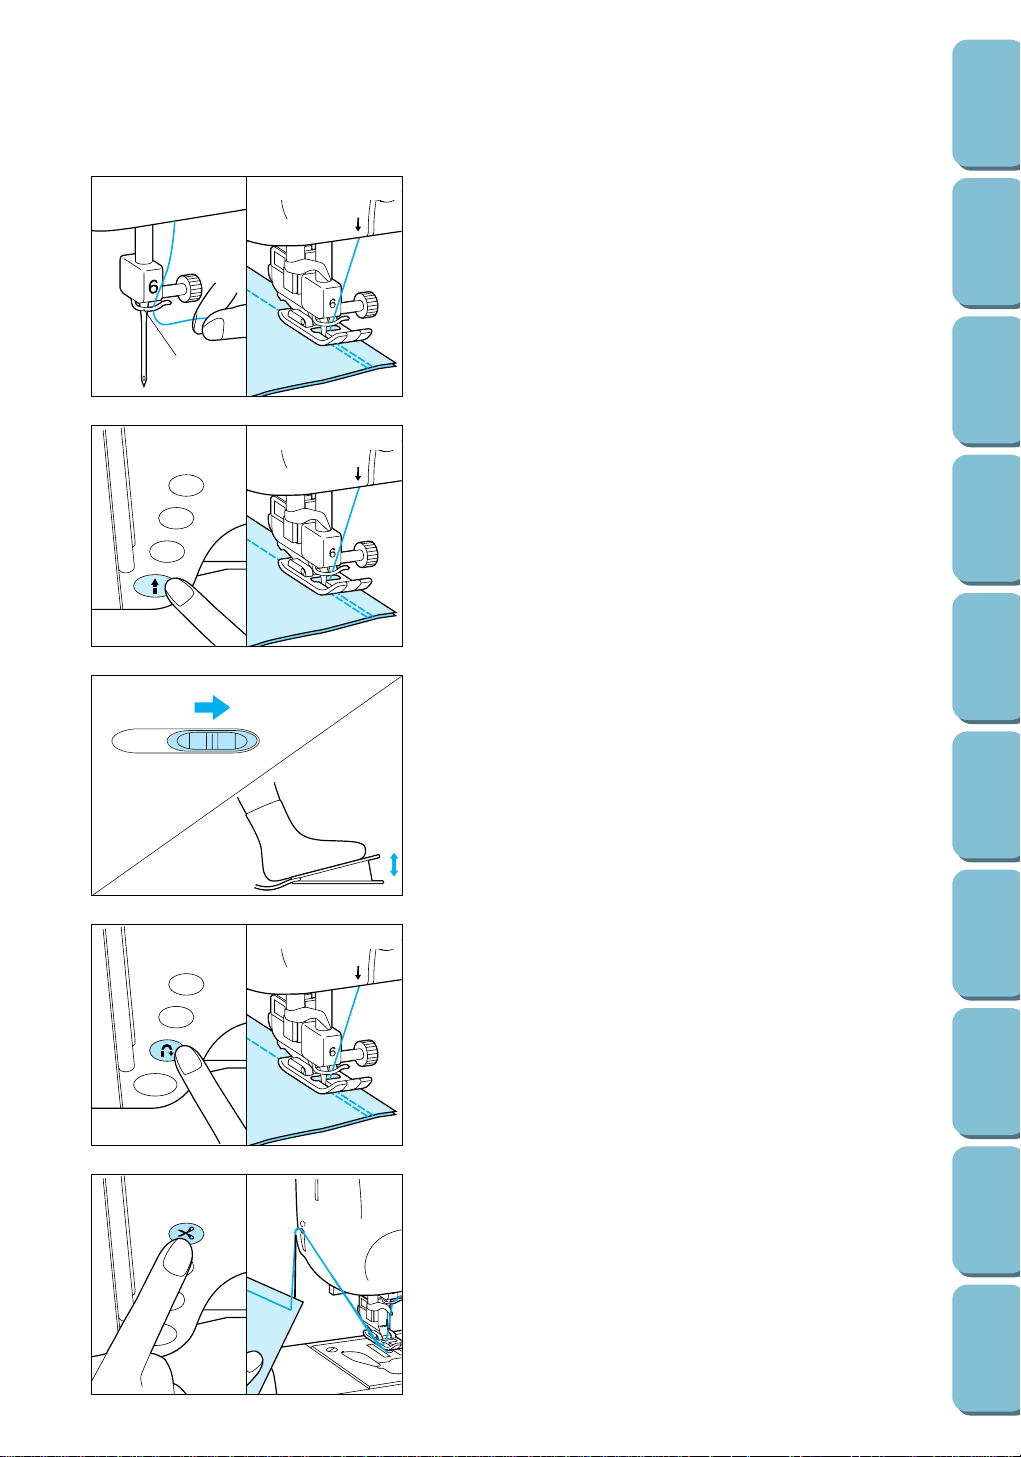
4. Lower the presser foot lever.
5. Press the reverse/reinforcement stitch button to sew reverse
stitches, and then press the start/stop button. The machine
starts sewing at slow speed.
Note
– To pause sewing in order to turn or adjust the fabric, press
the start/stop button. To restart sewing, press the start/stop
button again.
– If automatic reverse/reinforcement stitching is turned on
before you start sewing, pressing just the start/stop button
automatically sews reverse/reinforcement stitches before
sewing.
7. When the end of the stitching is reached, press the
reverse/reinforcement stitch button to sew reverse stitches
and stop the machine.
5
3
8. Press the thread cutter button to cut the threads.
Note
– Cut thick thread (thicker than #30) with the cutter on the side
of the machine as shown.
– If automatic thread cutting and automatic reverse/
reinforcement stitching are turned on before you start
sewing, pressing the reverse/reinforcement stitch button at
the end of the stitching automatically sews reverse/
reinforcement stitches, trims the threads and stops the
machine.
6. Adjust the sewing speed using either the sewing speed
controller or the foot controller.
5
3
Loading ...
Loading ...
Loading ...