Loading ...
Loading ...
Loading ...
17
CONTENTS
SETTING UP
SEWING
UTILITY
STITCHES
MY CUSTOM
STITCH
TM
(CREATE YOUR OWN
STITCH DESIGNS)
EMBROIDERING
MAINTENANCE
ERROR
MESSAGES
SEWING CHART
PATTERNS
(PROGRAMMED
IN MACHINE)
1
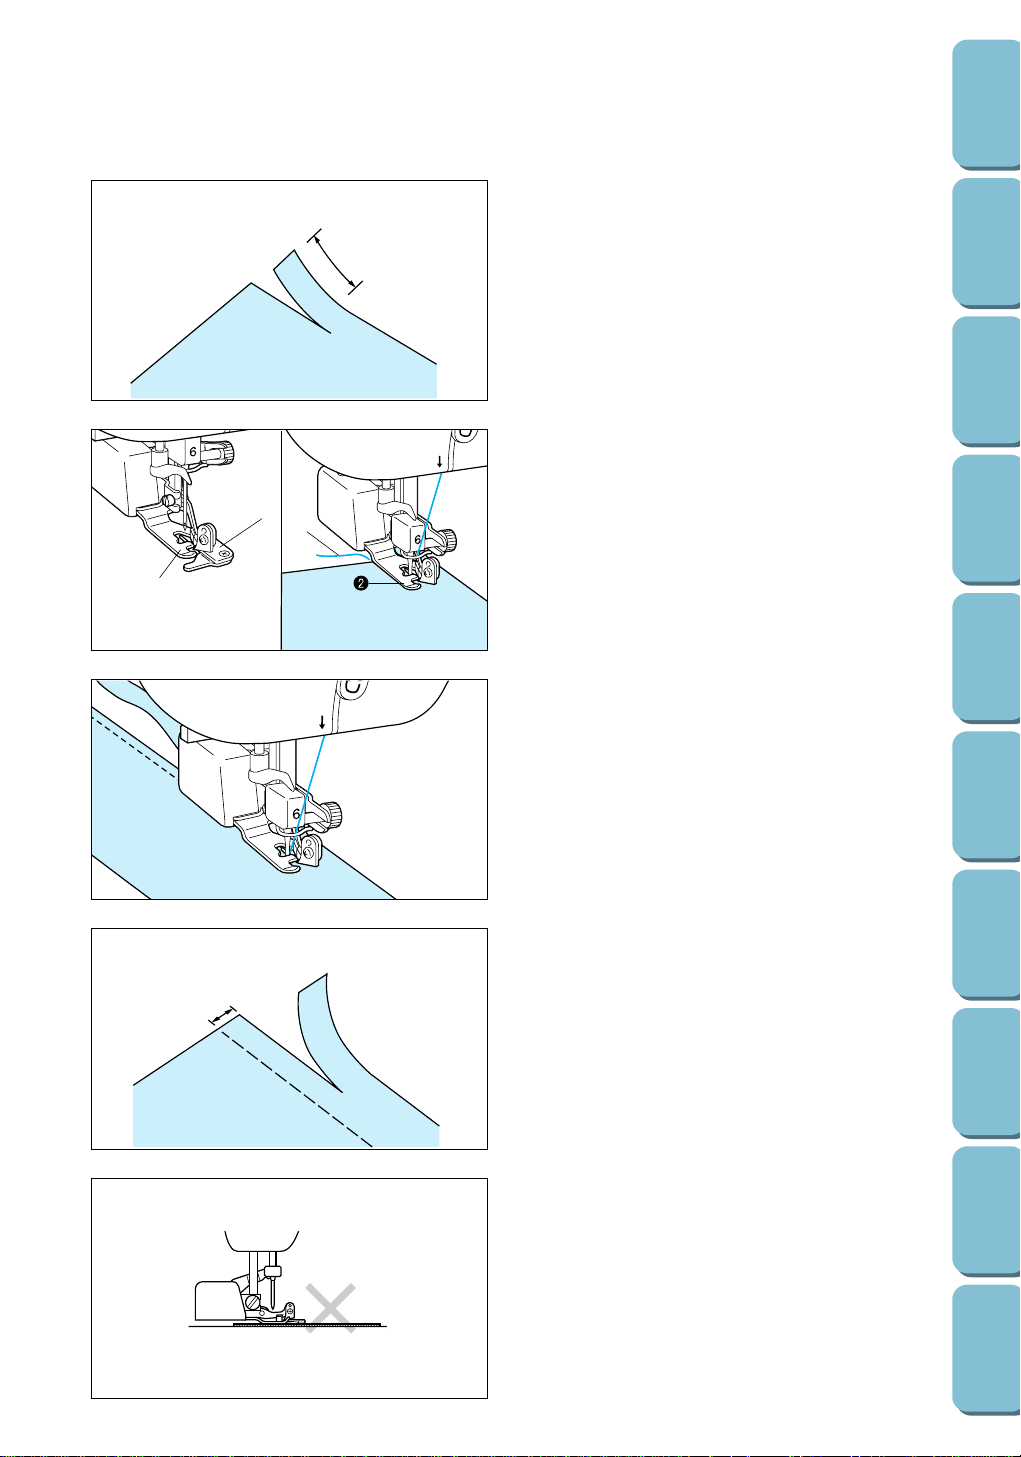
7. Make a cut of about 25/32" (2.0 cm) long in
the fabric.
1 25/32" (2.0 cm)
8. Raise the presser foot lever, and then thread
the bobbin thread and the upper thread.
1
3
2
A
5
B
9. Position the fabric so that the right side of the
cut goes over the guide plate and the left side
of the cut is under the presser foot.
1 Guide plate (lower knife)
2 Presser foot
10.Thread the needle, pull out a long section of
the upper thread, pass it under the presser
foot, and then pull it out toward the rear of the
sewing machine. (See figure B.)
2 Presser foot
3 Upper thread
5
3
1
Note
–The side cutter will not cut the fabric if the fabric
is simply spread out under the presser foot and
the guide plate. Be sure to position the fabric as
explained in step 9 before sewing.
–Always raise the needle before raising the
presser foot lever.
–The side cutter can cut one layer of 13-oz
denim.
–Clean the side cutter after using it, otherwise
dust and scraps of thread will build up in it.
–Add a small amount of oil as required to the
cutting edge of the cutter.
11.Lower the presser foot lever.
CAUTION
After the stitch width is adjusted, turn the
balance wheel toward you by hand and check
that the needle does not touch the side cutter.
If the needle hits the side cutter and breaks,
injuries may occur.
When sewing straight stitches, the seam margin
will be about 13/64" (5.0 mm).
1 Seam margin
Loading ...
Loading ...
Loading ...