Loading ...
Loading ...
Loading ...
50
CONTENTS
SETTING UP
SEWING
UTILITY
STITCHES
MY CUSTOM
STITCH
TM
(CREATE YOUR OWN
STITCH DESIGNS)
EMBROIDERING
MAINTENANCE
ERROR
MESSAGES
SEWING CHART
PATTERNS
(PROGRAMMED
IN MACHINE)
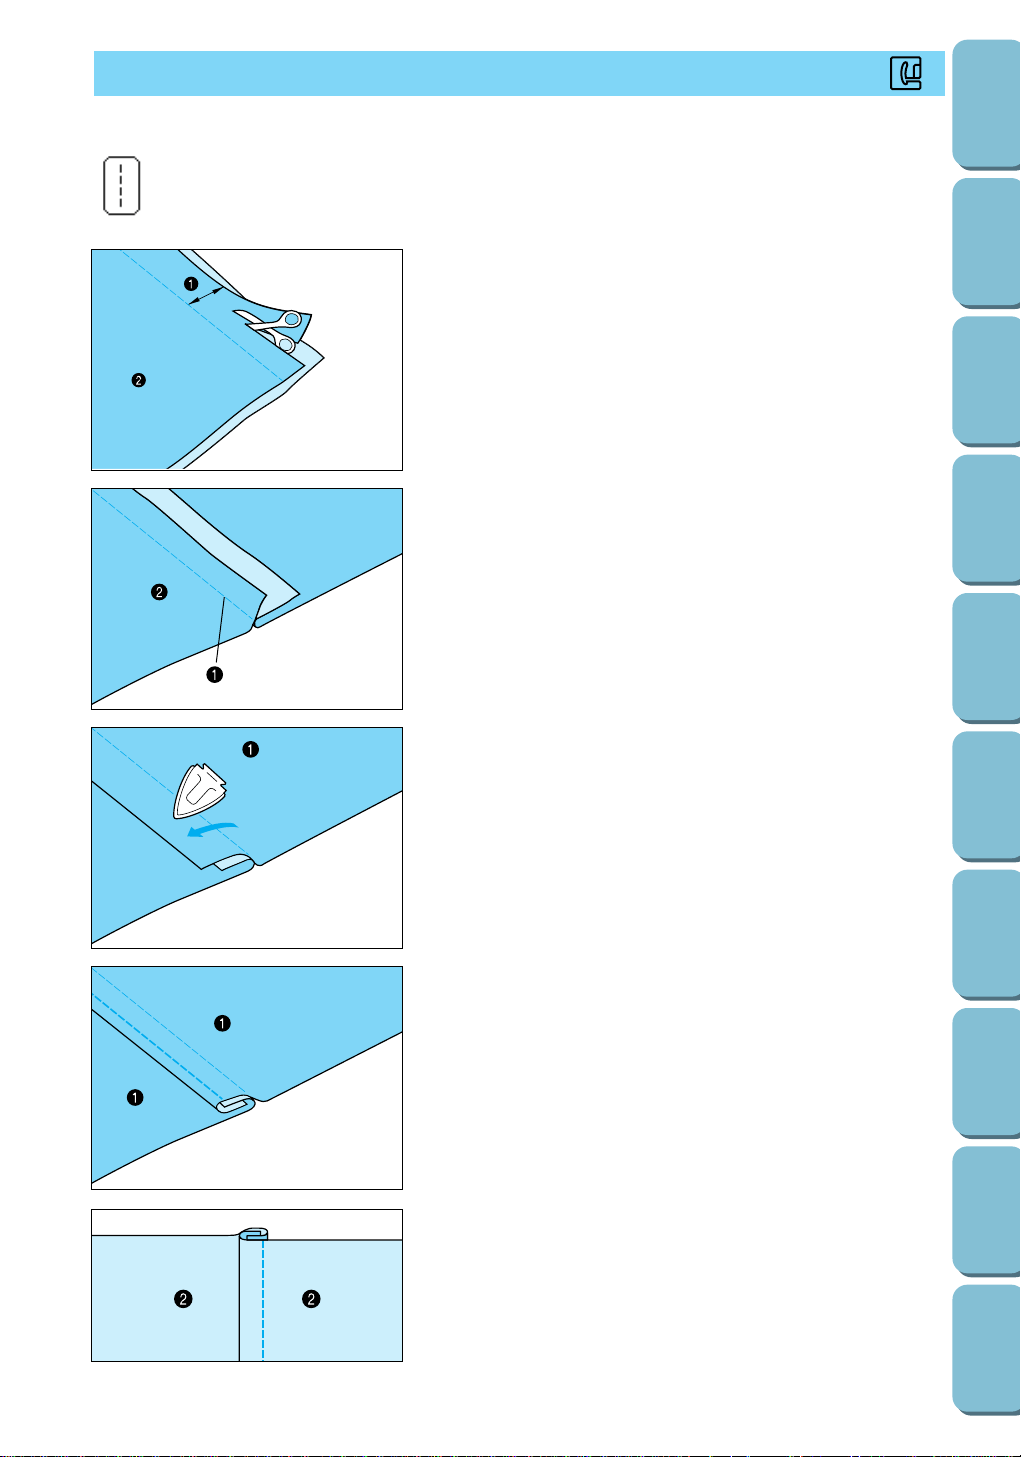
FLAT-FELL SEAM SEWING
J
1. Attach presser foot J, sew the seam, and then cut off half of
the seam allowance from the one that will lie flat.
1 About 15/32" (1.2 cm)
2 Wrong side of fabric
Note
If automatic thread cutting and automatic reverse/reinforcement
stitching are turned on before you start sewing, pressing just the
start/stop button automatically sews reverse stitches before
sewing. In addition, pressing the reverse/reinforcement stitch
button at the end of the stitching automatically sews reverse
stitches, trims the threads and stops the machine.
2. Spread out the fabric along the seamline.
1 Seamline
2 Wrong side of fabric
3. Iron both seam allowances toward the more narrow (cut)
one.
1 Wrong side of fabric
4. Fold the longer seam allowance around the more narrow
one, and sew the edge of the fold so that the seam appears
as shown.
1 Wrong side of fabric
2 Right side of fabric
Sew flat-fell seams to reinforce seams and for neatly finishing edges.
1 Straight (Mid) [straight stitch (center needle position)]
1
Loading ...
Loading ...
Loading ...