Loading ...
Loading ...
Loading ...
62
CONTENTS
SETTING UP
SEWING
UTILITY
STITCHES
MY CUSTOM
STITCH
TM
(CREATE YOUR OWN
STITCH DESIGNS)
EMBROIDERING
MAINTENANCE
ERROR
MESSAGES
SEWING CHART
PATTERNS
(PROGRAMMED
IN MACHINE)
1
2
3
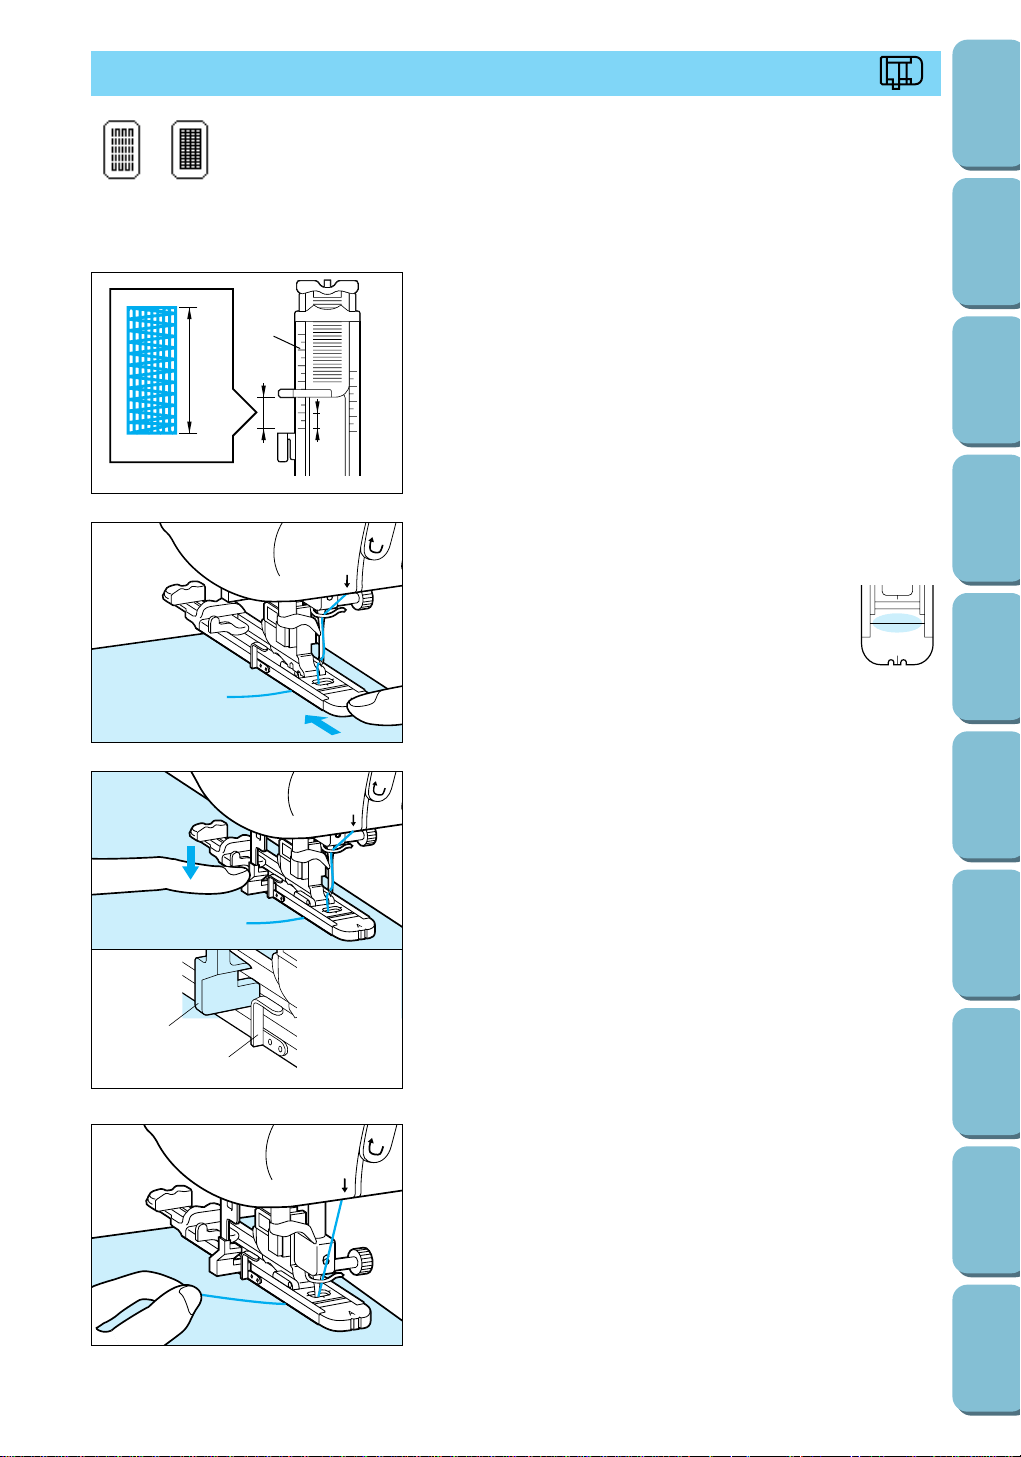
1. Attach buttonhole foot A and set the scale to the desired
length of the darning.
1 Scale
2 13/64" (0.5 cm)
3 Length of darning
Note
The maximum length of the darning is 1-3/16” (3.0 cm).
5
3
2. Check that the needle drops at the desired position and
lower the presser foot lever, making sure that the upper
thread passes underneath the buttonhole foot.
3. Slide the outside frame of the buttonhole foot
backward as far as possible as shown in the
illustration at the left, making sure that there is
no gap behind the part of the foot marked “A”.
Note
If the buttonhole foot is not slid back as far as possible, the
darning will not be sewn with the correct size.
5
3
5
3
2
1
5. Gently hold the end of the upper thread, and then press the
start/stop button to start the machine. Once sewing is
completed, the machine automatically sews reinforcement
stitches, and then stops.
Note
If automatic thread cutting is turned on before you start sewing,
both threads are automatically cut after the reinforcement
stitches are sewn.
4. Lower the buttonhole lever so that it is positioned behind the
metal bracket on the buttonhole foot.
1 Buttonhole lever
2 Metal bracket on the buttonhole foot
A
DARNING
Darning
1 for medium weight fabric
2 for thick fabric
A
12
Loading ...
Loading ...
Loading ...