Loading ...
Loading ...
Loading ...
5
2A 1
0
9
876
5
4
3
1
J
III
III
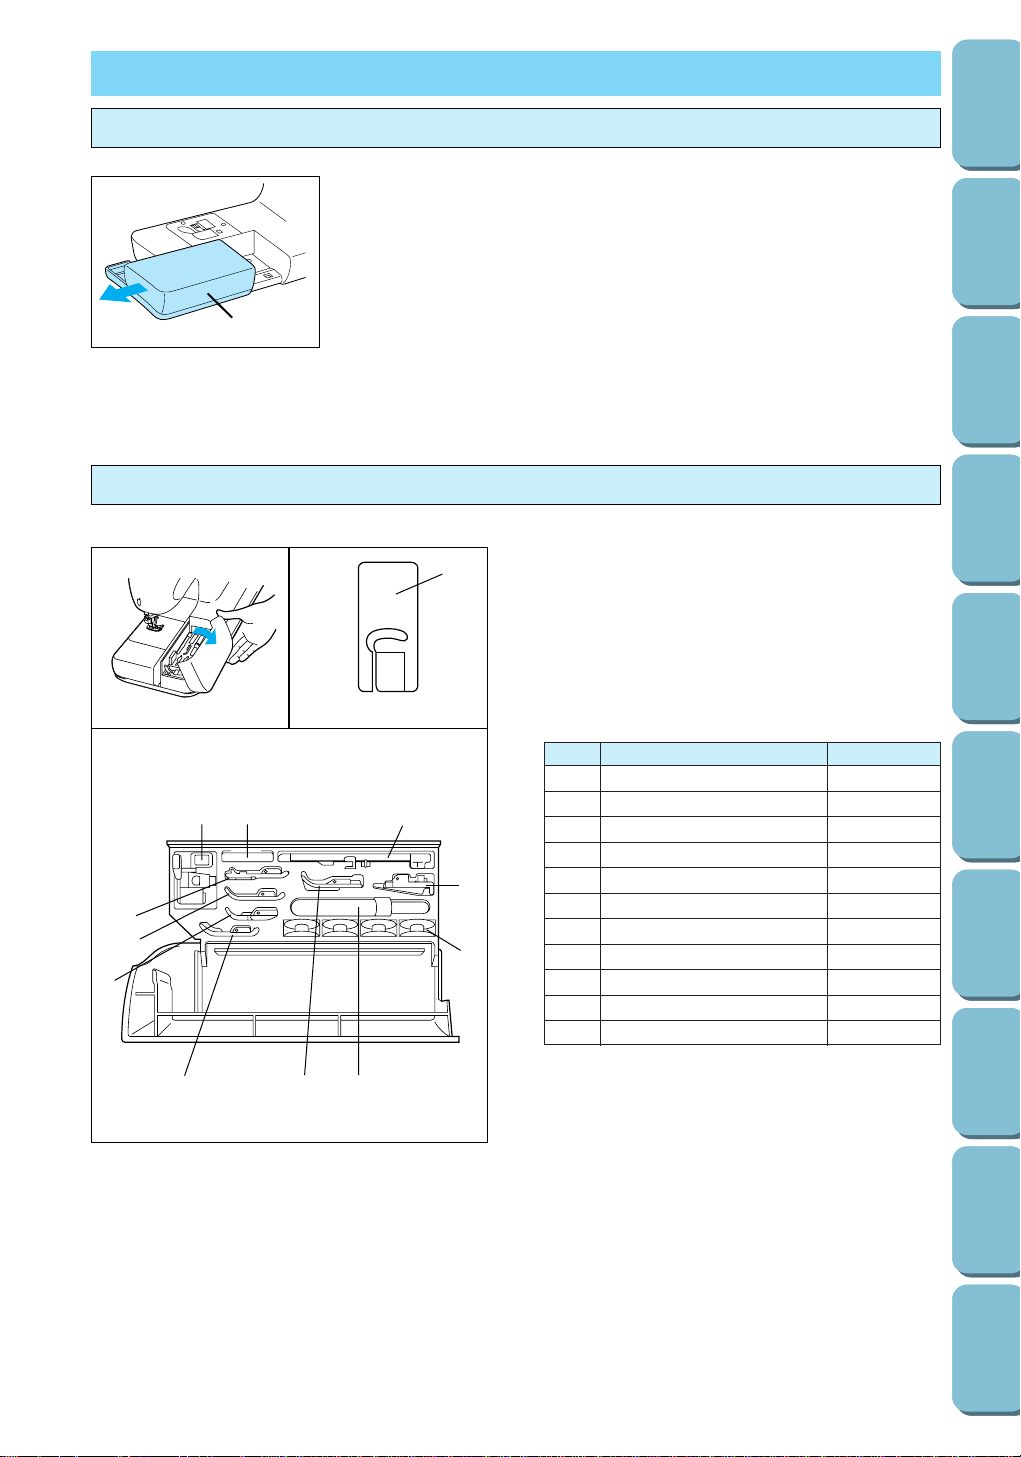
I To open the accessory compartment, tilt its lid
toward you.
II Each presser foot is marked with a letter.
1 Presser foot code
III Compartment accessories
The location of each accessory is shown in figure
III.
Only use the accessories designed for this
machine.
No. Part Name Part Code
*
Only use the plastic bobbins supplied in the
accessory compartment or as additional
accessories
.
FLAT-BED ATTACHMENT
1 Buttonhole foot A X57789-101
2 Embroidery foot Q XA5891-101
3 Overcasting foot G X51162-001
4 Monogramming foot N X53840-301
5 Zipper foot I X59370-051
6 Zigzag foot J 137748-101
7 Blind hem foot R X56409-001
8 Seam ripper X54243-001
9 Button sewing foot M 130489-001
0 Bobbins
* 136492-101
A Needle set X58358-001
Removing the flat-bed attachment
Accessory compartment
With the flat-bed attachment removed, sewing tubular pieces,
such as sleeves and pant legs, or hard-to-reach areas of the
garment is easier. To remove the flat-bed attachment, pull it
straight out to the left of the sewing machine.
1 Flat-bed attachment
1
CONTENTS
SETTING UP
SEWING
UTILITY
STITCHES
MY CUSTOM
STITCH
TM
(CREATE YOUR OWN
STITCH DESIGNS)
EMBROIDERING
MAINTENANCE
ERROR
MESSAGES
SEWING CHART
PATTERNS
(PROGRAMMED
IN MACHINE)
Loading ...
Loading ...
Loading ...