Loading ...
Loading ...
Loading ...
118
CONTENTS
SETTING UP
SEWING
UTILITY
STITCHES
MY CUSTOM
STITCH
TM
(CREATE YOUR OWN
STITCH DESIGNS)
EMBROIDERING
MAINTENANCE
ERROR
MESSAGES
SEWING CHART
PATTERNS
(PROGRAMMED
IN MACHINE)
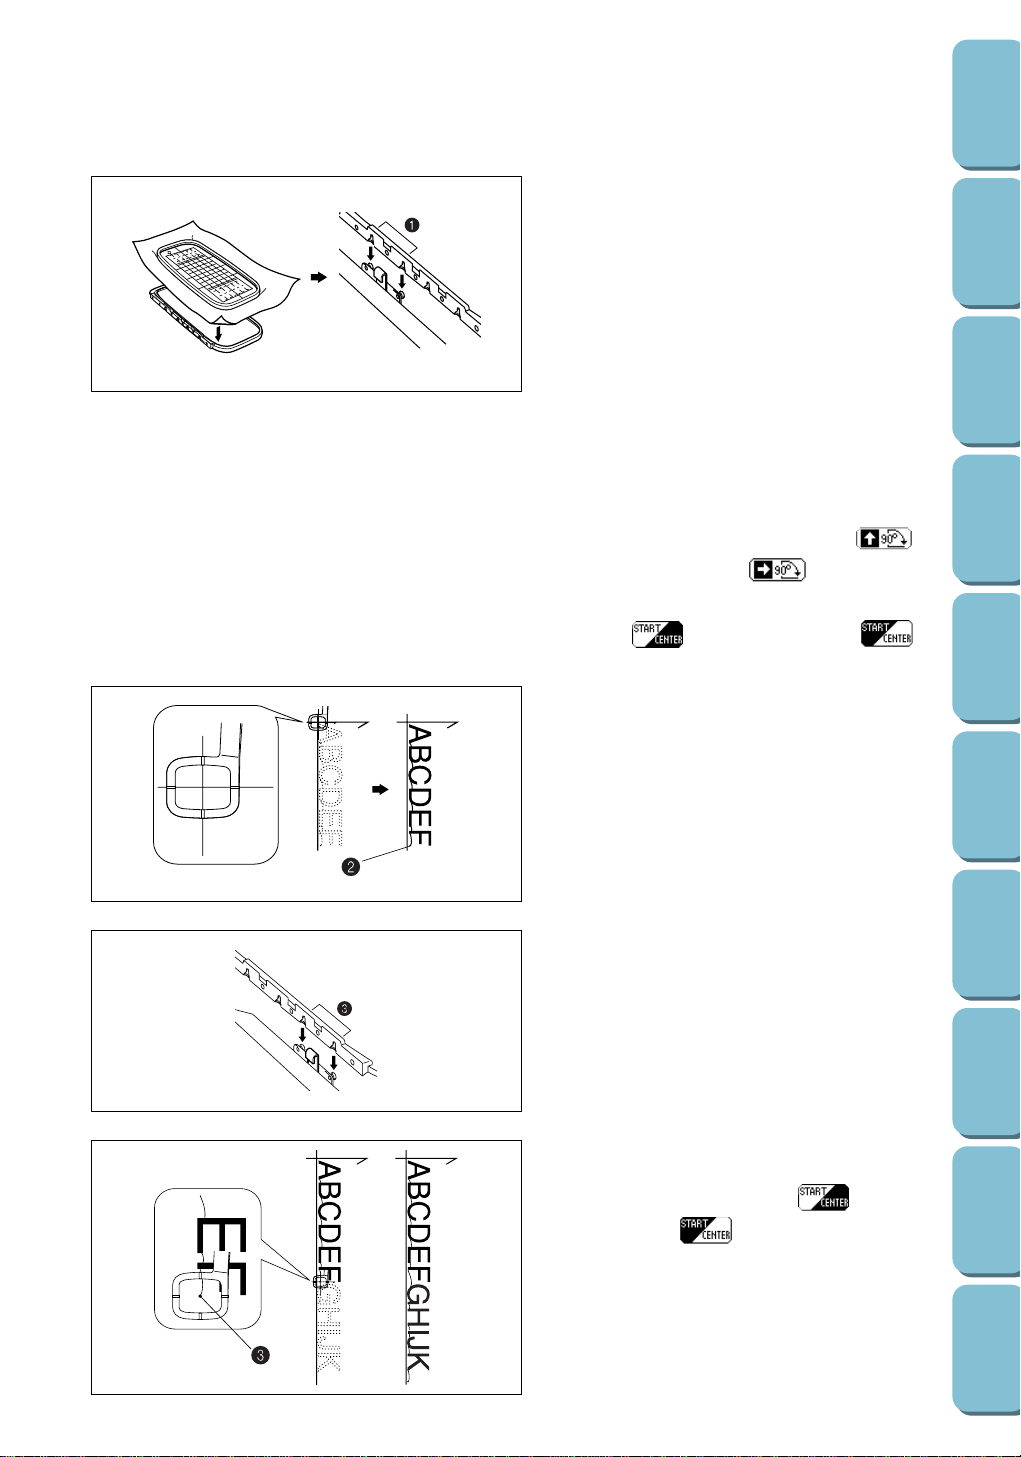
6. Use the arrow keys to align the needle with
the point where the reference lines cross
each other, and then begin embroidering.
2 Do not cut the thread after embroidering
"ABCDEF".
7. Remove the embroidery frame, and then re-
attach it to the embroidery arm at the bottom
installation position.
8. Erase "ABCDEF", and then type in "GHIJK".
9. Position the frame so that the pattern will be
embroidered correctly by pressing the
LAYOUT key, pressing so that it
appears as (refer to page 107), and
then using the arrow keys to align the needle
with the last stitch of "ABCDEF" (refer to
page 105).
3 Last stitch after embroidering "ABCDEF"
3. Stretch the fabric between the inner and
outer embroidery frames while making sure
that the reference lines on the embroidery
sheet remain aligned with reference lines for
the design drawn on the fabric. Then, attach
the embroidery frame to the embroidery arm
at the top installation position. (Refer to
pages 90 - 92 for more details on attaching
the embroidery frame.)
1 Top installation position
4. Select a medium size font and type in
"ABCDEF".
5. Rotate the pattern so that it is positioned
vertically by pressing the
SET key, then
LAYOUT key, and then pressing so
that it appears as (refer to page
106).
Press so that it appears as .
Loading ...
Loading ...
Loading ...