Loading ...
Loading ...
Loading ...
46
CONTENTS
SETTING UP
SEWING
UTILITY
STITCHES
MY CUSTOM
STITCH
TM
(CREATE YOUR OWN
STITCH DESIGNS)
EMBROIDERING
MAINTENANCE
ERROR
MESSAGES
SEWING CHART
PATTERNS
(PROGRAMMED
IN MACHINE)
2
3
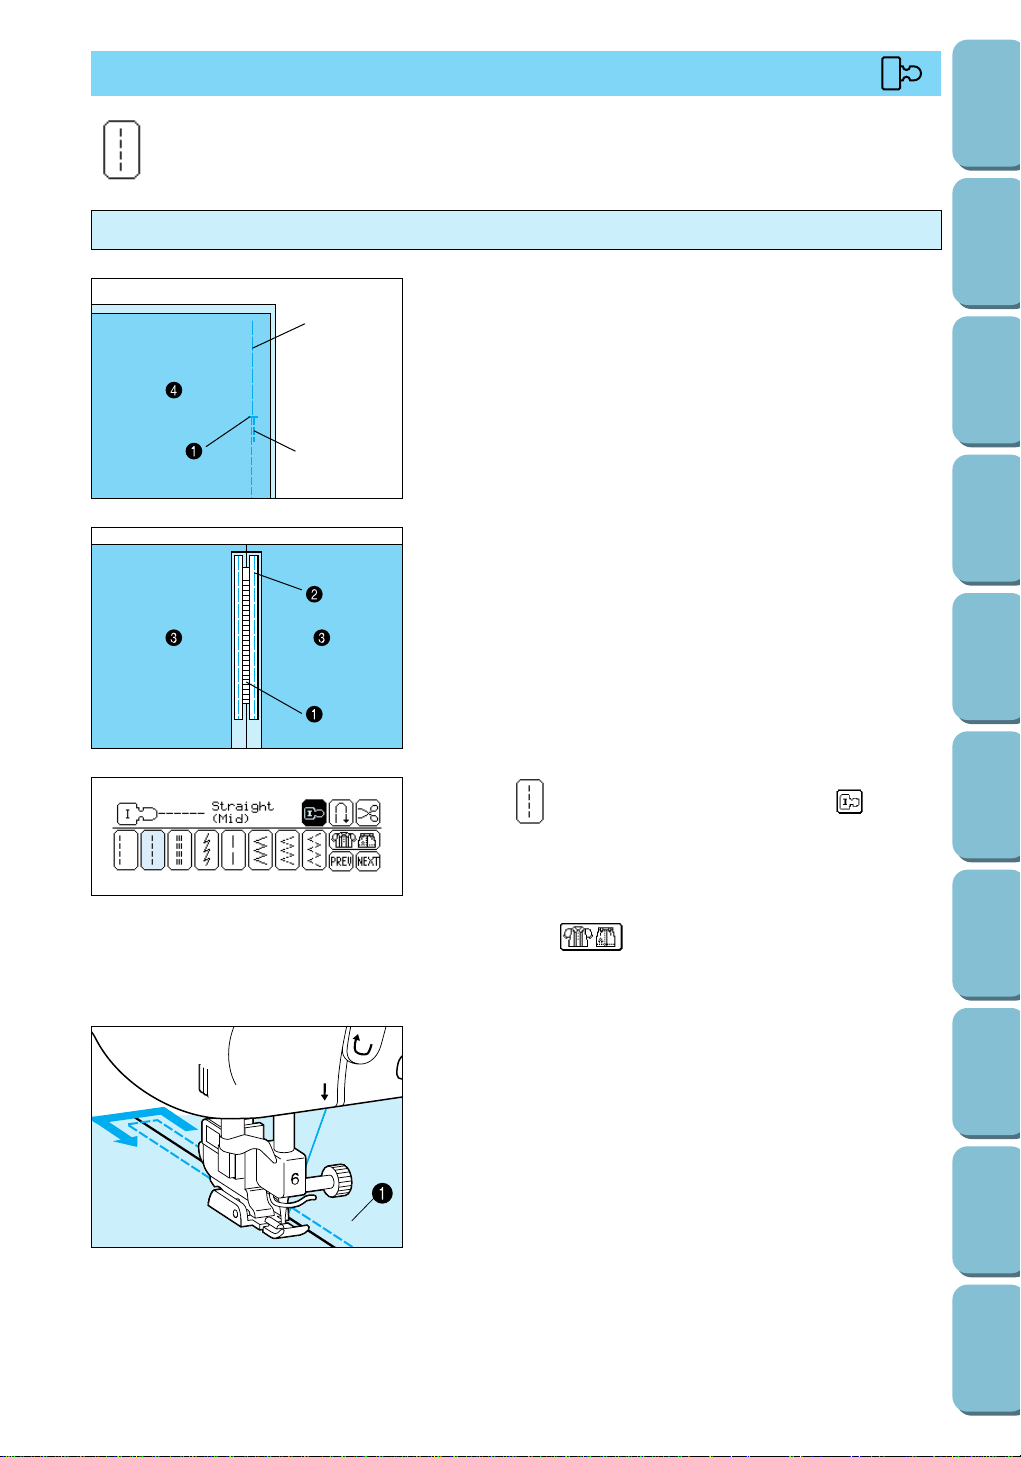
1. Attach presser foot J, sew straight stitches up to the zipper
opening, and then sew reverse stitches. Then, select a
basting stitch and continue sewing to the edge of the fabric.
1 End of zipper opening
2 Reverse stitches
3 Basting stitch
4 Wrong side of fabric
2. Press open the seam allowance, and then use the basting
stitch to baste the zipper in place.
1 Zipper
2 Basting
3 Wrong side of fabric
3. Press [Straight (Mid)], and then press (presser
foot I). The thread tension automatically adjusts for presser
foot I.
Note
If you pressed then ZIPPER INSERTION, the thread
tension is automatically adjusted.
5
3
4. Attach the presser foot holder to the right pin of presser foot
I, and topstitch around the zipper 25/64" (1.0 cm) from the
edge of the pressed edge.
1 Presser foot holder attached to right pin of presser foot I
2 Right side of fabric
5. Remove the basting.
Inserting a centered zipper
ZIPPER INSERTING (CENTER AND SIDE APPLICATIONS)
1 Straight (Mid) [straight stitch (center needle position)]
I
1
Loading ...
Loading ...
Loading ...