Loading ...
Loading ...
Loading ...
61
CONTENTS
SETTING UP
SEWING
UTILITY
STITCHES
MY CUSTOM
STITCH
TM
(CREATE YOUR OWN
STITCH DESIGNS)
EMBROIDERING
MAINTENANCE
ERROR
MESSAGES
SEWING CHART
PATTERNS
(PROGRAMMED
IN MACHINE)
5
3
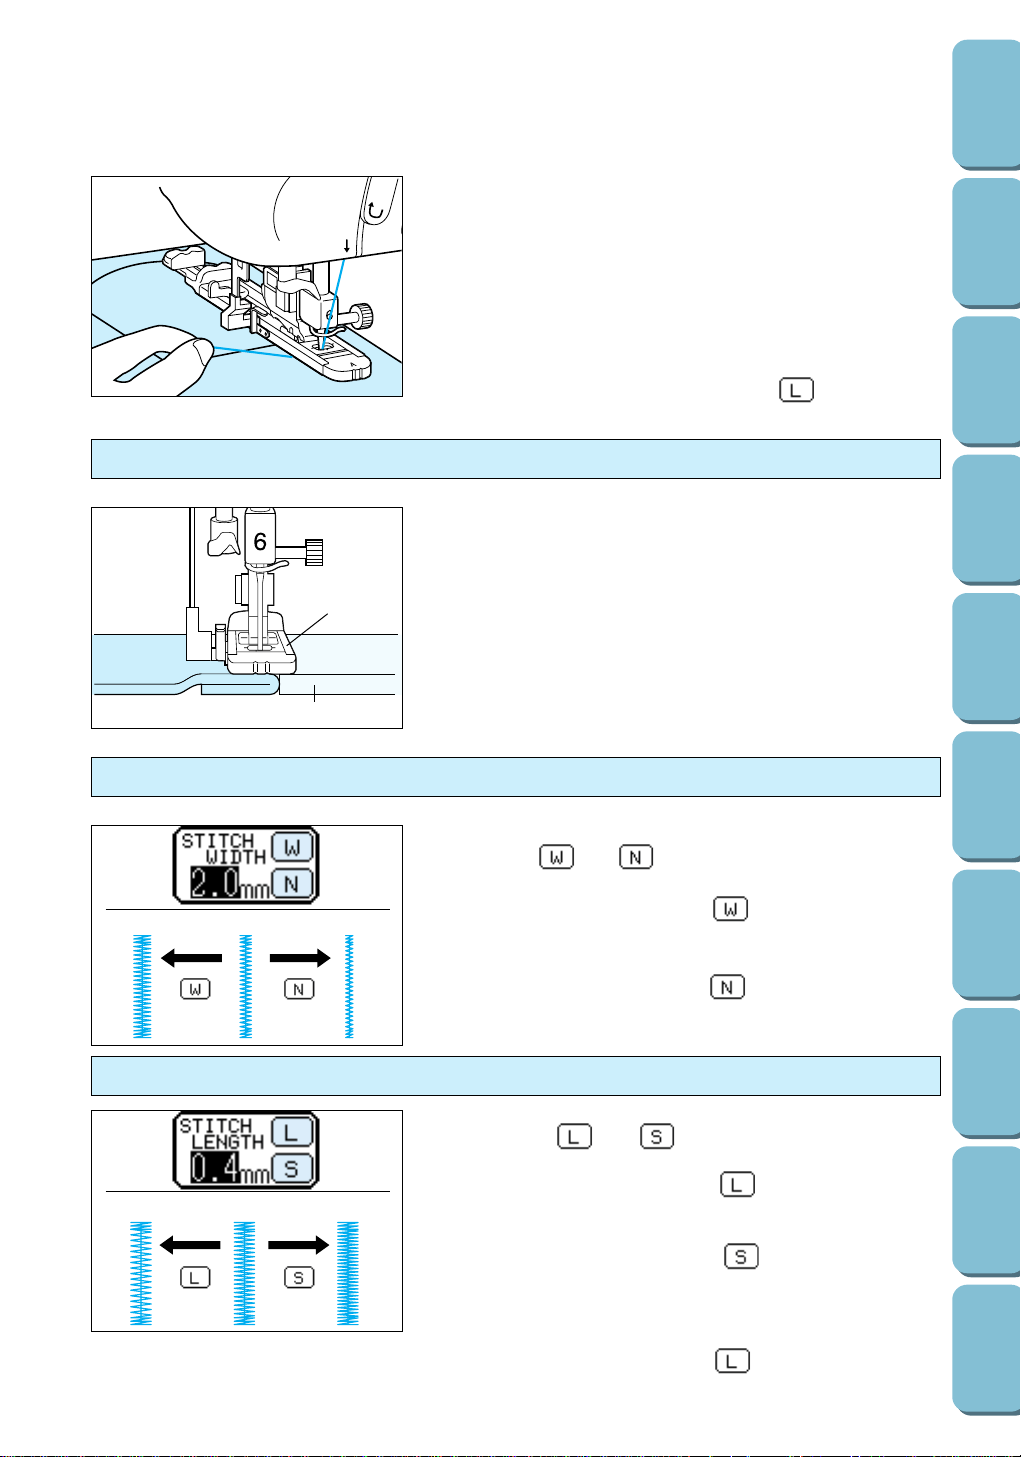
6. Gently hold the end of the upper thread, and then press the
start/stop button to start the machine. Once sewing is
completed, the machine automatically sews reinforcement
stitches, and then stops.
Note
– If automatic thread cutting is turned on before you start
sewing, both threads are automatically cut after the
reinforcement stitches are sewn.
– If the fabric does not feed (for example, because it is too
thick), press the STITCH LENGTH key to increase the
stitch length.
Sewing bar tacks on thick fabrics
1
2
Place a piece of folded fabric or cardboard beside the fabric
being sewn to level off the buttonhole foot and allow for easier
feeding.
1 Buttonhole foot
2 Folded fabric or cardboard
Adjusting the stitch length of the bar tack
Press the STITCH ADJUST key, and then use the STITCH
LENGTH keys and to adjust the stitch length of the
bar tack.
1 Pressing STITCH LENGTH key lengthens the bar tack
stitch length.
2 Standard bar tack stitch length
3 Pressing STITCH LENGTH key shortens the bar tack
stitch length.
Note
If the fabric does not feed (for example, because it is too thick),
press the STITCH LENGTH key to increase the stitch
length.
Adjusting the bar tack width
Press the STITCH ADJUST key, and then use the STITCH
WIDTH keys and to adjust the width of the bar tack.
1 Pressing STITCH WIDTH key increases the width of
the bar tack.
2 Standard bar tack width
3 Pressing STITCH WIDTH key decreases the width of
the bar tack.
231
123
Loading ...
Loading ...
Loading ...