Loading ...
Loading ...
Loading ...
124
CONTENTS
SETTING UP
SEWING
UTILITY
STITCHES
MY CUSTOM
STITCH
TM
(CREATE YOUR OWN
STITCH DESIGNS)
EMBROIDERING
MAINTENANCE
ERROR
MESSAGES
SEWING CHART
PATTERNS
(PROGRAMMED
IN MACHINE)
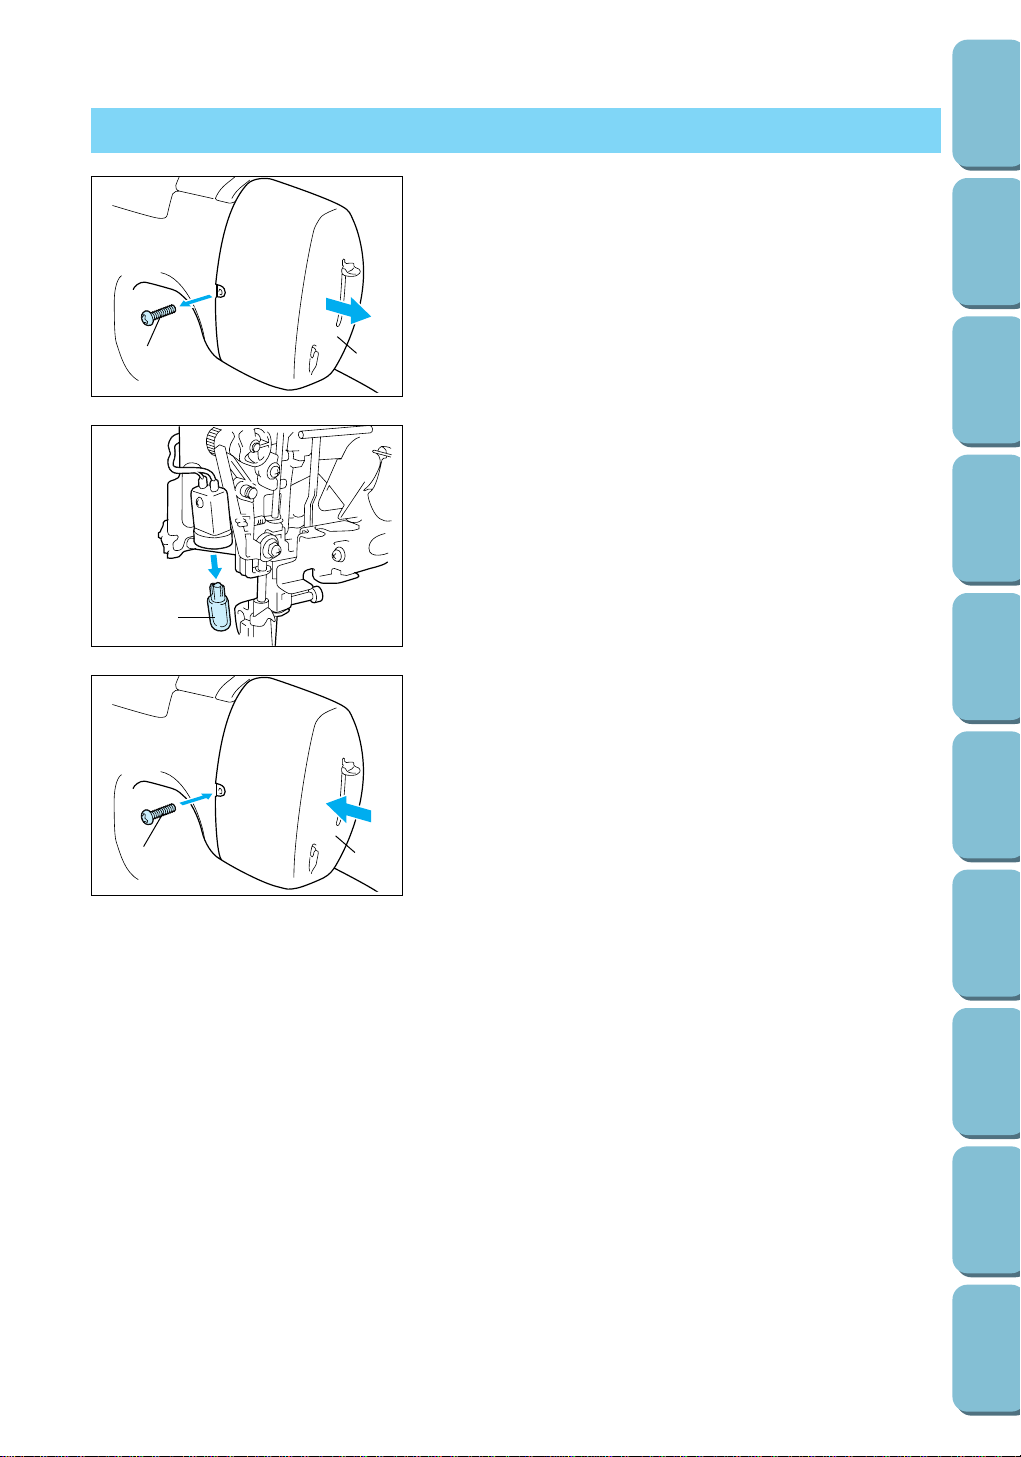
CHANGING THE LIGHT BULB
1
2
1. Set the main power switch to “ O ” and unplug the power
supply cord from the electrical outlet prior.
2. Loosen the screw on the back of the sewing machine head.
3. Remove the end cap.
1 Screw
2 End cap
1
4. Replace the snap-in light bulb with a new one.
1 Light bulb
Note
Light bulbs are available through your dealer. (12 V, 5 W; Parts
code XA2037001)
1
2
5. Re-attach the end cap.
6. Tighten the screw.
1 Screw
2 End cap
Loading ...
Loading ...
Loading ...